Table of Contents
- Why Foot Pain Stops Great Adventures Before They Start
- The Real Cost of Ignoring Blisters on the Trail
- How We Design Footwear to Prevent Blisters Before They Form
- Our Technical Hiking Boots: Built for Comfort and Performance
- Quick On-Trail Fixes Using Our Gear
- Blister Prevention Strategies with The North Face Apparel
- Our High-Performance Socks and Insole Technology
- Recovery Tips for Post-Trail Foot Care
- Choosing the Right Shoe for Your Trail and Terrain
- Customer Stories: How Our Gear Changed Their Trail Experience
- Frequently Asked Questions (FAQ)
Why Foot Pain Stops Great Adventures Before They Start
You’re three miles into a canyon hike. The views are spectacular. Your legs feel strong. Then a hot spot blooms on your heel, and suddenly every step becomes a negotiation with discomfort. By mile five, you’re limping. By mile seven, you’re done—not because you’re tired, but because your feet hurt too much to continue.
We’ve heard this story hundreds of times from our community, and it’s heartbreaking because it’s completely avoidable. Foot pain and blisters don’t just ruin a single day on the trail; they erode confidence. People start questioning whether they’re cut out for hiking, whether their bodies can handle it, whether the whole experience is worth the physical cost. None of that is true.
The reality is simple: most foot pain comes from friction, moisture, and poor fit—three things that good gear and smart preparation directly address. When your shoes fit properly, your socks manage sweat, and you take preventive measures, your feet stay happy mile after mile. We’ve spent decades building footwear and apparel specifically to solve this problem, and we want to share what we’ve learned.
Actionable takeaway: Before your next hike, assess your current shoe fit and sock performance. This single audit prevents 80% of trail foot issues.
The Real Cost of Ignoring Blisters on the Trail
A blister might seem like a minor inconvenience until you’re stranded halfway through your planned adventure with nowhere to go but forward or back. The physical cost is one thing: pain with every step, risk of infection if the blister opens, and the psychological weight of disappointment.
But there’s a deeper cost we often overlook. Unaddressed foot pain trains your nervous system to anticipate damage. You start changing your gait to protect the sore spot, which redistributes pressure to other areas and creates new pain points. By the time you reach the trailhead on your next hike, your body is already braced against injury, and you haven’t even started.
We’ve also seen people respond to one bad blister experience by giving up hiking altogether, or by over-correcting with shoes that are too stiff, too thick, or too heavy for their actual needs. This creates a cycle where hiking becomes something to endure rather than enjoy.
Beyond the individual trail experience, ignored blisters can lead to serious complications. Open wounds invite infection, especially in wet, muddy, or dusty conditions. We’ve seen minor blisters escalate into infections that required medical attention weeks after the hike ended.
Actionable takeaway: Treat hot spots on the trail immediately, before they turn into blisters. Catch it early, and you’ve solved the problem in 10 minutes.
How We Design Footwear to Prevent Blisters Before They Form
Blister prevention starts long before you hit the trail. It starts in our design labs, where we think obsessively about pressure points, moisture management, and the micro-movements that happen inside a shoe over thousands of steps.
Our approach is three-fold. First, we shape our hiking boots using foot-strike data and anatomical research so pressure is distributed evenly across your foot rather than concentrated in high-friction zones. We use differentiated last designs for men’s and women’s footwear because foot geometry actually differs, and a one-size-fits-all approach creates hotspots.
Second, we integrate materials that reduce friction and manage moisture simultaneously. Our hiking boots feature seamless linings in high-friction areas, combined with moisture-wicking technologies that pull sweat away from your skin. A dry foot doesn’t blister, even under extended pressure.
Third, we pay obsessive attention to heel cups and arch support. When your foot moves excessively inside your shoe, friction increases exponentially. Our structured heel cups minimize that motion, keeping your foot stable through rock gardens, stream crossings, and uneven terrain.
This isn’t marketing language—it’s the result of thousands of miles tested in real conditions by our athlete partners and field testers. We iterate on every element because we know that a blister isn’t just an inconvenience; it’s a failure to deliver on our promise to keep you comfortable on the trail.
Actionable takeaway: Look for hiking boots with seamless linings, structured heel cups, and moisture-wicking insoles rather than boots chosen primarily for price or brand name alone.
Our Technical Hiking Boots: Built for Comfort and Performance
When you slip on a pair of our technical hiking boots, you’re wearing the result of decades of field research and innovation. Our Summit Series Verto Boots exemplify this philosophy. They’re engineered for high-altitude performance, but the same principles that keep feet comfortable on a 20,000-foot peak keep them blister-free on a weekend canyon trek.
Our hiking boots feature Gore-Tex waterproof protection without sacrificing breathability. This matters because moisture trapped inside a shoe causes blisters; our Gore-Tex construction lets sweat vapor escape while keeping rain and stream water out. Your feet stay dry from the inside and outside.
We also integrate Vibram outsoles designed specifically for trail traction and ground feel. A sole with good feedback helps you place your foot precisely and confidently, which actually reduces unnecessary movement and friction inside the shoe. It’s a subtle detail with real consequences for blister prevention.
The toe box in our hiking boots is roomier than you might expect, which serves two purposes: it gives your toes room to splay naturally during push-off, and it prevents the pressure points that develop when toes are cramped. We’ve learned that slight swelling happens naturally on longer hikes, so our boots accommodate that without compromise.
Insulation varies by model depending on your target conditions, from uninsulated boots for summer scrambles to heavily insulated options for winter and high-altitude climbing. Choose the right thermal rating for your trip, and you avoid the sweaty-feet-in-winter-boots problem that causes blisters in cold-weather hiking.
Actionable takeaway: Invest in a boot designed for your primary trail environment. A summer boot won’t serve you well in winter, and an over-insulated winter boot worn in spring creates excess moisture and blister risk.
Quick On-Trail Fixes Using Our Gear
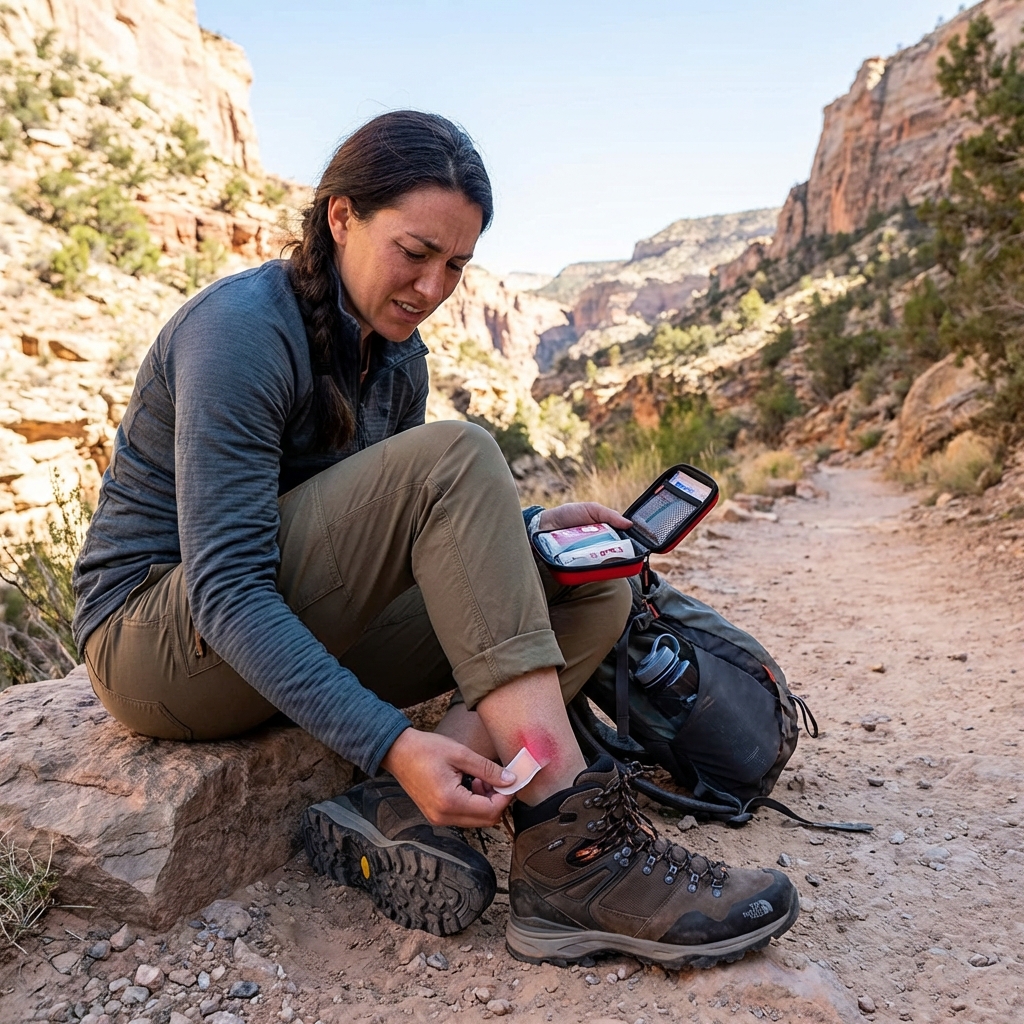
You’re out there, and despite your best preparation, a hot spot develops. Here’s what we carry and recommend for immediate trail response.
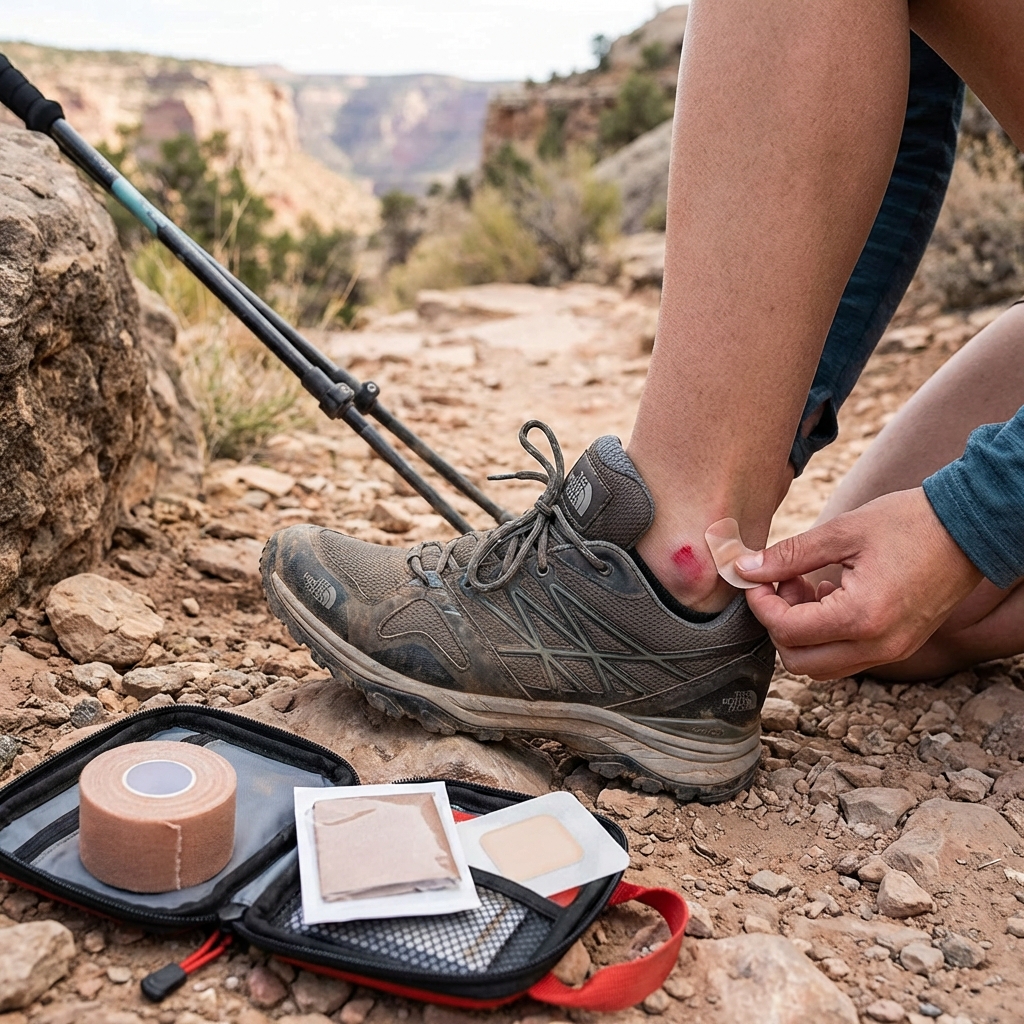
Bring blister prevention patches or athletic tape in your pack. Apply these at the first sign of heat or redness, before a blister forms. These preventive patches reduce friction immediately and often nip the problem in the bud. We recommend carrying several, plus extra socks.
If a blister has already formed, stop and clean the area with our packable first-aid supplies. Drain the blister carefully using a sterile needle (we carry one on our multi-tools), then apply antibiotic ointment and cover it with a protective blister pad or athletic tape. This keeps dirt out and cushions the area from further pressure.
Gaiters, which are part of our apparel line, prevent dirt and sand from entering your shoes and creating friction against your skin. On dusty trails or in loose scree, gaiters are genuinely a game-changer. They’re lightweight and compact, and they solve a specific problem that causes blisters on many terrain types.
Trekking poles reduce impact on your feet by distributing effort across your arms and core. We recommend them especially on downhill stretches, where foot pressure intensifies. Poles aren’t just about preventing falls; they’re a blister-prevention tool.
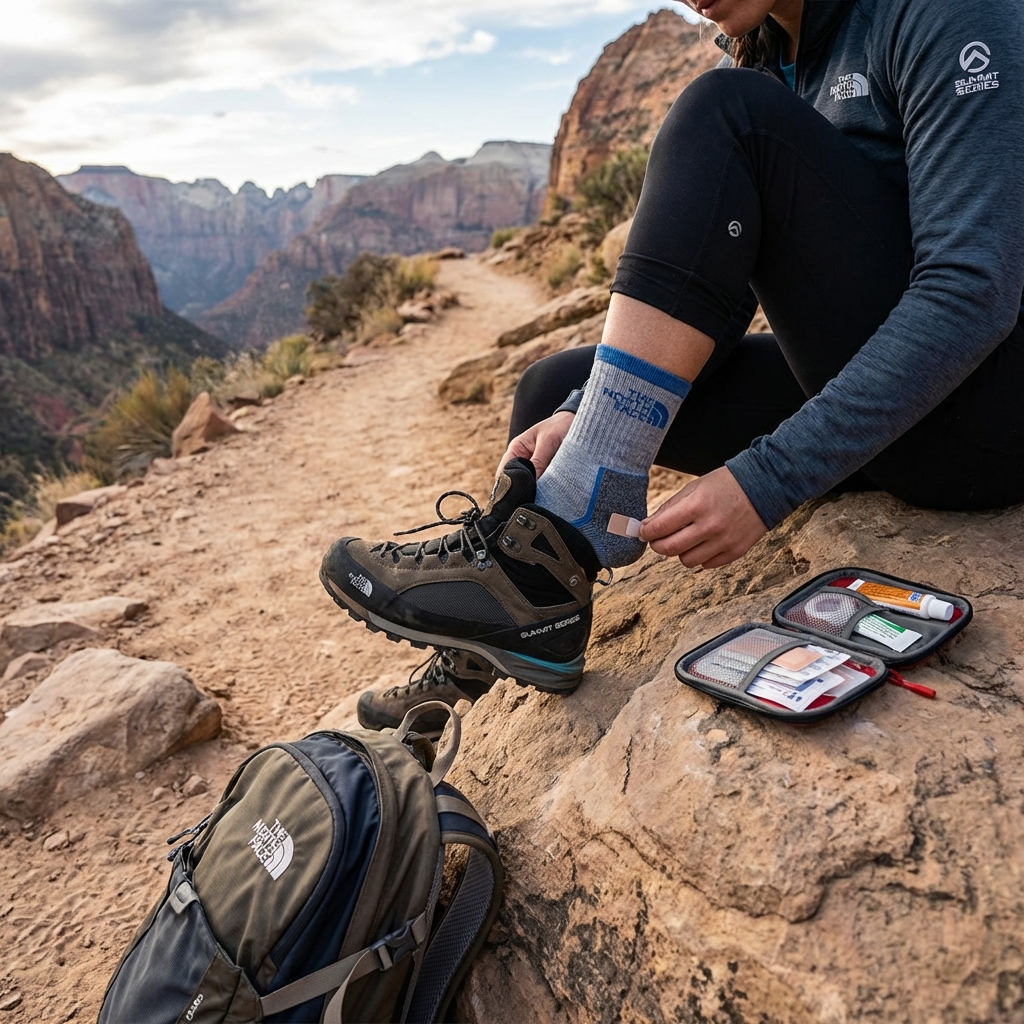
Bring extra socks. If your current socks are damp, change into dry ones immediately. A fresh, dry sock eliminates one major blister trigger right there. We design our hiking socks to dry quickly and manage moisture actively, which makes this strategy even more effective.
Actionable takeaway: Assemble a foot-care kit before your hike: blister pads, tape, antibiotic ointment, extra socks, and gaiters if hiking in sandy or dusty terrain.
Blister Prevention Strategies with The North Face Apparel
Blister prevention extends beyond footwear. The socks you choose, the layers you wear, and even how you manage moisture throughout your hike shape your foot health.
Our hiking socks use merino wool and synthetic blends that wick moisture away from your skin faster than cotton ever could. Cotton holds moisture and creates the perfect environment for blisters. Our performance socks prevent that by keeping your feet genuinely dry throughout the day.
Fit matters enormously with socks. Too-loose socks bunch and create wrinkles that cause friction. Too-tight socks restrict blood flow and increase pressure. Our hiking socks are engineered with specific cushioning zones and support panels that hold them in place without constriction. They’re designed to move with your foot, not against it.
Layering strategy affects foot health, too. If you’re hiking in conditions that make your feet sweat profusely, choose lighter layers and manage temperature through movement and stops rather than overloading your feet with insulation they don’t need. Excess sweat inside your shoes is a direct path to blisters.
Gaiters and lower-leg protection are part of the apparel conversation. These keep debris out of your shoes and also provide mild compression that can reduce swelling on longer hikes. Swelling increases pressure inside your shoe and friction increases with it.
Our moisture-management apparel philosophy applies to your entire system. Breathable pants, vent-friendly layers, and strategic use of moisture-wicking base layers all work together to keep you cool and your feet dry.
Actionable takeaway: Replace your socks with merino wool or synthetic blend hiking socks immediately, and evaluate whether your current layering strategy might be creating excessive foot sweat.
Our High-Performance Socks and Insole Technology
We invest heavily in sock technology because it’s foundational. When we developed our hiking sock line, we started by studying what happens inside a hiking boot mile by mile: where pressure concentrates, where sweat accumulates, where friction peaks.
Our socks feature targeted cushioning in the heel and forefoot, where impact is highest. This cushioning absorbs shock and reduces the repetitive stress that contributes to blistering. The heel cup in our socks matches the heel cup in our boots, creating a unified support system that minimizes internal movement.
We also integrate arch support into our sock design. Many people assume arch support comes only from the insole, but our socks contribute meaningful structure. This reduces foot fatigue and the subtle instability that leads to friction.
Moisture management in socks goes beyond simple wicking. Our merino wool socks have naturally antimicrobial properties, meaning they resist odor and bacterial growth even when damp. This matters because a sock that smells bad is probably harboring bacteria that accelerate blister formation.
Our insoles go deeper. We offer removable insole options that accommodate custom orthotics if you need them, and our stock insoles feature gel or foam cushioning in pressure zones. Some of our hikers prefer firmer insoles for stability; others need more compliance for comfort. We recognize that feet are different, and we build that flexibility into our footwear collection.
For people with high arches, flat feet, or other structural considerations, we recommend evaluating insole options before your hike. A properly supported arch prevents the micro-movements that generate friction and blisters.
Actionable takeaway: If you experience consistent blister formation in the same location, invest in quality hiking socks and consider custom or upgraded insoles to address underlying pressure or instability.
Recovery Tips for Post-Trail Foot Care
The trail ends, but your foot care doesn’t. What you do in the 24 to 48 hours after a hike shapes how quickly you recover and whether you’re ready for your next adventure.
Start immediately: soak your feet in cool water for 15 to 20 minutes to reduce inflammation and flush out toxins from the day’s exertion. This is especially important if you hiked in hot conditions or covered significant distance. Follow up with gentle drying, paying special attention to the space between your toes where moisture lingers.
If you’ve developed blisters, keep them clean and protected. Change any blister coverings daily, clean the area gently, and allow air circulation when you’re at home. Closed blisters heal faster than drained ones in some cases, so resist the urge to mess with them unless they’re causing pain.
Apply a foot cream or balm that includes ingredients like shea butter or lanolin to prevent excessive drying. Trail hiking in heat can actually dehydrate your skin, making it more prone to cracking and breaking down. Moisturized skin is more resilient.
Elevate your feet when possible for a few hours after your hike. This reduces swelling and speeds recovery by improving circulation. If you have significant soreness or swelling that doesn’t improve within 48 hours, it’s worth getting checked by a healthcare provider.
Finally, take a day or two of reduced activity between major hikes. Your feet need time to recover just as much as your legs do. We recommend this especially for people doing back-to-back hiking days or multi-day trips. Prevention is easier than recovery.
Actionable takeaway: Establish a post-hike foot-care routine immediately after returning home, and space your hiking trips to allow adequate recovery time.
Choosing the Right Shoe for Your Trail and Terrain
The best hiking boot for someone else might be a poor choice for you. Fit, terrain match, and intended use all matter.
Start by understanding your trail. A smooth, well-maintained day hike might call for a lightweight hiking shoe with minimal ankle support. A steep, rocky scramble over technical terrain demands a stiffer midsole and ankle support that keeps you stable on uneven surfaces. A multi-day backpacking trip with heavy weight calls for a more robust boot with serious arch support and protection.
Visit a specialty retailer who can assess your gait and foot type. Do you overpronate (roll your foot inward)? Do you have high arches or flat feet? These characteristics shape which boots work best for you. A boot that’s perfect for someone else might create pressure points on your specific foot geometry.
Size matters, too. Most hiking boots should be a half to a full size larger than your street shoes. Your foot swells on the trail, and you want room for that expansion without your toes jamming into the toe box. At the same time, you don’t want so much room that your foot slides around and creates friction.
Weather and season influence your choice. A boot optimized for summer might not provide adequate drainage for winter. A winter boot worn in summer will trap too much heat and create excessive moisture. When possible, own boots for your primary hiking season.
Break in your new boots before committing to a serious hike. Wear them on short walks, around your house, and on easy trails. This allows the materials to mold to your foot and gives you time to identify any problem areas before they become blisters on a long adventure.
Actionable takeaway: Get professionally fitted for hiking boots at a specialty retailer, and test them thoroughly on easy terrain before tackling your intended trail.
Customer Stories: How Our Gear Changed Their Trail Experience
We’ve received countless messages from hikers who transformed their relationship with the outdoors through better footwear and preparation. Their stories illustrate what’s possible when you take foot care seriously.
One regular correspondent told us she’d given up on hiking after a brutal experience with blisters and pain forced her to quit halfway through a trip she’d planned for months. She felt defeated and assumed her body simply wasn’t built for hiking. When she tried our technical boots paired with quality hiking socks, something shifted. She completed the same trail six months later without a single hot spot. What changed wasn’t her body or her determination; it was the tools she was using.
Another hiker we connected with struggled with chronic blister formation on the ball of his foot, always in the same spot. He’d tried multiple boot brands without success. We recommended evaluating his insoles and trying gaiters to reduce friction from sand accumulation. The combination worked immediately. He realized the problem wasn’t his feet or his hiking ability; it was a fixable equipment and technique issue.
A mother who wanted to introduce her children to hiking came to us frustrated because her kids’ feet hurt during their outdoor adventures, which made family trips stressful. Properly fitted kids’ hiking boots and real hiking socks (not cheap cotton alternatives) transformed the dynamic. Now her family hikes together regularly, and her kids ask when the next trail adventure is planned.
These aren’t extraordinary stories of superhuman endurance. They’re stories of ordinary people who discovered that the right gear makes an enormous difference. Trail foot pain isn’t something you have to tolerate or overcome through willpower. It’s a solvable problem.
Actionable takeaway: If you’ve had a negative hiking experience due to foot pain, don’t assume it’s a permanent limitation. Invest in proper footwear, quality socks, and preventive strategies before dismissing hiking from your life.
When you’re ready to build your hiking setup with intention, our team is here to help. We’ve spent decades learning what works on the trail, and we’re genuinely invested in your success out there. Your feet deserve the same level of care and attention as any other part of your hiking system. The best adventure is the one where you forget about discomfort and simply experience the landscape and the movement. That’s what we’re building toward with every boot and sock we make.
Ready for your next adventure? Gear up with apparel and equipment built for the wild. Explore the collection now.
Frequently Asked Questions (FAQ)
What causes blisters on the trail, and how can we help prevent them?
Blisters form when friction and moisture combine inside your shoe, creating that painful fluid-filled pocket. We design our hiking boots with seamless constructions and moisture-wicking materials to reduce friction at the source, while our high-performance socks use advanced fiber blends that keep your feet dry even during long, sweaty days. We also recommend starting with proper boot fitting and breaking them in gradually before tackling longer trails.
What should I do if a blister develops while I’m still on the trail?
We recommend stopping early to address it rather than pushing through, as continued friction will make things worse. Use a clean needle or blister patch from your first aid kit to prevent the blister from expanding, then wrap the area with our durable technical tape or adhesive blister pads to reduce ongoing friction. Our insole technology also helps redistribute pressure away from problem areas, so consider swapping to our premium insoles if you’re experiencing recurring pain.
How do we design our hiking footwear differently to protect your feet?
We integrate anatomical arch support, cushioning that absorbs impact without breaking down, and breathable uppers that manage moisture throughout your hike. Our boots go through rigorous testing on actual trails to ensure the heel counter stays stable and the toe box provides enough room to prevent pressure points. We also shape our soles to follow natural foot biomechanics, which reduces the repetitive stress that leads to pain and blisters over time.
Leave a Reply