Blog

  • Best Women’s Hiking Boots for Wide Forefeet and Narrow Heels: Our Expert Guide

    Best Women’s Hiking Boots for Wide Forefeet and Narrow Heels: Our Expert Guide

    Table of Contents

    Why We Built Hiking Boots for Your Unique Foot Shape

    Best Women’s Hiking Boots for Wide Forefeet and Narrow Heels: Our Expert Guide

    Your feet are unique, and they deserve boots built with that reality in mind. If you’ve spent years squeezing toes into standard-fit hiking boots or watching your heels slip with every descent, you’re not alone. We’ve heard this challenge countless times from the women in our community, and it’s exactly why we engineered our women’s hiking boot collection to accommodate the wide forefoot and narrow heel combination that many of us live with.

    Fit isn’t one-size-fits-all, and we stopped pretending it should be. When we designed our women’s hiking boots, we started with a simple truth: the average women’s foot doesn’t fit the average women’s boot. Too many hikers settle for footwear that works “well enough,” only to discover blisters, lost toenails, and premature wear after a few miles on steep terrain.

    Our approach began in the field. We watched women hike across Cascade passes, volcanic ridges, and switchback-heavy trails in the Sierra. We documented foot shapes, pressure points, and performance failures. The pattern was unmistakable: many of you needed a wider forefoot to accommodate your toes without compression, paired with a snugger heel cup to prevent that uphill rocking motion that drains energy and creates friction.

    We didn’t compromise. Instead, we built multiple collections with differentiated lasts (the internal shape that determines fit) so you can find boots that match your actual foot geometry, not a marketing average. This investment in precision fit reduces injuries, extends your hiking season, and lets you focus on the trail instead of your feet.

    What to do next: Consider your own foot shape honestly. Are your toes crowded in past boots? Does your heel lift during descent? These are your starting clues for the right collection.

    Understanding the Wide Forefoot, Narrow Heel Challenge

    The wide forefoot with narrow heel profile isn’t a defect; it’s a common and functional foot shape. Your forefoot carries your weight and propels you uphill. Your heel stabilizes and anchors. They demand different support strategies, yet most boots treat your foot as a single, uniform shape.

    Here’s what happens when boots don’t honor this distinction: a boot wide enough for your toes leaves excess volume at your heel. Every step down compresses your heel lift. Friction builds. Blisters form in predictable places: the back of your heel, the inside of your arch, sometimes along the outer edge. Over two, five, ten miles, this friction compounds into real pain that ends hikes early.

    The narrower heel also affects stability. That lift at heel strike means your ankle is micro-adjusting constantly, working harder to stay centered on uneven terrain. You fatigue faster. Your knees absorb more impact.

    Standard hiking boots force you into a compromise: go up a size to accommodate your forefoot and live with heel slip, or stay true to your heel size and squeeze your toes. Neither option is acceptable, which is why we built boots with independent forefoot and heel geometry.

    What to do next: Try on boots and specifically test the heel. Lace snug at the toe. Walk downhill on a slight incline and notice whether your heel shifts forward. If it does, that boot isn’t your match, no matter how comfortable the toes feel.

    How Our Design Philosophy Solves Fit Problems

    We use three primary design strategies to solve the wide forefoot, narrow heel equation. First, we employ different last shapes across our collections. A last is the wooden form that determines a boot’s internal dimensions. Rather than applying one shape across all sizes, we build women’s lasts with a wider toe box and a distinctly narrower heel cup. This isn’t a minor tweak; it’s a fundamental architectural difference from unisex or men’s boots.

    Second, we layer strategic padding and heel counter reinforcement. Your heel cup isn’t just deep; it’s contoured to cradle your heel without wasted volume above or beside it. We use firmer materials in the heel counter to prevent any rocking or sideways movement, while the forefoot padding absorbs impact and accommodates toe splay without compressing your digits.

    Illustration 1
    Illustration 1

    Third, we use lacing systems and collar design to distribute pressure intelligently. Our women’s boots feature gusseted tongues that keep laces centered and prevent tongue roll. The collar sits lower and curves inward more than unisex designs, allowing you to customize pressure across your ankle and midfoot without sacrificing heel security.

    Combine these three strategies with seam placement that avoids pressure points where women’s feet typically experience friction, and you get boots that work with your anatomy rather than against it.

    What to do next: When shopping for our women’s boots, ask to try multiple collections within your size range. Feel the difference in heel cup depth and forefoot width across styles. Your perfect fit exists within our range.

    Our Women’s Hiking Boot Collections That Deliver

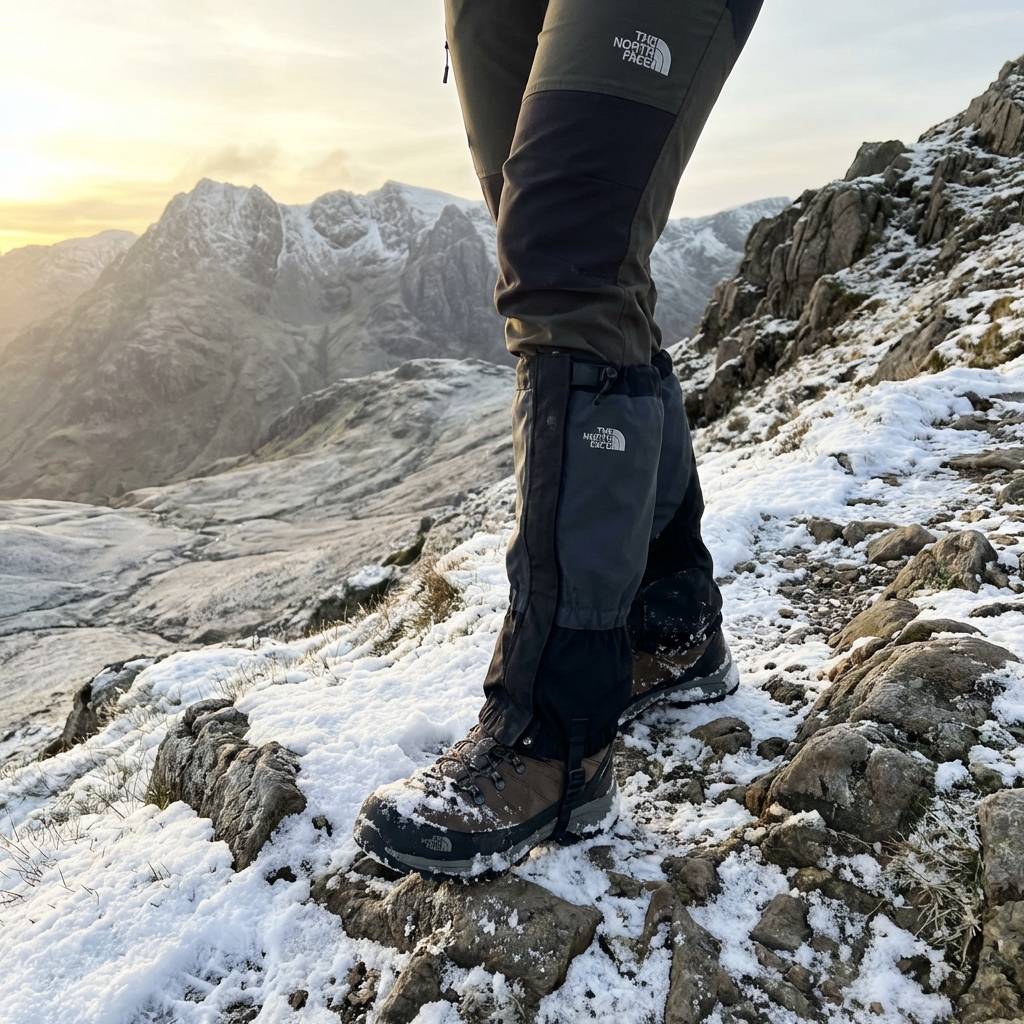
    We offer several collections tailored to different adventure types and fits. Our Trail Series boots suit day hikes and light backpacking with moderate support and exceptional comfort for long hours on maintained trails. These boots are designed with a roomier forefoot and secure heel, ideal if you prioritize comfort during lower-stakes missions.

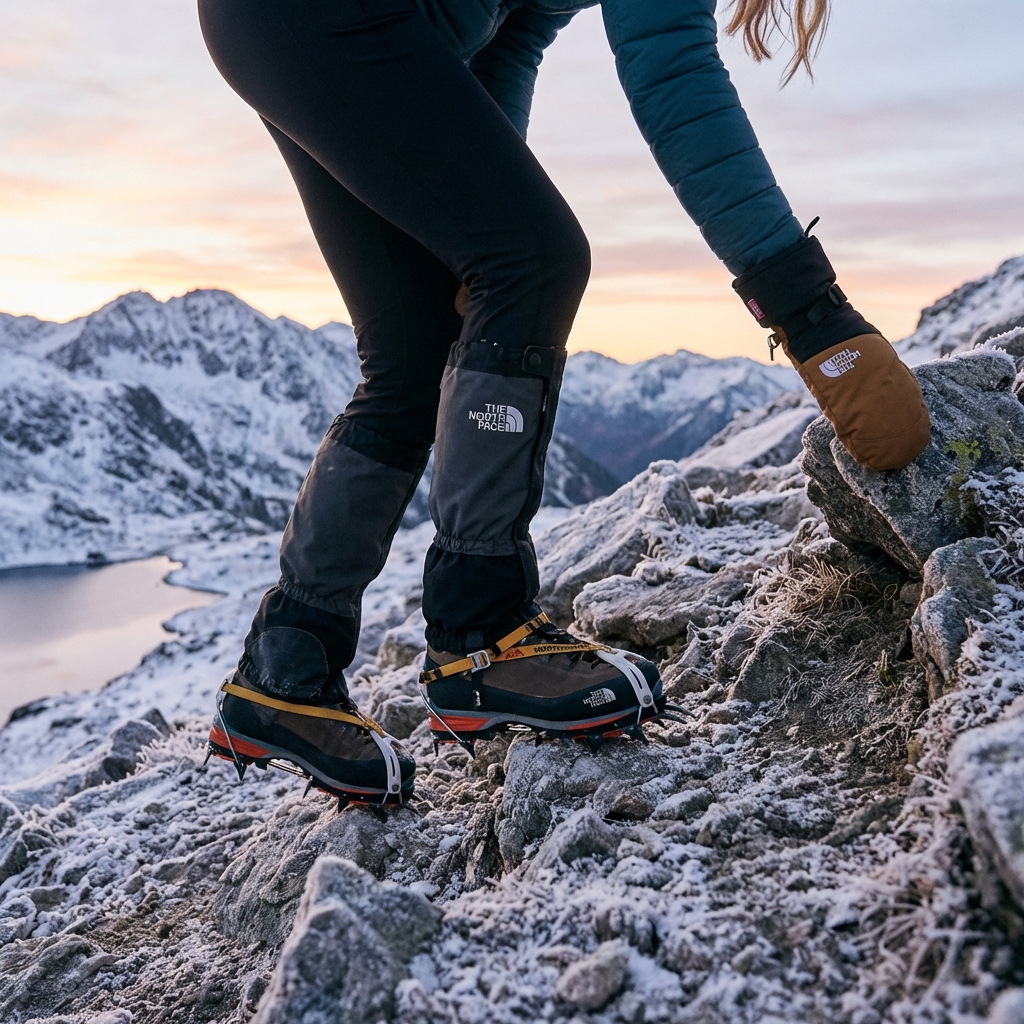
    The Summit Series represents our technical line. These are purpose-built for scrambling, mountaineering, and alpine terrain where precision footwork matters. Our Blackout Summit Verto boots exemplify this category, with a narrower heel cup, reinforced toe cap, and aggressive tread. The forefoot is still generously proportioned to prevent crowding, but the overall geometry is more precise for technical movement.

    Our All-Terrain Collection splits the difference, built for mixed conditions where you need stability on loose scree, confidence on wet roots, and enough cushioning for distance. These offer a medium forefoot width with a secure heel, making them versatile for varied terrain.

    All our women’s hiking boots feature Gore-Tex or comparable breathable-waterproof linings, insulated options for winter hiking, and durable Vibram or similar outsoles for grip. Visit our footwear section to explore the full range and filter by fit, terrain, and season.

    What to do next: Identify your primary terrain and mission. Will you wear these boots on day hikes or multi-day backpacking trips? In alpine or forested terrain? Your use case narrows down which collection suits you best.

    Key Features We Engineered Into Our Boots

    Beyond fit, we’ve invested in features that make women’s hiking boots genuinely high-performance.

    Heel-to-toe drop sits between 12-16mm on our boots, offering a balanced geometry that reduces Achilles tension on steep descents while maintaining natural ankle angles. This range feels neutral compared to hiking shoes while providing more stability than minimal footwear.

    Insulation comes in multiple weights. Our lightweight synthetic insulation works for three-season hiking, adding minimal bulk while retaining warmth. Winter-rated boots use premium insulation rated to negative temperatures, allowing you to push deeper into cold-weather season.

    Waterproofing and breathability come from Gore-Tex or equivalent technologies. Your feet stay dry during stream crossings and wet vegetation, while vapor still escapes during hard climbing. No interior film sweat trap.

    Midsole stiffness varies by collection. Day-hike boots are more flexible, allowing your foot to move naturally. Technical and backpacking boots feature stiffer midsoles that distribute weight across your foot rather than concentrating it on small areas. This matters on rocky terrain and when carrying heavy packs.

    Sole unit uses Vibram or comparable high-grip rubber with patterns optimized for different terrain. Our alpine boots have sharper edges for edging on hard snow and ice. Trail boots emphasize grip on wet roots and scrambles.

    Weight is kept reasonable despite technical features. Most of our women’s boots in size 7 weigh between 1.2 and 1.5 pounds per boot. A lighter foot is a stronger foot over twenty miles.

    What to do next: Prioritize the two features that matter most to your hiking style. If you hike wet terrain year-round, invest in the best waterproofing. If you carry weight, prioritize midsole stiffness and heel support.

    Illustration 2
    Illustration 2

    Breaking In Our Boots: Tips for Success

    New boots need a breaking-in period, even perfectly fitted ones. We design our boots with this reality in mind, using supple leathers and linings that soften with use rather than requiring brutal miles of discomfort.

    Start with short hikes on gentle terrain. Two to three miles through town, then a local trail, then a favorite medium-difficulty hike. This staged approach lets your feet, ankles, and calves adapt without accumulated damage. You’re building muscle memory and allowing materials to conform to your specific foot shape.

    Wear the socks you’ll actually hike in. Lightweight merino wool is our recommendation; it regulates temperature, manages moisture, and reduces friction compared to cotton. Don’t overthink it. Just avoid cotton and ensure your socks aren’t baggy or bunched.

    If you notice pressure spots during breaking in, address them before they blister. Blisters are rare in well-fitted boots, but they happen when fit isn’t quite perfect for your specific foot or your pressure points differ from average. A small blister suggests the heel cup is slightly too loose (heel slip) or the forefoot is too tight in one spot. Minor lacing adjustments often solve this. Loosen the forefoot laces slightly or tighten the heel area more. Small adjustments yield big results.

    Some women apply mole skin or blister prevention tape preemptively on spots they know will chafe. This is fine during breaking in, but if you’re doing it on every hike after fifty miles of wear, your fit isn’t quite right. Return the boots or adjust your socks and lacing.

    What to do next: Plan three to four short hikes before taking your boots on a major adventure. Journal any pressure points, then adjust lacing or socks accordingly.

    Real Terrain Testing: Performance You Can Trust

    We don’t finish boot designs and ship them without trail validation. Our products are worn by our athletes, tested across genuine mountains, and evaluated in conditions that matter: steep talus fields, boulder scrambles, snowpack, rain, and multi-day carries.

    Our Summit Series boots have logged miles on Cascade volcanoes, peaks throughout the Sierra, and alpine ridges where precision footwork directly impacts safety. Our Trail Series has been worn on everything from New England’s roots-tangled footpaths to California coastal bluff walks.

    This testing reveals what matters. We’ve learned that women’s boots often fail in the heel cup because designers underestimate how much narrower your heel is compared to your forefoot. We’ve adjusted. We’ve learned that forefoot cushioning matters more on extended hikes because your toes absorb shock differently than larger feet. We’ve added it. We’ve learned that lacing systems designed for men don’t distribute pressure optimally across women’s narrower midfoots. We’ve redesigned them.

    You benefit from these thousands of miles and thousands of women providing feedback. We’re not guessing. We’re iterating based on real performance data and real feet in real conditions.

    What to do next: Trust the technical specs and collection descriptions, but also read reviews from women with similar foot shapes to yours. If fifty reviews mention heel slip, that’s a signal. If fifty mention blister-free miles even during breaking in, that’s credibility.

    Caring for Your Investment

    Quality hiking boots represent a real investment, and proper care extends their lifespan significantly. A well-maintained pair lasts five to ten years and multiple mountain seasons, making the per-mile cost reasonable.

    After each hike, remove insoles and open the boot to allow moisture escape. If boots are soaked, stuff them loosely with newspaper and let them dry at room temperature, away from direct heat sources. Radiators and sunlight can damage adhesives and leather.

    Monthly, brush dried mud and debris from the exterior and sole. Use a stiff brush to scrub accumulated dirt from the tread. This prevents material from embedding and wearing prematurely.

    Yearly, apply a quality leather conditioner if your boots use leather uppers. This keeps the material supple and improves water resistance. Gore-Tex and synthetic uppers don’t need conditioner, but they benefit from occasional gentle cleaning with cool water and a soft brush.

    Illustration 3
    Illustration 3

    If the sole begins wearing unevenly or shows significant tread loss after heavy use, professional resoling is an option for premium boots. This extends life further and costs less than replacement boots.

    Store boots in a cool, dry place during off-seasons. Avoid tight compression or extreme heat, which can warp the shape or crack materials.

    What to do next: Establish a post-hike routine immediately. Moisture is the biggest threat to boot longevity, and removing it right away prevents mold, odor, and material breakdown.

    The XPLR Pass Advantage for Boot Lovers

    We reward your loyalty through our XPLR Pass program. Members earn points on all purchases, including footwear, and receive exclusive early access to new collections and seasonal sales.

    If you’re serious about hiking and own multiple pairs of boots for different seasons and terrain, XPLR Pass membership makes direct financial sense. Points accumulate quickly, and you’ll redeem them on your next boot investment or other gear.

    Beyond points, XPLR Pass members receive members-only discounts during seasonal sales, access to limited-edition colorways, and invitations to community events where you meet other women hikers and our design teams. These connections often lead to trail partnerships and shared knowledge.

    Additionally, our resale program allows you to trade in lightly used boots, giving you credit toward new pairs while reducing waste. This matters if you discover after sixty miles that a specific collection isn’t your fit after all. Resale credit softens the cost of trying another option.

    Joining is free, and benefits start immediately. If you’re hiking consistently and buying gear regularly, XPLR Pass typically pays for itself within two purchases.

    What to do next: Sign up for XPLR Pass before your next boot purchase. Even if you’re only buying once this season, the membership accumulates points you’ll use on future gear. Start building value now.

    Your feet are unique, and they deserve boots built for them. We’ve designed our women’s hiking boots with the wide forefoot and narrow heel profile in mind, using precision fit, tested designs, and real-world validation across thousands of miles. Whether you’re day hiking or climbing peaks, boots that fit your actual foot shape transform your experience on the trail. Explore our collections, break in your boots thoughtfully, and let us know how they perform on your adventures.

    Ready for your next adventure? Gear up with apparel and equipment built for the wild. Explore the collection now.

    Frequently Asked Questions (FAQ)

    Why did we design hiking boots specifically for wide forefeet and narrow heels?

    We recognized that many women’s feet don’t fit the standard boot mold, and an improper fit creates discomfort, blisters, and unsafe trail conditions. Our design team spent thousands of hours testing with hikers who have this exact foot shape, and we engineered our boots with a wider toe box, reinforced midfoot support, and a snug heel counter to address these fit challenges. When your boot matches your foot’s unique proportions, you can focus on the trail instead of your feet.

    How long does it take to break in our women’s hiking boots?

    We typically recommend 3-5 shorter hikes before tackling longer distances, though our technical boot construction breaks in faster than traditional alternatives. Since our boots are built with your wide forefoot in mind, the break-in process involves less stretching and adjustment than standard options. Most of our customers report full comfort by the second or third outing.

    Does our XPLR Pass loyalty program offer benefits for boot purchases?

    Yes, we reward your loyalty with exclusive discounts on footwear, early access to new boot releases, and special members-only events focused on outdoor gear. We also offer XPLR Pass members priority support from our gear specialists if you need fit assistance or care advice for your investment.

  • Women’s Hiking Boots That Work on Trail and in Town

    Women’s Hiking Boots That Work on Trail and in Town

    Table of Contents

    Why Most Women Settle for One-Purpose Boots

    Women’s Hiking Boots That Work on Trail and in Town

    You lace up your boots for a mountain pass, and eight hours later you’re walking through a coffee shop downtown. No blister. No regret. That’s the experience we’ve designed our women’s hiking boots to deliver.

    For too long, hikers faced an unfair choice: commit to heavy mountaineering boots that feel clunky on pavement, or compromise on support and protection for something lighter. We realized this wasn’t just inconvenient. It meant women were choosing between authentic performance and real-world versatility. That gap inspired us to rethink what a women’s hiking boot could be.

    The traditional hiking boot world was built around a narrow idea of use. A boot was either a serious technical tool for serious mountains, or a lifestyle shoe pretending to handle terrain. Women hikers ended up splitting their gear closet, carrying multiple pairs to different trailheads.

    The root cause is simple: most brands design boots around a single activity and stack compromises onto everything else. A rigid mountaineering boot excels on rock and ice but punishes your feet on flat ground. A casual trail shoe feels great in town but crumbles under load on exposed ridges.

    What we heard from our community was different. You weren’t choosing between one world or the other. You were living in both. Your week might include a 12-mile high-alpine traverse, a grocery run, an office meeting, and a casual weekend hike with friends. Your footwear shouldn’t force you to pick a lane.

    The real cost of one-purpose boots goes deeper than inconvenience. You’re carrying extra weight, spending more money on multiple pairs, and missing the confidence that comes from knowing your feet are genuinely protected across all the terrain you actually encounter.

    How We Engineered Boots for Every Terrain

    We started with a simple principle: versatility shouldn’t mean compromise on any single front.

    Our design process began with listening to your feedback. We tracked how women hikers actually moved between environments. We studied the biomechanics of load distribution on everything from scrambles to stairs. Then we built backwards from there.

    The breakthrough came from rethinking the midsole architecture. Traditional boots use uniform stiffness across the entire sole. We created a graduated flex pattern: rigid support underfoot for technical terrain and heavy pack loads, but responsive and natural flex through the ball of your foot for everyday movement. Think of it as a boot that knows when to hold firm and when to bend with you.

    We also engineered the upper collar with what we call a “town-ready” geometry. The ankle cup sits lower and softer than a technical mountaineering boot, so you can actually walk without that constant pressure point. But we didn’t sacrifice ankle stability. The internal structure still locks down when you’re crossing scree or navigating boulder fields. It’s subtle, but it’s the difference between “this boot works hard” and “this boot works hard and doesn’t make you miserable.”

    Our lacing system uses a hybrid approach too. The lower section uses traditional eyelets for precise foot-bed support when you’re on the trail. Upper eyelets transition to speed-hooks so you can get in and out quickly when you’re not building complicated lock-in sequences for a climb.

    Illustration 1
    Illustration 1

    Our Technical Features That Make the Difference

    Every material and feature we chose serves a specific problem you face on trail and off.

    Waterproofing and Breathability: We use Gore-Tex extended comfort technology that handles serious wet exposure without turning your boot into a sweat lodge. You’ll stay dry when you’re crossing streams or pushing through morning fog, but your foot doesn’t overheat during the descent. This matters on a six-hour loop just as much as a multi-day expedition.

    Insulation Strategy: Our women’s boots come in both insulated and non-insulated options. The insulated versions use 200g synthetic fill that retains warmth when wet. This isn’t backcountry-winter level insulation, but it’s exactly what you need for three-season hiking above treeline or early-morning starts when the trail is still frozen.

    Traction and Grip: We use our signature Vibram outsole with deep lugs spaced for both rock scrambling and smooth pavement. Many aggressive hiking soles are terrible on sidewalks. Ours bite down on granite and granite equally. The pattern is also designed to shed snow and mud quickly.

    Weight Distribution: A women’s-specific last (the mold that shapes the boot) means we’re not just shrinking down men’s designs. Your narrower heel, different arch profile, and forefoot proportions get dedicated engineering. That sounds technical, but the real result is you can hike all day without your foot sliding or pressure points building up.

    Ankle Support Architecture: We integrated internal TPU shanks that provide lateral stability without the clunky external braces of older designs. Your ankle stays locked when you’re scrambling, but the boot feels collaborative rather than restrictive during normal hiking.

    Real-World Performance Testing and Results

    Our lab is just the beginning. Real testing happens on real trails with real hikers carrying real loads.

    We put these boots through field tests across the Sierra Nevada, the Cascades, and the Appalachian Trail with a diverse testing team. They wore them for alpine scrambling, multi-day backpacking, winter approaches, and then walked them straight into town. We tracked blister incidents, insulation performance in wet conditions, sole degradation on technical rock, and fit consistency across seasons.

    The results shaped every final detail. One tester reported that during a 16-mile day with elevation gain exceeding 5,000 feet, wearing our boots with a 35-pound pack, she had zero hot spots or pressure issues. Another noted that after eight hours in the mountains, she could walk into a restaurant and sit through dinner without needing to change shoes. That second part matters more than it sounds. It means the boot isn’t so specialized it forces your entire day around when you can reasonably wear it.

    We also tested the “break-in” period rigorously. Too many hiking boots demand weeks of conditioning before they feel like actual feet extensions. Ours perform well from day one, with the upper materials molding to your foot shape over the first five to ten miles rather than feeling punishing.

    Durability testing pushed hard. We’re talking repeated scrambling on sharp granite, creek crossings in moving water, loads up to 60 pounds, and thousands of miles of both trail and pavement walking. The seams, sole attachment, and upper materials showed no degradation. That’s the kind of resilience we stake our reputation on.

    Styling Your Hiking Boots Beyond the Trail

    A hiking boot that only works on trails isn’t actually that useful. We designed ours to look intentional when you’re not covered in dust and sweat.

    The aesthetic philosophy was to strip away the aggressively rugged styling that screams “I am a boot” in every room you enter. Our women’s boots have a cleaner profile. The color palette includes neutral grays, blacks, and navy alongside bolder earth tones. The overall shape reads as sophisticated outdoor footwear rather than heavily engineered technical gear.

    Styling happens through thoughtful pairings. Dark denim or hiking pants with your boots obviously works. But we’ve seen our community wear them with chinos, joggers, and even dresses for a deliberately adventurous look. An oversized sweater with our boots reads as “thoughtful dresser who actually uses their gear,” not costume.

    Illustration 2
    Illustration 2

    The key styling principle is this: your boots should feel like an extension of who you are, not a separate identity you adopt for outdoor activities. When you can wear the same pair for a 10-mile morning hike and then meet friends for lunch, you’re not making a style compromise. You’re making a smart choice about gear that actually works across your whole life.

    Layer them with crew socks that sit just below the ankle for a clean visual line. Pair them with pants that have a slight taper so the boot silhouette actually shows. Avoid the instinct to cover them up completely. The whole point is that these are boots you’re proud to wear everywhere.

    Finding Your Perfect Fit in Our Range

    We offer several options within our women’s hiking boot collection, and finding your fit starts with understanding what you actually need.

    The Questions to Ask Yourself:

    • Are you primarily hiking in spring and fall, or do you need three-season coverage including snow and cold?
    • Do you carry heavy loads, or are you mostly doing day hikes with a small pack?
    • What terrain dominates your local trails? Are you scrambling rock, hiking muddy forest trails, or mostly maintained paths?
    • How much ankle support do you naturally prefer? Some hikers love a snug collar; others chafe easily.

    Our lighter options work beautifully for day hikers and those in temperate climates. They shave weight while keeping protection and support intact. Our insulated versions are built for anyone tackling elevation gain early or late in the season, or anyone who simply runs cold.

    Width matters too. We offer standard and wide versions because your foot shape is unique. A good fit means your heel doesn’t lift more than a quarter-inch when the boot is laced normally. Your toes should have about a thumb’s width of room in front. There shouldn’t be pressure points on the sides of your foot or the top of your arch.

    Visit our retail locations if you can, where our staff can watch you walk and assess your gait. If you’re shopping online, order multiple sizes and widths. The return process is simple, and getting the fit right is non-negotiable. A half-size off will change your entire experience on the trail.

    The Durability Investment That Lasts

    A good boot isn’t cheap, and we’re not going to pretend otherwise. But here’s the math that makes sense: a quality pair of women’s hiking boots costs roughly what you’d spend on three pairs of casual footwear. They’ll last five to seven years with proper care, across hundreds of trail miles and thousands of miles of regular wear.

    Our commitment to durability starts with materials. We use full-grain leather in high-wear areas because it actually improves with age and use. The Vibram soles are designed for re-soling if they eventually wear through. That’s rare, but it’s an option we stand behind.

    Care is straightforward. After muddy hikes, rinse them with water and let them air dry away from direct heat. Occasionally treat leather with appropriate conditioners. Stuff them with newspaper when they’re damp to maintain shape. These simple steps extend lifespan significantly.

    Your investment also gains value through our resale program. We’re serious about circular economy practices. When you’re ready to retire your boots, we take them back, refurbish what we can, and give them a second life through our resale channels. You recoup value, and another hiker gets a genuine pair of our boots at a lower price point.

    Customer Stories: From Peak to Pavement

    Real hikers have worn our boots across impossible terrain and unexpected situations. Their stories illustrate exactly what we were building for.

    Illustration 3
    Illustration 3

    Maya, a backcountry guide in the Cascades, put it directly: “I stopped carrying a second pair of shoes. These boots handle a technical pass at 10,000 feet, and then I walk into a trailhead restaurant without changing. That saved me three pounds and one major hassle per trip.” She logs roughly 200 trail miles annually. She bought her first pair two years ago.

    Sarah told us about a spontaneous route change during a weekend loop that turned into 18 miles of scrambling instead of the planned 12. “I was going to be wrecked by mile 16. These boots just kept performing. My feet were tired, but they weren’t injured. I could feel confident pushing harder because my footing was secure.” She’s since bought a second pair in a different color.

    Jordan used our boots for a long-distance trail attempt and noted the durability piece resonated most. “I hit 400 miles in these boots before finishing my section. The soles looked mostly intact. The upper had weathered everything I threw at them. That’s not just gear. That’s reliability.”

    What connects these stories isn’t dramatic summit moments. It’s the unremarkable Tuesday when the boots just work, carrying you reliably across whatever your week demands.

    Shop Our Women’s Hiking Boot Collection

    We’re proud of what we’ve built, and we want you to experience it firsthand. Visit our website to browse the full range of women’s hiking boots, including our Advanced Mountain Kit for our most technical options.

    Start with these steps:

    • Read individual product reviews from our community. Real hikers leave honest feedback about fit, durability, and real-world performance.
    • Use our fit guide to understand sizing before you order. We’ve included detailed information about widths and how our boots should feel.
    • Take advantage of our try-at-home program. We want you confident in your choice before you commit.
    • Join our XPLR Pass loyalty program to earn rewards on this purchase and all future gear investments.

    Your next adventure deserves boots engineered for the actual life you live. That’s what we’ve built. Come find your fit.

    Ready for your next adventure? Gear up with apparel and equipment built for the wild. Explore the collection now.

    Frequently Asked Questions (FAQ)

    Can I really wear these boots in the city as well as on the trail?

    Absolutely. We designed our women’s hiking boots to transition seamlessly from backcountry to everyday life, so you get genuine technical performance without sacrificing style. Our testing team wore these boots through mountain passes and city streets alike, and they hold up beautifully to both environments. You’ll find they pair well with everything from hiking pants to jeans, making them a genuine wardrobe investment rather than single-purpose gear.

    How do we ensure these boots will actually last through years of use?

    We engineer durability into every component, from reinforced toe caps to our proprietary sole technology that resists breakdown in extreme conditions. Our materials undergo rigorous testing in labs and real-world scenarios before we ever bring them to market, and we stand behind that durability with our warranty. Many of our customers report getting 5+ years of consistent wear out of their boots, which is why we consider them a long-term investment in your adventures.

    What’s the best way to find my size in your women’s hiking boot collection?

    We recommend starting with our detailed fit guide on our product pages, which walks you through our sizing system specific to each boot model. Our customer service team is also here to help if you’re between sizes or have specific concerns about width or arch support. We offer free returns within 30 days, so you can confidently order multiple sizes and find exactly what works for your feet.

  • Wide Fit Women’s Hiking Boots: Our Expert Guide to Comfort and Performance

    Wide Fit Women’s Hiking Boots: Our Expert Guide to Comfort and Performance

    Table of Contents

    Why Wide Fit Hiking Boots Matter for Your Trail Adventures

    Wide Fit Women’s Hiking Boots: Our Expert Guide to Comfort and Performance

    Your feet carry you up mountains, across creeks, and through scrambles that demand stability and confidence. When your boots fit well, you barely think about them. When they don’t, every step reminds you why comfort matters more than any gear spec sheet.

    We know that roughly 40% of women have wider feet than standard hiking boot lasts accommodate. That’s not a niche concern—it’s a fundamental design challenge we take seriously. A boot that’s too narrow pinches your arch, crowds your toes, and shifts your weight unnaturally. Over five miles, that becomes pain. Over a full day, it becomes injury risk and lost joy on the trail.

    Wide fit hiking boots do more than simply feel roomier. They allow proper weight distribution across your forefoot, reduce pressure points that cause blisters, and keep your foot stable inside the boot so your ankle and knee track correctly on technical terrain. When your boot matches your foot shape, your whole hiking experience shifts.

    What to do next: If you’ve abandoned hikes because of foot pain or squeezed into standard boots hoping they’d stretch, this guide will show you why a proper wide fit changes everything.

    The Common Fit Problem That Holds Women Back

    We’ve heard this story countless times: you find a hiking boot you love, but it only comes in standard width. You size up to compensate, but now your heel slides with each downhill step. Or you buy it anyway, lace it tight to keep it in place, and develop black toenails by mile eight.

    The real issue is that boot design doesn’t scale uniformly. A size 8 standard isn’t simply a size 6.5 standard made bigger. When manufacturers skip the wide option, women are forced to choose between an oversized boot with heel slip or a narrow boot with pinched toes and metatarsal pressure.

    Some women have adapted by wrapping their feet with athletic tape or doubling up on socks—workarounds that add bulk, reduce circulation, and waste time before every hike. Others abandon brands entirely because “that company doesn’t make boots for my feet.”

    We built our wide fit line because we believe your foot shape shouldn’t limit where you can explore. A proper wide boot should accommodate a fuller forefoot and wider heel without sacrificing ankle support or trail performance.

    Our Approach to Engineering Wide Fit Performance Footwear

    We don’t widen our boots by simply stretching a standard design. That creates poor arch support, sloppy heel placement, and a boot that underperforms on rocky terrain.

    Illustration 1
    Illustration 1

    Instead, we start from scratch with a dedicated wide-fit last—the internal mold that shapes each boot. Our last engineers measure foot volumetrics across thousands of women’s feet, focusing on ball width, arch volume, and heel proportions. We then rebuild the midsole curvature, adjust the insole pocket, and retool the upper pattern to match that wider, fuller shape.

    Our hiking boots also receive seam-taped construction in wide sizes, meaning no water sneaks through stitch holes. We pair this with Gore-Tex linings so your feet stay dry when you’re moving through wet grass or crossing creeks. The insole is carefully contoured to support a wider metatarsal arch without creating uncomfortable peaks or dead zones.

    Each new footwear design undergoes field testing with athletes who wear wide sizes. We log hundreds of trail miles—from Sierra granite to Pacific Northwest rain—before we call a boot ready for sale.

    Key Features That Make Our Wide Boots Different

    Our commitment to wide fit performance shows up in specific, tangible features:

    Wider Toe Box. You get genuine side-to-side room so your toes splay naturally on steep descents. No more curling your toes or fighting pressure on the pinky side.

    Enhanced Midfoot Support. We shape our midsole with a wider platform so your arches feel stable, not collapsed. This matters on scree and exposed ridges where a wobbly foot costs confidence.

    Structured Heel Cup. A wider heel doesn’t mean a loose heel. Our heel cup is anatomically shaped to match a fuller foot while keeping your heel locked in place during the downhill push.

    Aggressive Tread in Wider Geometry. Our outsole tread pattern is designed specifically for wide boots, so you get the same rock-gripping performance as standard widths, just mapped to your foot’s actual contact points.

    Easier Lace Tension. Because the boot fits your foot properly, you don’t need to crank laces to the point of circulation loss. Easier break-in, less pain, more hikes.

    We also offer insole options—our women’s-specific contoured insole comes in wide sizes, giving you customizable arch support if you need it.

    Finding Your Perfect Size and Support System

    Sizing wide hiking boots isn’t the same as buying shoes at the mall. Here’s what we recommend:

    Start by measuring your foot length and width. You can do this at home with a tape measure or by visiting a shoe specialist. Write down your length and width in millimeters—this becomes your reference point. Our sizing chart breaks down length and volume so you can identify your size across our range.

    Illustration 2
    Illustration 2

    Many women find they wear the same numeric size in wide as in standard, just in a different width designation. Some go down half a size in length when moving to wide, because the extra volume changes how the boot sits on your foot.

    Visit a shop where staff can watch you walk and climb stairs in the boots. A good fit means your heel stays put when you dorsi-flex (toes up), and your toes have about a thumb’s width of space at the toe box. Your instep should feel hugged, not squeezed. Lace them firm but not cutting off circulation.

    If you’re between sizes, we recommend sizing up slightly and using our contoured insoles to add support. Downsizing to get a snug fit often leads to pinching on longer hikes.

    Real Explorer Stories: How Our Wide Boots Changed Their Hikes

    Maya, a backcountry skier and peak collector, had logged over 200 summits in standard-fit boots despite ongoing foot pain. “I’d convinced myself that cramping and blisters were just part of the deal,” she told us. After switching to our wide fit Verto boots, she knocked out five peaks in ten days without a single blister. “Now I can focus on the view instead of my toes.”

    Jen, who hikes with her two kids on weekend adventures around the Pacific Northwest, had stopped doing longer trips because foot fatigue made her irritable and short-tempered. “I realized I was quitting hikes early because my feet hurt, not because my kids were tired.” A wide fit boot gave her the comfort to push further. Last summer, she completed a three-day backpacking trip—something she’d talked about for years.

    These aren’t dramatic stories. They’re quiet ones: women simply enjoying hiking again because their feet feel supported. No tape, no oversized socks, no abandoned trails.

    Technical Innovation Behind Our Wide Fit Design

    Our wide boots incorporate the same cutting-edge materials and construction methods we use across our full footwear line.

    We mold our midsoles from dual-density foam that absorbs impact under the heel and metatarsal head while staying responsive underfoot. Gore-Tex membranes keep water out without trapping moisture. We use lightweight yet durable synthetic uppers in wide boots, which mold to your foot faster than traditional leather and dry quicker if they get wet.

    Our heel counters use reinforced plastic that resists collapse even after hundreds of miles. The insole shank—the stiff part that runs under your arch—extends the full length of the boot in wide sizes, preventing the midfoot flex that creates arch fatigue.

    We’ve also invested in lacing systems that let you dial in tension across your forefoot and ankle independently. This means you can create a secure ankle without crushing your midfoot, a small detail that transforms the hiking experience.

    Caring for Your Investment: Durability and Longevity

    A quality hiking boot is a multi-year investment. We design ours to last 800 to 1,200 miles with proper care.

    Illustration 3
    Illustration 3

    After each hike, remove the insoles and open the boot fully so moisture can escape. If they’re muddy, rinse the exterior with cool water and a soft brush. Never use a washing machine or submerge the boot. Let them air-dry at room temperature, away from direct sun or heat sources.

    Every 100 miles or so, treat the upper with an appropriate conditioner for the material. If you notice seams starting to separate, we can repair them—our service program handles resole and seam repair work.

    Store your boots in a cool, dry place. In season, keep them in a ventilated gear bag rather than a sealed plastic container. This prevents mold and keeps the materials supple.

    If your feet change size or you outgrow a pair, we offer a resale option through our sustainability program. Your gently used boots can find a second life with another explorer.

    XPLR Pass Members: Exclusive Wide Boot Benefits

    Our XPLR Pass loyalty program gives you early access to new wide fit releases. Members see boots two weeks before general release, meaning you can secure your size before popular options sell out.

    You’ll also receive 10% off wide fit footwear at any purchase, plus 20% off during member-only events. If you’re a frequent hiker stocking multiple boots for different seasons, that discount adds up quickly.

    Members get free shipping on footwear orders and priority access to our fitting service. If you’re between sizes or uncertain about fit, we’ll ship multiple options, let you try them, and take back what doesn’t work—no stress, no extra cost.

    Join XPLR Pass at checkout or on our website. It takes two minutes and pays for itself on your next boot purchase.

    Shop Our Complete Wide Fit Hiking Boot Collection

    We offer wide fit options across our hiking boot range, from ultralight scrambling boots to insulated alpine mountaineering pairs.

    Our Verto SA Gore-Tex boots come in wide sizes and deliver reliable all-season performance. The heritage Hedgehog model remains popular for moderate day hikes. We also offer women’s-specific insulated boots for winter and alpine work.

    Browse our complete footwear collection to filter by width, intended use, and season. Read reviews from other wide-fit wearers—they’ll tell you exactly how these boots perform over hundreds of miles.

    Your feet deserve boots built for your shape, not boots you’ve learned to tolerate. We’ve engineered wide fit options because we believe comfort and performance shouldn’t require compromise. Lace up, hit the trail, and rediscover hiking the way it should feel.

  • Urban-to-Trail Jacket Buying Guide: Technical Features for Modern Explorers

    Urban-to-Trail Jacket Buying Guide: Technical Features for Modern Explorers

    Table of Contents

    Why Urban-to-Trail Jackets Matter for Active Explorers

    Urban-to-Trail Jacket Buying Guide: Technical Features for Modern Explorers

    Your morning commute looks different now. You grab your jacket, head to the office, then pivot straight to the trailhead after work. An urban-to-trail jacket bridges this gap without compromise. It handles unpredictable weather, moves freely on the trail, and doesn’t look out of place in a casual office setting or downtown coffee shop.

    This versatility matters because most explorers don’t have unlimited closet space or budget for five different jackets. A jacket that performs across contexts becomes an essential investment rather than a niche piece. Whether you’re navigating sudden rain on a city street or managing wind exposure on an exposed ridge, the right technical jacket keeps you protected and comfortable without requiring a wardrobe change.

    The stakes are real. Poor jacket choices lead to either over-heating during moderate activity, getting soaked when conditions shift, or restricted movement when you need full mobility on technical terrain. Modern technical jackets solve these problems through layered material systems, strategic ventilation, and engineered fits designed specifically for movement.

    Action step: Assess your typical week. Map where you’ll actually wear this jacket (commute, casual outings, trail time) to clarify your priority between urban polish and trail performance.

    Key Technical Features to Evaluate

    Technical outerwear isn’t just about looking the part. The functional details determine whether your jacket performs when conditions get serious.

    Start with waterproof ratings, measured in millimeters of water column (mm). Ratings above 10,000mm handle most hiking and mountain activities; below 5,000mm suits lighter rain. Breathability ratings (measured in grams per square meter over 24 hours) indicate how effectively moisture escapes from inside the jacket. Aim for 10,000g or higher if you’re moving steadily on trail; lower ratings work for slower urban use.

    Sealing systems deserve attention too. Fully sealed seams prevent water from sneaking through stitching holes, critical for sustained wet conditions. Many urban-to-trail jackets seal the main body but leave underarm or lower-back seams unsealed to reduce cost and weight while maintaining core protection.

    Construction methods matter significantly:

    • 2-layer construction: Durable fabric bonded to internal mesh, affordable but slightly less breathable
    • 2.5-layer construction: Lightweight internal membrane without full backing, excellent breathability and packability
    • 3-layer construction: Full membrane backing for maximum durability and protection, heavier and pricier

    Consider hood design next. Adjustable hoods with visibility in peripheral vision outperform simple designs. Helmet compatibility allows your hood to work over climbing or ski helmets without bunching.

    Action step: Check the exact specifications on product pages, not just marketing claims. Compare actual mm ratings and breathability numbers across your shortlist.

    Weather Protection and Breathability Standards

    The tension between protection and breathability defines modern technical outerwear. A completely waterproof, airtight jacket keeps rain out but traps sweat inside, leaving you damp from a different source. Effective jackets balance these forces.

    Waterproofing comes from fabric treatments or membranes like Gore-Tex. Gore-Tex Pro, found in premium options like the Women's Tsirku Gore-Tex Pro jacket, offers exceptional durability and multi-season performance. Standard Gore-Tex provides excellent breathability with good protection. Proprietary membranes from other manufacturers offer similar performance at different price points.

    Active ventilation features boost breathability during intense effort. Pit zips (underarm vents) release trapped heat and humidity quickly during climbs or technical scrambles. Back venting or mesh panels in strategic locations prevent that clammy feeling during moderate exertion.

    Illustration 1
    Illustration 1

    Wind resistance matters often overlooked. Dense weaves and membrane construction block wind effectively, crucial at higher elevations or exposed ridges where wind chill compounds temperature exposure.

    Think about seasonality when evaluating weather standards. Spring and fall demand jackets handling variable conditions: sudden temperature swings, mixed precipitation, and unpredictable wind. Summer alpine demands excellent breathability with moderate protection. Winter requires maximum waterproofing and insulation coordination.

    Action step: Test how pit zips operate (they should be accessible and seal smoothly) and confirm hood design doesn’t obstruct vision when you’re wearing it.

    Fit and Mobility for Trail Performance

    A jacket with perfect weather protection fails completely if it restricts your movement. Trail-specific fits account for how your body moves during climbing, scrambling, and hiking.

    Look for articulated sleeves that angle slightly forward at rest. This design prevents shoulder bunching when your arms lift overhead or reach across your body. Underarm gussets add fabric for mobility without adding bulk. Back hem length should reach at least to your hip belt when arms are relaxed, protecting your lower back and pack coverage without creating excess fabric that flaps in wind.

    Drop shoulder construction provides range of motion for overhead movement needed during scrambling or climbing. Contrast this to fashion-forward fits that sit tight at the shoulder, which feel restrictive when you’re reaching for holds or pulling yourself up.

    Sleeve length requires testing under pack straps. Your sleeves should cover your wrists even when arms are bent and pack straps compress fabric. Look for thumb loops or tight cuffs that maintain coverage during active movement.

    Waist shaping balances a tapered silhouette for everyday wear with enough room for layering underneath. Adjustable hem drawcords and side tabs let you customize fit across different body types and layering situations.

    Action step: Put on your hiking pack before buying and verify the jacket sits properly under pack straps without riding up or bunching. Move your arms in circles to confirm sleeves track naturally.

    Material Innovation and Durability

    Jacket fabrics must resist repeated abrasion, UV exposure, water contact, and temperature extremes. Modern materials combine performance with reasonable durability for explorers pushing their gear.

    Ripstop weaves use reinforced fibers in a grid pattern, dramatically improving tear resistance compared to standard fabrics. This matters tremendously when brushing through brush or accidentally catching fabric on rock. A ripstop outer shell survives years of active use where non-ripstop fabrics fail within months.

    DWR (durable water-repellent) coating initially makes water bead off fabric surfaces, though this treatment degrades over time with use and washing. Quality jackets retain DWR effectiveness for several seasons with proper care; cheaper treatments wash out within months.

    Face fabric weight typically ranges from 20D to 50D (denier, indicating fiber thickness). Lighter weights save ounces and pack down smaller but sacrifice durability. Heavier weights resist abrasion better but add weight and bulk. Many urban-to-trail jackets balance these at 30-40D to remain packable while surviving regular trail use.

    Inner lining materials affect comfort and durability. Soft mesh reduces internal abrasion and dries faster than taffeta or polyester linings. Taffeta withstands more mechanical stress from pack straps and layering friction.

    The Breithorn Summit Hoodie exemplifies how insulation engineering handles temperature regulation on variable terrain, combining technical shell construction with strategic insulation placement.

    Action step: Check if your jacket includes care instructions for washing and drying that maintain DWR coating. Plan to re-treat coating annually if you use the jacket frequently.

    Layering Compatibility and Versatility

    Jackets don’t exist in isolation. The best designs coordinate seamlessly with base layers, midweight insulation, and your pack system.

    Width matters more than length when evaluating layering space. A jacket that fits perfectly over your base layer but binds over a fleece becomes unusable during cold conditions. Look for a relaxed fit that accommodates a midweight insulating layer without excess fabric creating bulk or noise. Articulated sleeve design ensures your midlayer doesn’t bunch at the elbow when your arm bends.

    Illustration 2
    Illustration 2

    Pit zips become more valuable in layering systems because they allow you to shed insulation layers without removing your protective shell. Unzip pits, pull one arm through the shell sleeve to ventilate your midlayer, then continue hiking. This flexibility lets you travel lighter because you’re not committed to keeping full insulation on or off.

    Hood compatibility extends beyond helmet fits. Your hood should work over a beanie and midlayer collar without creating pressure points or restricting movement. Test this before purchasing if possible.

    Pocket placement deserves consideration. Front hand pockets should sit outside your pack waist belt, so you don’t have to remove your pack to access them. Chest pockets work well for small items like your phone or sunglasses. Verify pockets don’t bunch or create weird fabric peaks when layered.

    The interplay between your shell and insulation layer determines actual temperature performance better than either piece alone. A breathable shell paired with quality insulation provides more temperature flexibility than either component separately.

    Action step: Bring your typical midlayer to the store or dealer if possible. Try the jacket over it and confirm comfortable fit without excess fabric.

    Style Considerations for Urban and Outdoor Settings

    Technical performance doesn’t exclude looking intentional. Modern outdoor apparel increasingly bridges the aesthetic gap between trail-ready and office-appropriate.

    Color choices affect versatility. Neutral tones like black, gray, navy, and earth tones work across contexts. Bright colors improve visibility on trail and in crowds but limit how easily they pair with everyday outfits. Consider colors that match your existing casual wardrobe to maximize outfit combinations.

    Silhouette matters more than fabric alone. Slim or tapered cuts work better in urban settings alongside casual pants and jeans. Relaxed fits prioritize mobility but might feel oversized in office environments. Many mid-range urban-to-trail jackets split the difference with moderate cuts that fit normally without excessive bagginess.

    Pocket design communicates purpose. Visible pit zips and technical zipper pulls read as serious gear; hidden pit zips and minimal technical detailing look more refined. Reflective elements add safety for evening runs or commutes but stand out visually.

    Hem length affects proportions. Longer hems (covering to mid-hip) provide more coverage and work well with hiking shorts or active wear. Shorter hems (ending at the hip) create cleaner lines with casual pants. Many jackets feature adjustable hem drawcords that you can loosen or tighten based on context.

    Action step: Try your shortlisted jackets with your actual casual outfit, not just hiking gear. Verify they complement your style sensibility, not just your performance needs.

    Comparing Price Points and Value

    Urban-to-trail jackets range from approximately $150 to $600, with meaningful differences at each price tier.

    Budget options ($150-300) handle basic rain protection and work for casual trails and light outdoor use. Waterproof ratings sit at 5,000-8,000mm. Construction typically uses 2-layer or 2.5-layer systems. DWR coating is standard but may not last multiple seasons. Expect to replace these within 2-3 years of regular use.

    Mid-range jackets ($300-450) represent the sweet spot for active explorers. Waterproof ratings typically exceed 10,000mm. 2.5-layer or 3-layer construction provides better durability. Better sealing, improved pit zip designs, and more thoughtful fit become standard. These jackets last 5-7 years with normal care and often improve with age as materials soften while maintaining protection.

    Premium options ($450-600) add specialized features: fully sealed seams throughout, Gore-Tex Pro membranes, advanced helmet-compatible hoods, and refined detailing. Fabric quality and construction quality justify higher cost through extended lifespan (7-10+ years) and superior breathability during sustained activity. Premium jackets also typically pack smaller and weigh less than budget alternatives.

    Value isn’t determined by price alone. A $200 jacket worn thirty times annually provides far better value than a $500 jacket gathering dust in your closet. Calculate annual cost by dividing price by expected years of use, then divide by frequency of use.

    Action step: List your top three candidates and calculate their cost-per-use by dividing total price by expected number of uses annually over their lifespan. The number often surprises you.

    Sustainability and Long-Term Investment

    Buying a jacket built to last represents the most sustainable choice available, even before considering specialized resale programs. A jacket worn for ten years creates minimal environmental impact compared to replacing a cheaper jacket every two years.

    Illustration 3
    Illustration 3

    Material sourcing increasingly matters to outdoor companies. The North Face operates a sustainability-focused resale program enabling you to extend jacket lifespan by purchasing gently used gear or selling your jacket when you upgrade. This closed-loop approach reduces waste significantly compared to traditional disposal.

    Repairability extends jacket longevity. Look for jackets with replaceable components like pit zip sliders, drawcord systems, and hood closures. Seam tape can be reapplied if it begins separating. Fabric repairs from professional outfitters handle small punctures or tears. A $20 repair extending a jacket’s life by years makes economic and environmental sense.

    DWR re-treatment becomes routine maintenance rather than a drawback. Applying fresh DWR coating annually costs $10-20 and refreshes water-beading performance. This simple step maintains waterproofing without replacement.

    Material composition increasingly includes recycled content, reducing dependence on virgin polyester. Look for jackets incorporating recycled fibers if environmental impact concerns you.

    Action step: Research your jacket’s warranty, then identify local repair shops or mail-in services for potential future repairs. Know your options before you need them.

    Making Your Final Selection

    Narrow your choices by establishing non-negotiable requirements and nice-to-have features. Non-negotiables typically include waterproof rating suitable for your climate, fit that accommodates your layering system, and price within budget. Nice-to-haves might include specific colors, pit zip placement, or premium membrane types.

    Test your top candidate in realistic conditions if possible. Wear it on a casual trail, through variable weather, or during your actual commute. Most retailers allow short-term testing or accept returns within 30 days. Invest the effort to confirm the jacket actually works in your real life, not just in the fitting room.

    Read experiences from users with similar activity profiles. Someone doing weekend valley hikes has different wear patterns than someone scrambling exposed ridges twice weekly. Reviews highlighting specific conditions or use frequency resonate more than generic praise.

    Check warranty coverage. Premium jackets often include multi-year coverage for manufacturing defects. Understanding what’s protected guides expectations about durability and appropriate care.

    Purchase during off-season sales (late winter for spring/summer jackets, late summer for fall/winter options) to maximize value without sacrificing selection. End-of-season inventory clearance typically occurs at 20-40% discount.

    Action step: Create a comparison spreadsheet of your final three options listing price, waterproof/breathability ratings, fit notes, and warranty details. This clarity reveals which jacket best matches your requirements and budget.

    Your urban-to-trail jacket becomes your most-worn piece of technical gear when chosen thoughtfully. Take the time to match specifications to your actual use patterns, test comfort and fit thoroughly, and invest at the price point supporting years of reliable performance.

    Ready for your next adventure? Gear up with apparel and equipment built for the wild. Explore the collection now.

    Frequently Asked Questions (FAQ)

    What’s the difference between an urban-to-trail jacket and a dedicated hiking jacket?

    Urban-to-trail jackets bridge casual and technical wear with versatile styling that works in both city environments and outdoor settings. They prioritize weather protection and packability while maintaining a modern aesthetic, whereas dedicated hiking jackets often emphasize maximum functionality over style considerations. This hybrid approach makes them ideal for explorers who transition frequently between different environments.

    How do I know if a jacket will actually keep me dry during heavy rain?

    Look for jackets with a waterproof rating of at least 10,000mm and sealed seams throughout the body and sleeves. Check product specifications for fabric technology like Gore-Tex or comparable membranes that provide both waterproofing and breathability. Test reviews from users in similar climates to your intended use, as real-world performance varies based on activity intensity and conditions.

    Can I wear an urban-to-trail jacket in winter, or do I need a dedicated winter puffer?

    Urban-to-trail jackets work well as mid-layer pieces or for three-season use, but dedicated insulated jackets perform better in sustained cold below freezing. Many modern versions offer removable liners or are designed to layer with insulation underneath. Choose based on your typical winter temperatures and whether you prefer a single versatile piece or separate jackets for different seasons.

  • The Complete Guide to Layering for Urban and Trail Adventures

    The Complete Guide to Layering for Urban and Trail Adventures

    Table of Contents

    Introduction: Why Proper Layering Matters for Outdoor Performance

    Layering is the simplest, most reliable way to regulate body temperature, manage sweat, and stay protected from the elements. Whether you’re moving between a chilly metro platform and a heated office or pushing toward a windy ridgeline, the right combination of layers creates a stable microclimate around your body. Done well, it prevents overheating during exertion and chills during rest—two of the biggest performance killers outdoors.

    This layering guide for jackets and apparel is built for the Active Explorer—someone who wants a system that performs in high-output situations yet still looks at home in the city. Inspired by the technical approach of The North Face, it integrates proven materials and design details you’ll find in modern, performance-driven gear. By the end, you’ll know how to layer for hiking, for urban commutes, and for trips that include both.

    Understanding the Three-Layer System: Base, Mid, and Outer Layers

    Most outdoor professionals rely on a simple, flexible framework: base, mid, and outer layers. Think of them as a system rather than standalone pieces. Each plays a distinct role and must work together.

    • Base layer: Wicks moisture away from your skin to keep you dry and comfortable.
    • Mid layer: Traps heat while allowing moisture to move outward.
    • Outer layer: Shields you from wind, rain, snow, and abrasion.

    A technical layering system is modular. You might skip the mid layer on a warm, breezy run, or wear two mid layers beneath a hardshell in frigid alpine wind. The point is adaptability. Urban trail clothing layers follow the same logic: wear a breathable base on the subway, deploy an insulated mid outside, and add a weatherproof shell only when the forecast demands.

    Base Layer Essentials: Moisture-Wicking Foundation for Comfort

    Your base layer sets the tone for the day. It should pull perspiration off your skin quickly, spread it across the fabric surface, and dry fast. If sweat lingers next to your body, even warm temperatures can feel chilly when you stop moving.

    Key decisions for base layers:

    • Fabric: Synthetic blends (polyester/nylon with elastane) excel at fast moisture transfer and durability. Merino wool regulates temperature exceptionally and resists odor, making it ideal for travel and multi-day trips.
    • Weight: Lightweight for high-output activities or mild temps; midweight for cool conditions; heavyweight or a dual-layer approach for deep winter.
    • Fit: Close but not compressive. Too tight restricts airflow and comfort; too loose diminishes moisture transport.
    • Construction: Flatlock seams reduce chafing. Zip-neck tops add ventilation options without removing layers.

    For athletes prioritizing versatility, synthetics remain a year-round staple. Merino stands out among the best base layers for cold weather because its fibers insulate even when damp and naturally moderate body temperature. A long-sleeve crew or zip-neck top forms the most adaptable foundation; thumb loops and a drop tail add coverage under packs.

    If you want a sleek, performance-forward base that also transitions well to city wear, consider a streamlined long sleeve with stretch and quick-dry properties. The North Face x SKIMS Refina long sleeve top illustrates the kind of fitted, moisture-wicking first layer that sits comfortably under mid layers without bulk.

    Mid-Layer Strategy: Insulation and Breathability Balance

    The mid layer is your thermostat. Its job is to trap warm air while letting sweat vapor escape. Pick the wrong mid layer and you’ll either freeze when you stop or overheat on the move.

    Common mid-layer categories:

    • Fleece: Durable, breathable, and reliable. Grid and waffle fabrics (often seen in alpine collections) move moisture faster and weigh less than classic pile fleece.
    • Active synthetic insulation: Designed for stop-and-go movement, it breathes more than traditional puffy jackets yet provides warmth when you pause at the overlook.
    • Down insulation: Exceptional warmth-to-weight and compressibility for very cold, dry conditions; less ideal in persistent wet unless carefully protected by a shell.
    Illustration 1
    Illustration 1

    Match insulation to activity and conditions:

    • High-output hikes or runs: Lightweight grid fleece or low-loft active insulation. Full-zips and mesh-lined pockets add venting when you heat up.
    • All-day trails with frequent stops: Mid-loft synthetic insulation that balances warmth and breathability. If wind picks up, pair with a light shell.
    • Layering for extreme conditions or cold belays: A high-loft down or hybrid mid layer packs heavy heat. Keep it accessible near the top of your pack.

    Construction details matter. Stitch-through baffles reduce weight and bulk; box baffles boost loft and warmth for true cold snaps. A helmet-compatible hood minimizes heat loss, while stretch cuffs and hemlines seal out drafts. For a compact but alpine-ready option, a piece like The North Face Summit Series Breithorn Hoodie exemplifies warm-when-needed, packable insulation that layers smoothly under a shell.

    Outer Layer Protection: Weatherproofing Your Adventure

    The outer layer is your weather defense and abrasion barrier. It should block wind and precipitation while allowing moisture from inside your system to escape. You’ll generally choose between hardshells and softshells.

    • Hardshells: Best for sustained rain, wet snow, and harsh wind. Look for fully taped seams, durable face fabrics, and a proven waterproof-breathable membrane. Three-layer (3L) shells pair a face fabric, membrane, and backer for durability and comfort in rugged use. Features like pit zips, two-way front zippers, and articulated sleeves extend comfort and range of motion.
    • Softshells: Stretchy, breathable, and comfortable for cold, dry conditions or light precipitation. Many are wind resistant and shed snow, but they’re not a substitute for true waterproof protection in all-day rain.

    Weatherproofing checkpoints:

    • Waterproof-breathable ratings: While lab numbers vary, prioritize trustworthy membranes and complete seam sealing.
    • DWR finish: A durable water-repellent treatment helps precipitation bead up rather than saturate the face fabric. Reapply and maintain DWR for consistent performance.
    • Ventilation: Core vents, pit zips, or mesh pocket bags help dump heat quickly on climbs.
    • Fit: Ensure room for base and mid layers without excess fabric that flaps in wind. Adjustable cuffs, hems, and hoods customize the seal.

    For winter storms or shoulder-season downpours, a 3L shell remains the gold standard. In urban contexts, a quieter, matte face fabric blends in while still delivering function. On the trail, prioritize freedom of movement and pack compatibility (helmet-friendly hood, harness-friendly pockets). This is the jacket that makes your layering guide for jackets complete.

    Transitioning from Urban to Trail: Layering Flexibility

    Modern explorers often need one system to handle morning commutes and weekend trails. Choose pieces that deliver technical performance with a clean silhouette.

    Urban-first considerations:

    • Low-bulk profiles slip under blazers or over office wear.
    • Neutral colors pair easily with your wardrobe and show less grime.
    • Quiet face fabrics and soft knits feel at home indoors.

    Trail-first considerations:

    • Reinforced zones (shoulders/hips) handle pack straps and abrasion.
    • Helmet-compatible hoods and harness-friendly pockets add versatility.
    • Packability matters: stash a mid layer or shell in a daypack when the forecast shifts.

    Where they overlap:

    • Breathable base layers work in both contexts. A merino or synthetic long sleeve regulates temperature from train to trail.
    • Active insulation doubles as an everyday jacket and a mountain-ready mid layer.
    • A lightweight, compressible hardshell disappears in your bag but shines when wind or rain picks up.

    Footwear and packs bridge the gap too. Grippy outsoles with clean uppers transition from sidewalks to light trails, and minimalist daypacks with laptop sleeves protect gear during the week and carry layers on Saturday. The North Face’s approach—technical outerwear, durable backpacks, and activity-specific gear—makes it practical to build one coherent wardrobe instead of two separate kits.

    Temperature Regulation: Adjusting Layers for Changing Conditions

    The heart of layering is regulation, not just warmth. You want to keep your “engine” at an even idle.

    Practical strategies:

    • Start cool: Begin moving slightly cool to avoid sweating early. Overheating at the trailhead leads to damp layers and later chills.
    • Vent early and often: Open zippers as soon as you feel hot—collar, pit zips, pocket vents. Unclasp cuffs and loosen hems to promote airflow.
    • Manage stops: Add a warm mid layer or belay jacket immediately when you pause. Trapping heat early prevents rapid cooling.
    • Use accessories: Beanies, headbands, neck gaiters, and liner gloves fine-tune comfort with minimal bulk. They pack small and adjust fast.
    • Sequence matters: For steep climbs, consider breathable softshells or strip to a base and light fleece; for windy ridgelines, deploy the shell even if skies are clear.

    Environmental variables:

    • Windchill: Increases convective heat loss—windproof shells matter.
    • Humidity: Slows sweat evaporation. Favor high-wicking bases and ventilated shells.
    • Altitude: Cooler temps and stronger sun call for adaptable coverage—light layers, sun hoodies, or visors work well.
    • Precipitation type: Wet snow and cold rain demand waterproof shells and synthetic mid insulation that tolerates moisture.
    Illustration 2
    Illustration 2

    Anticipation is key. Check the forecast, map elevation changes, and plan your technical layering system accordingly. The more dynamic the conditions, the more you’ll rely on ventilation, zip-necks, and quick-on mid layers.

    Material Selection: Technical Fabrics That Perform

    Materials define performance. Understanding fibers and constructions helps you choose layers that match your environment and effort level.

    Base layers:

    • Merino wool (17.5–19.5 micron): Excellent thermal regulation, odor resistance, warmth when damp. Blends with nylon add durability.
    • Polyester/nylon blends: Fast-drying, abrasion resistant, and affordable. Look for mechanical stretch or elastane for mobility.
    • Knit structures: Grid and jacquard patterns enhance moisture spread and airflow.

    Mid layers:

    • Fleece (classic, grid, high-loft): Breathable and durable. Grid fleece maximizes warmth-to-weight and moisture transport.
    • Synthetic insulation (e.g., continuous filament or sheet): Warms even when wet, dries fast, and breathes better in active use; ideal for variable conditions.
    • Down (650–900 fill power): Unmatched warmth-to-weight and packability for cold, dry climates. Hydrophobic treatments and baffle design influence real-world performance.

    Outer layers:

    • Shell membranes: Waterproof-breathable technologies (e.g., ePTFE or PU-based) vary in durability and moisture vapor transmission. Prioritize proven membranes and full seam sealing.
    • Face fabrics: Higher denier nylon or nylon 6,6 increases abrasion resistance; ripstop weaves limit tears.
    • DWR coatings: PFC-free options are increasingly common and more sustainable; maintain them to keep performance high.

    Sustainability considerations:

    • Recycled polyester and nylon reduce virgin material use.
    • Bluesign- and OEKO-TEX-certified textiles reflect safer chemical management.
    • Resale and repair programs extend product life and reduce waste, aligning with a more circular approach to gear.

    Practical Layering Outfits: Urban Commute vs. Backcountry Hiking

    Bringing it all together, here are clear, adaptable outfits for typical scenarios. Use them as templates and fine-tune for your climate and activity level.

    Urban commute (40–55°F / 4–13°C, intermittent drizzle)

    • Base: Lightweight synthetic or merino long-sleeve. A trim fit minimizes bunching under a blazer or shell.
    • Mid: Low-profile active insulation or thin grid fleece. Full-zip for quick venting on a crowded train.
    • Outer: Lightweight 2.5–3L waterproof shell with a quiet face fabric. Packable in a tote or daypack.
    • Bottoms: Stretch commuter pant with a DWR finish.
    • Accessories: Compact umbrella, liner gloves, and a beanie in the pocket.
    • Footwear/Bag: Water-resistant leather or knit hybrid shoes with grippy soles; a sleek daypack with a laptop sleeve.

    Urban deep-winter (20–35°F / -6–2°C, wind and flurries)

    • Base: Midweight merino or synthetic with a zip neck for indoor venting.
    • Mid: Active synthetic insulation jacket or light down under a shell.
    • Outer: Windproof, waterproof parka or 3L shell with an insulated hood.
    • Bottoms: Thermal tights under lined trousers if needed.
    • Accessories: Insulated gloves, wool beanie, neck gaiter.

    Shoulder-season hike (35–55°F / 2–13°C, variable sun and wind)

    • Base: Lightweight synthetic with high wicking and a half-zip.
    • Mid: Breathable grid fleece for the climb; stowable active insulation for summit breaks.
    • Outer: Windproof, water-resistant softshell or a light hardshell in the pack.
    • Bottoms: Stretch hiking pants with DWR and articulated knees.
    • Accessories: Brimmed cap, light gloves, and sunglasses.

    Backcountry day hike (25–45°F / -4–7°C, gusty ridge)

    • Base: Midweight merino or synthetic to balance warmth and moisture management.
    • Mid: Active synthetic insulation, hooded for heat retention at stops.
    • Outer: 3L hardshell with pit zips for the ridge and any snow squalls.
    • Bottoms: Softshell pants or lined hiking pants; hardshell pants if snow is deep.
    • Accessories: Insulated beanie, windproof gloves, spare dry socks.
    • Pack notes: Keep your warmest mid layer near the top for quick deployment during breaks.

    Winter alpine or snowshoe tour (10–25°F / -12–-4°C, snowfall)

    • Base: Heavyweight synthetic or merino plus a thin liner base if you run cold.
    • Mid: High-loft synthetic or down jacket for rest periods; breathable fleece for the climb.
    • Outer: 3L snow-rated shell with a helmet-compatible hood and powder skirt if skiing.
    • Bottoms: Hardshell pants with side zips for venting.
    • Accessories: Balaclava, goggles, insulated mittens, vapor barrier socks if extremely cold.

    In all scenarios, the same rules apply: start cool, vent early, and adjust layers proactively. These urban trail clothing layers blend function with a clean look, so your system performs from weekday to weekend.

    Common Layering Mistakes and How to Avoid Them

    Even experienced hikers and commuters make predictable errors. Avoid these pitfalls to keep your system working as intended.

    Illustration 3
    Illustration 3
    • Wearing cotton next to skin: Cotton holds moisture and chills quickly. Prioritize moisture-wicking synthetics or merino.
    • Overinsulating at the start: Starting too warm invites sweat buildup. Begin slightly cool and add layers if needed.
    • Ignoring wind: Calm temps can feel frigid with windchill. Always pack a windproof layer for exposed sections.
    • Skipping ventilation: Zippers, cuffs, and collars are your tools for fine-tuning. Vent early to stay dry.
    • Poor fit and layering order: A base that’s too loose won’t wick; a mid that’s too tight restricts airflow; a shell that’s too small compresses insulation.
    • Neglecting the neck, head, and hands: Small accessories have an outsized impact on comfort and heat retention.
    • Not adjusting for stops: Put on a warmer layer immediately when you pause to trap residual heat.
    • Using the wrong mid-layer type: Down for drizzly forests or heavy sweating can disappoint. Choose active synthetics for damp, high-output days.
    • Forgetting the bottoms: Windproof shells or lined pants can be as critical as a shell jacket in winter.
    • Not testing your system: Before big trips, wear your layers on shorter outings to confirm comfort and range of motion.

    Maintenance and Care for Long-Lasting Layered Gear

    Care is performance. Well-maintained layers wick, insulate, and protect as designed—often for years.

    Base layers:

    • Wash regularly to remove oils and restore wicking. Use mild detergent; skip fabric softeners, which inhibit moisture transfer.
    • For merino, use wool-safe detergents and cool water. Lay flat to dry when possible to preserve shape.

    Mid layers:

    • Synthetic insulation and fleece: Wash in cold or warm water with mild detergent. Tumble dry low to re-loft. Avoid high heat.
    • Down insulation: Use down-specific detergent. Rinse thoroughly, then tumble dry low with clean dryer balls to restore loft. Expect a longer dry time.

    Outer shells:

    • Clean shells to maintain breathability. Dirt and oils clog pores and reduce performance.
    • Reactivate DWR by tumble drying on low or applying gentle heat with an iron (check care labels).
    • Reapply DWR treatment when water stops beading on the surface.

    General best practices:

    • Store down and insulated pieces uncompressed to preserve loft.
    • Repair small tears promptly with appropriate patches or seam-grip to prevent growth.
    • Periodically check seam tape and zippers on shells; address issues early.
    • Rotate gear to extend overall lifespan. Consider trusted resale or renewal programs to keep quality gear in use and reduce waste.

    Sustainability note: Extending the life of your equipment is the most impactful step you can take. The North Face’s sustainability-focused resale initiatives reflect a broader industry move toward circularity—keeping technical apparel in service longer, reducing resource use, and giving explorers more options to build or refresh a layering kit responsibly.

    If you’re assembling a multi-season system or upgrading key pieces over time, loyalty programs such as XPLR Pass can also help you track purchases, receive personalized recommendations, and take advantage of member benefits as you refine your kit.

    Conclusion: Building Your Versatile Layering System

    A strong layering system blends science and simplicity. Start with a moisture-wicking base to keep skin dry, add an adaptive mid layer to manage warmth, and cap it with a protective shell that shields from wind and precipitation. Use ventilation and accessories to fine-tune, and choose materials matched to your climate and output. This is the essence of a technical layering system—and the backbone of any reliable layering guide for jackets.

    From urban commutes to alpine starts, the approach remains the same: anticipate conditions, start a little cool, and adjust proactively. When in doubt, carry one more compact layer than you think you’ll need and practice transitions before you’re exposed on a ridge or in a storm. With the right combination of base, mid, and outer layers—built from durable, breathable, and weatherproof fabrics—you’ll move comfortably and confidently on sidewalks and singletrack alike.

    The North Face has long focused on performance-driven design for athletes and modern explorers. As you refine your kit, look for pieces that deliver the comfort you want in the city and the protection you need on the trail. Over time, you’ll build a versatile wardrobe that performs in real weather, adapts across seasons, and supports a lifetime of everyday adventures and ambitious objectives.

    Ready for your next adventure? Gear up with apparel and equipment built for the wild. Explore the collection now.

    Frequently Asked Questions (FAQ)

    How should I layer for hiking in variable weather?

    Start with a moisture-wicking base (synthetic or merino), add a breathable mid-layer (grid fleece or active insulation), and carry a protective shell. Use a softshell for wind and light drizzle; switch to a waterproof-breathable hardshell when rain or wet snow moves in. Begin slightly cool, then manage heat by venting zippers, removing your hat/gloves, or shedding a layer before steep climbs.

    What are the best base layers for cold weather?

    Mid- to heavyweight merino or high-wicking synthetics (polyester blends with stretch) keep skin dry and warm. Merino handles odor and wide temperature swings; synthetics dry fastest during high output. Aim for a snug, next-to-skin fit and avoid cotton.

    How do I adapt my layering from city commute to the trail?

    Select versatile pieces: a moisture-wicking base, a low-profile mid-layer (light fleece or active insulation), and a packable waterproof shell. Commuting, wear the base and mid under the shell for wind and drizzle; on trail, stash the shell and add or remove the mid as intensity changes. Neutral styles work in town, while technical features like pit-zips and helmet-compatible hoods pay off outdoors.

  • Best Urban-to-Trail Jackets: Top Materials and Construction for Every Adventure

    Best Urban-to-Trail Jackets: Top Materials and Construction for Every Adventure

    Table of Contents

    Introduction: Understanding Urban-to-Trail Jacket Design Criteria

    Urban-to-trail jackets bridge two distinct environments: city streets with changeable microclimates and trails where wind, precipitation, and temperature swings demand true performance. The best pieces move seamlessly from bike lanes and subway platforms to ridge lines and muddy switchbacks without feeling out of place. They combine clean silhouettes and thoughtful pocketing with proven weather protection, breathability, mobility, and packability.

    Design criteria start with the shell fabric, which dictates weather resistance and durability. Breathability and venting determine how well the jacket regulates moisture as activity levels change. Insulation strategy—whether none, light, or robust—should match the wearer’s output and climate. Patterning and stretch panels preserve range of motion, while a balanced weight-to-warmth ratio keeps the jacket versatile across seasons.

    Fit and features complete the equation. On-commute convenience (secure media pockets, two-way zips for bike posture, adjustable hood) must coexist with trail-readiness (helmet-compatible hood, glove-friendly toggles, hem seals, and robust closures). Urban-to-trail jackets thrive when these elements are tuned for real-world use, rather than optimized only for a single sport or static office commutes.

    Advanced Shell Materials: Comparing Technical Fabrics and Waterproofing

    Shell fabric is the foundation of weather-resistant outerwear. Three common constructions define performance: 2-layer (2L), 2.5-layer (2.5L), and 3-layer (3L). Each balances waterproofness, breathability, hand feel, and weight differently.

    • 2L: A face fabric bonded to a waterproof-breathable membrane with a separate hanging liner. It’s quiet, comfortable, and often priced accessibly. In urban-to-trail contexts, 2L garments excel for commuting and day hiking. Typical hydrostatic head ratings sit around 10,000–20,000 mm with solid windproofing. Breathability is moderate and increases with pit zips or mesh-backed pockets.
    • 2.5L: A face fabric bonded to a membrane plus a printed or coated “half layer” to protect the membrane internally. It shaves weight and bulk, packs compactly, and is popular for fast-and-light use. With proper venting, breathability can be strong; however, the interior can feel clammy at higher exertion without a knit backer.
    • 3L: The performance benchmark for rough weather and high output. A face fabric, membrane, and backer laminate into a durable, unified layer that resists abrasion, sheds water, and manages sweat efficiently. Typical hydrostatic head ratings exceed 20,000 mm, and moisture vapor transmission (MVTR) often reaches 20,000–30,000 g/m²/24 h for well-engineered systems.

    Membrane types matter. Expanded PTFE (ePTFE) membranes—exemplified by GORE-TEX technologies—offer robust waterproofing and consistent breathability across big temperature gradients. Polyurethane (PU) and nanospun PU membranes can deliver impressive breathability with supple hand feel and stretch, which is valuable when you’re scrambling over wet roots or shoulder-checking in traffic. The North Face employs DryVent (PU-based, available as 2L/2.5L/3L) for reliable waterproof-breathable protection and FUTURELIGHT (nanospun PU) for advanced airflow and soft, quiet drape in active use.

    Surface finishing also defines performance. Durable Water Repellent (DWR) treatments prevent the face fabric from wetting out, preserving breathability. Non-PFC DWRs have advanced in recent seasons, narrowing the performance gap with legacy chemistries while reducing environmental impact. Look for reinforced shoulders and hips to resist backpack abrasion and laminated brims that help shed rain during city and trail transitions.

    Insulation Types: Down vs. Synthetic Performance Comparison

    Insulation determines whether an urban-to-trail jacket is a do-it-all shell, a versatile midlayer, or true cold-weather outerwear. Choosing between down and synthetic comes down to moisture management, warmth-to-weight, compressibility, and durability.

    • Down insulation: High loft for the weight and best-in-class compressibility. Fill power (e.g., 550, 700, 800) indicates loft per ounce; higher numbers trap more air for the same weight. Down shines in cold, dry conditions and travels exceptionally well—ideal for city commutes that segue into clear but frigid trail walks. Its weakness is moisture; untreated down loses loft when saturated. Hydrophobic treatments and smart baffling help, but persistent wet snow and extended drizzle still favor synthetics.
    • Synthetic insulation: Designed to mimic down’s loft while maintaining structure when damp. Fibers like PrimaLoft or The North Face’s Heatseeker Eco insulate even when wet and dry quickly, a decisive advantage for changeable shoulder seasons. While synthetics are typically bulkier for the same warmth, modern fiber blends close the gap and handle repeated compression with impressive resilience.

    Construction also matters. Sewn-through baffles reduce weight and create a trim profile that layers cleanly under shells—excellent for multi-modal commuting and cool-day hikes. Box-wall baffles avoid cold spots and enhance loft retention for serious cold. Hybrid designs map synthetic insulation to moisture-prone zones (shoulders, cuffs, hood) with down in the core, capturing the best of both. For many urban-to-trail wardrobes, a lightly insulated synthetic jacket or a medium-fill down piece paired with a 2.5L or 3L shell forms a flexible system that spans fall through spring.

    Seam Sealing and Weatherproof Construction Techniques

    Even the best membrane falters if seams allow ingress. Construction details are the quiet workhorses that keep you dry between light rail stops and while kicking steps on a snowy incline.

    • Full vs. critical seam sealing: Fully taped seams seal every stitch line, essential for prolonged rain or snow. Critically sealed garments target high-exposure zones like shoulders, hood, and upper torso—often sufficient for short showers and urban exposure. For true trail insurance, fully taped remains the gold standard.
    • Tape width and micro-taping: Narrow, 13–15 mm micro-tapes reduce weight and bulk without sacrificing protection, particularly in 3L jackets where the backer supports tapes cleanly. Wider tapes can be more forgiving but add grams and stiffness.
    • Bonded vs. stitched seams: Bonding eliminates needle holes and reduces potential leak points, common in brims, pockets, and yokes. Where stitching is necessary, double-needle seams with tight stitch density strengthen high-stress zones, aided by bar-tacks at pocket entries and hem drawcord exits.
    Illustration 1
    Illustration 1
    • Zippers and closures: Water-resistant zippers (e.g., polyurethane-coated) lighten garments and offer sleek profiles. External or internal storm flaps provide mechanical redundancy. Laminated or wire-brim hoods shed rain, and sealed cuff closures prevent water migration along sleeves.

    These choices influence not only waterproofness, but also drape and noise. Urban-to-trail jackets benefit from quieter face fabrics, smooth zipper garages that won’t snag scarves, and low-profile seam tapes that keep silhouettes clean for urban wear without compromising trail integrity.

    Stretch Panels and Mobility Features for Active Movement

    Mobility is more than stretch percentage on a spec sheet. It’s how fabric, patterning, and closures work together under dynamic movement—shoulder checks on a bike, reaching for bus straps, or scrambling over wet granite.

    • Fabrics with mechanical or elastane-enhanced stretch: Stretch-woven face fabrics paired with breathable membranes enable natural articulation in hardshells and hybrids. Nanospun membranes like FUTURELIGHT maintain airflow and flexibility, lending hardshell-level protection with softshell ease.
    • Patterning: Articulated elbows, raglan sleeves, and underarm gussets reduce seam strain and avoid ride-up when you’re layered or wearing a backpack. A drop-tail hem protects the lower back on damp benches and bike saddles while sealing drafts on exposed switchbacks.
    • Strategic panel mapping: Placing stretch panels at the shoulders and across the back increases reach and comfort under pack straps. Durable, non-stretch reinforcements at hips and cuffs handle abrasion. Internally, soft tricot chin guards and collar linings reduce friction.
    • Venting you can move in: Core vents or pit zips placed forward enough to operate while wearing a pack keep airflow responsive. Two-way center-front zippers allow quick heat dumping on climbs and accommodate bike posture in the city.

    When executed well, these features disappear in use, letting you focus on the route ahead, not on tugging sleeves or adjusting hems.

    Weight-to-Warmth Ratio: Finding Your Ideal Balance

    Urban-to-trail jackets earn their keep by doing more with less. Weight-to-warmth is a practical lens for choosing layers that work Tuesday through Sunday.

    • Shell-only strategy: A 2.5L or 3L shell in the 250–450 g range (size M) paired with active midlayers covers a wide spectrum. This approach favors breathability and adaptability—excellent when your commute, office AC, and weekend plans shift daily.
    • Lightly insulated options: Synthetic-insulated pieces with 40–80 g/m² in the body and lighter fills in sleeves hit a versatile middle ground. They’re warm enough for brisk city mornings, breathe on moderate trail climbs, and compress into a daypack. Expect weights of 350–600 g with strong real-world warmth.
    • Down-forward builds: Down jackets with 700–800 fill power balance warmth with packability, excelling in dry cold. A midweight down hoody around 350–500 g pairs well under a hardshell for true winter. For wet-prone regions, consider hybrids—down in the core, synthetic in moisture zones—to preserve performance.

    Remember, warmth is a system. A shell plus a fleece or active-insulation midlayer often proves more versatile than one heavy insulated jacket. Look for consistent loft distribution, minimal cold spots at stitch lines, and hem/hood seals that prevent warm air from escaping.

    Durability and Longevity in High-Use Conditions

    Commuters and weekend hikers put different but relentless demands on apparel. Abrasion from pack straps, bus seats, and rock scrambles adds up. Durable construction protects your investment and reduces environmental impact over time.

    • Fabric denier and weave: Face fabrics in the 20D–40D range keep weight low for everyday carry. Stepping up to 40D–70D improves rock and branch resistance on technical trails. Ripstop weaves stop snags from propagating, and micro-grid textures can hide scuffs while preserving a refined look.
    • Reinforcements: Shoulder and hip overlays resist pack wear; cuff bindings shield fabric from sidewalk brush and pole plants. Laminated patches in high-stress zones preserve shape and reduce seam creep.
    • Lab and field validation: Reliable jackets reference abrasion (Taber or Martindale) and tear-strength testing, then validate with field use. Look for double bar-tacks at pocket corners, tight seam tolerances, and high-quality trims—robust drawcords, cordlocks, and zipper pulls that won’t fail mid-season.
    • Maintainable finishes: Non-PFC DWRs and quality backers that survive frequent washing help keep performance consistent. Jackets designed for reproofing, with accessible care instructions and replaceable components, extend lifecycle meaningfully.

    The North Face balances weight with appropriate deniers across categories, from fast-and-light pieces to expedition-proven hardshells, so you can match durability to your daily wear and weekend ambitions.

    Top Urban-to-Trail Jacket Recommendations by Use Case

    Because climates, commutes, and weekend goals vary, start with your dominant use case and layer from there. Below are versatile archetypes with representative examples from The North Face to guide you.

    Illustration 2
    Illustration 2
    • Daily commute in unpredictable drizzle: A 2.5L DryVent shell with a quiet face fabric, core vents, and a drop-tail hem. It packs small, sheds sudden showers, and layers over a sweater without bulk. A trim, urban-ready cut maintains polish for the office while delivering trail-grade protection after work.
    • Fast-paced city-to-park workouts: A highly breathable, lightweight shell using FUTURELIGHT or an equivalent nanospun membrane. Prioritize stretch, venting you can reach while moving, and reflective details. This is the piece you’ll forget you’re wearing until the weather turns—then you’ll appreciate the sealed hood and quick-drying face.
    • All-weather day hiking and shoulder-season travel: A 3L DryVent or FUTURELIGHT shell with fully taped seams and helmet-compatible hood for crossover into more technical hikes. Hand pockets placed above hipbelt height, YKK AquaGuard zips, and micro-taped seams help manage both airport and alpine agendas without compromise.
    • Snow and high-exposure mountain days: A full-featured 3L hardshell using a top-tier membrane with robust denier, powder skirt compatibility, and glove-friendly hardware. For backcountry lines and demanding weather, the Tsirku Gore-Tex Pro jacket provides expedition-grade waterproofing, durable face fabrics, and a feature set tailored to technical objectives.
    • Urban winter warmth with weekend viability: A midweight down jacket (700 fill) with a tough nylon ripstop face, durable cuffs, and a hood. It handles school runs, coffee lines, and trailhead warmups. For a modern, style-forward take that still brings real warmth, see the Nuptse X SKIMS jacket, blending iconic baffles with everyday usability.
    • Wet-cold commutes and variable shoulder seasons: A hybrid insulated jacket—synthetic in sleeves and hood, down or higher-loft synthetic in the core—with a weather-resistant outer and integrated venting. This one-piece solution reduces wardrobe changes and works on drizzly mornings that turn into breezy, sunny afternoons.
    • Minimalist travel system: A packable 3L shell plus an ultralight down or synthetic midlayer. Each stands alone in mild conditions; together they tackle cold rain and wind. The combo covers conference rooms, redeye flights, and spontaneous summit pushes.

    These use cases illustrate how construction choices map to daily realities. Select the architecture that best matches your climate, pace, and weekend plans.

    Comparison Summary: Material Performance Matrix

    Below is a quick-reference snapshot of common jacket constructions and how they stack up for urban-to-trail use. Use it to shortlist options before you fine-tune features and fit.

    • 2L waterproof-breathable (e.g., PU-based with liner)

    – Waterproofing: High (10,000–20,000 mm typical) – Breathability: Moderate; depends on vents/liners – Durability: Moderate; comfortable hand – Stretch: Limited unless blended – Packability: Moderate – Best uses: Daily commuting, casual hikes, travel in mixed weather

    • 2.5L waterproof-breathable (printed backer)

    – Waterproofing: High (similar to 2L) – Breathability: Moderate to high; excels with pit zips – Durability: Moderate; interior can feel clammy at high exertion – Stretch: Some options; lighter hand – Packability: High – Best uses: Fast-and-light, run-commuting, packable emergency shell

    • 3L waterproof-breathable (laminated backer)

    – Waterproofing: Very high (20,000 mm+ typical) – Breathability: High; consistent under load – Durability: High; resists abrasion and delamination – Stretch: Available in select membranes and face fabrics – Packability: Moderate to high depending on denier – Best uses: All-weather hiking, alpine days, long commutes in heavy rain

    • Softshell (woven stretch, DWR-treated)

    – Waterproofing: Water-resistant; not fully waterproof – Breathability: High; comfortable, quiet – Durability: Moderate to high, depending on weave – Stretch: High – Packability: Moderate – Best uses: Cool, dry days; active movement; urban layering

    • Insulated down (sewn-through or box-wall)

    – Warmth-to-weight: Excellent (especially 700–800 fill) – Wet performance: Low without shell; improved when layered – Compressibility: Excellent – Durability: Face fabric dependent; protect with shell in rough use – Best uses: Cold, dry climates; style-forward city wear with trail crossovers

    • Insulated synthetic (sheet or blowable fibers)

    – Warmth-to-weight: Good; retains warmth when damp – Wet performance: Strong; dries quickly – Compressibility: Good; less than down – Durability: Strong for repeat compression and washing – Best uses: Wet-cold commutes, variable shoulder seasons, high-output cold-weather activities

    Sustainability and Responsible Construction Practices

    Sustainable performance begins with durable design and extends through materials, manufacturing, and end-of-life pathways. The North Face integrates several responsible practices across its lines.

    • Recycled and certified inputs: Many face fabrics and liners incorporate recycled nylon or polyester, reducing virgin resource use. Responsible Down Standard (RDS) certification helps ensure down is ethically sourced. Bluesign-approached material choices prioritize safer chemistry in the supply chain.
    • Non-PFC DWR transitions: Moving away from long-chain perfluorinated chemistries reduces environmental persistence while still delivering reliable water beading. Regular care and reproofing keep these finishes performing season after season.
    • Dope-dye solutions: Select fabrics use solution dyeing to cut water and energy consumption while improving colorfastness. For daily commuters subjecting jackets to frequent washing, better dye stability reduces the need for premature replacement.
    • Product longevity and repairability: Robust stitching, field-repairable trims, and replaceable components extend useful life. The North Face supports circularity through its sustainability-focused resale and refurbishment efforts, encouraging gear to stay in use longer by a second or third owner.
    • Loyalty that rewards responsible choices: XPLR Pass loyalty rewards can make it easier to maintain your kit responsibly—whether that’s investing in repair-friendly pieces, picking recycled-content upgrades, or participating in trade-in and resale opportunities.
    Illustration 3
    Illustration 3

    Sustainability in this category is cumulative: buying once, maintaining well, and choosing materials engineered for years of service adds up.

    Selection Guide: How to Choose Your Perfect Jacket

    Clarify needs before comparing tags. A short checklist narrows the field to jackets that fit your climate, pace, and style.

    • Define your primary environment:

    – Mostly urban with short outdoor stints: 2L or 2.5L, quiet face, refined silhouette. – Equal city and trail time: 3L with micro-taping, helmet-compatible hood, raised pockets. – Cold-first regions: Add a down or synthetic midlayer, or choose a lightly insulated shell.

    • Identify your precipitation profile:

    – Frequent, heavy rain or wet snow: Fully taped 3L with robust DWR, laminated brim. – Intermittent drizzle: 2.5L with core vents and packable design. – Dry cold: Down-forward insulation with tough face fabric.

    • Match insulation to output:

    – High-output (run, ride, fast hike): Shell plus active midlayer; synthetic if damp. – Moderate output (walk, commute, casual hike): Light synthetic or low-fill down. – Low output (spectator, static wear): Higher-loft down or hybrid with windproof shell.

    • Fit and mobility checks:

    – Lift arms; hem shouldn’t rise excessively. – Rotate shoulders; no binding across upper back. – Try with your typical midlayer to confirm sleeve and hem coverage.

    • Feature prioritization:

    – Hood: Helmet compatible if you ride or climb; adjusters accessible with gloves. – Pockets: Media sleeve, internal stash, and hipbelt-friendly hand pockets. – Venting: Pit zips or core vents if you heat up quickly. – Zippers: Two-way main zip for biking or belay stance; water-resistant where needed.

    • Durability and travel:

    – Choose 40D+ face fabrics for regular pack wear or rough trails. – Opt for lighter deniers if your priority is packability and you carry minimal loads.

    With these criteria, you can build a shortlist that respects both your weekday routines and weekend goals.

    Maintenance and Care to Extend Jacket Lifespan

    Consistent care preserves performance and reduces environmental impact. A few targeted habits keep urban-to-trail jackets working like day one.

    • Routine cleaning:

    – Wash when dirt or body oils cause wet-out or odors. Use a technical-wash detergent; avoid fabric softeners and bleach. – Close all zippers and Velcro tabs. Machine wash cold or warm, gentle cycle. – Rinse thoroughly to remove detergent residues that impair DWR.

    • Restoring water repellency:

    – Tumble dry low to reactivate DWR. If beading doesn’t return, apply a spray-on or wash-in non-PFC DWR treatment, then tumble dry as directed. – Focus on high-exposure zones—shoulders, hood, sleeves—for targeted reproofing.

    • Down-specific care:

    – Use down detergent. Dry low and slow with clean tennis balls or dryer balls to restore loft. – Break up clumps periodically during drying. Fully dry before storage to prevent odor or mildew.

    • Synthetic insulation care:

    – Wash with technical detergent; synthetics handle more frequent cleaning. – Air dry or tumble low per label. Shake to redistribute loft.

    • Storage and field repairs:

    – Store clean and fully dry; hang shells and keep insulated jackets uncompressed. – Carry a small repair kit: tenacious tape, mini sewing kit, and zipper pull replacements. Address small snags early to avoid propagation.

    • Zippers, elastics, and hardware:

    – Periodically lubricate zippers with a suitable zipper care product. – Inspect drawcords and toggles; replace worn components to maintain weather seals.

    • Professional service:

    – For peeling seam tape, delamination, or major tears, contact the brand’s service team or a reputable technical repair shop. Timely intervention often saves a favorite jacket.

    By aligning materials, construction, and care, urban-to-trail jackets become dependable tools—equally at home dodging puddles downtown and shedding spindrift above treeline. The right choice, maintained well, delivers versatile performance clothing you’ll reach for in every season.

    Frequently Asked Questions (FAQ)

    How do I choose the right waterproof and breathability ratings for an urban-to-trail jacket?

    Aim for at least 10,000 mm waterproofing and 10,000 g/m2/24h breathability, plus a durable water repellent (DWR) finish for commuting and light hikes. For sustained rain or high-output activity, choose 20k/20k or a 3-layer membrane with fully taped seams and vents (pit zips or mesh pockets). Hybrid designs with stretch panels at the underarms or back improve mobility without giving up weather protection.

    Should I choose down or synthetic insulation for city-to-trail use?

    Down delivers the best warmth-to-weight and packs small; opt for 700–900 fill with a hydrophobic treatment and pair it with a protective shell in wet forecasts. Synthetic (such as PrimaLoft or recycled polyester) insulates when damp and dries faster, which suits humid or variable weather. For active movement, a hybrid approach—down in the core, synthetic at shoulders and hood—balances warmth, moisture management, and durability.

    What sustainable features matter in an urban-to-trail jacket without sacrificing performance?

    Prioritize recycled nylon or polyester face fabrics with PFC-free DWR and durable high-tenacity ripstop. Verify bluesign-approved materials, Responsible Down Standard (RDS) or Global Recycled Standard (GRS) claims, and repair-friendly details like modular zippers and replaceable cord locks. Extending lifespan through proper care, repairs, and resale programs typically lowers impact more than any single material choice.

  • Urban-to-Trail Jacket Materials: Technical Construction for Versatile Performance

    Urban-to-Trail Jacket Materials: Technical Construction for Versatile Performance

    Table of Contents

    Introduction: The Evolution of Urban-to-Trail Jacket Design

    A decade ago, a waterproof jacket built for big mountain storms rarely doubled as an everyday layer for the train platform or a crowded city street. Today’s urban-to-trail outerwear bridges that gap, merging technical face fabrics, refined patterning, and low-bulk insulation with silhouettes and colors suited to daily life. This shift is driven by the Active Explorer—people who expect one piece to handle weather shifts, varied activity levels, and a packed schedule.

    At the heart of this evolution are advances in jacket materials and construction. Lightweight membranes pair with quieter, more durable face fabrics. Insulations are mapped by zone to balance warmth and mobility. Details—from seam taping to collar shaping—are engineered to protect, but also to feel comfortable when the weather calms down. The North Face has pushed this versatility through athlete testing and performance fabric innovation, adapting expedition-grade concepts to city-ready designs that still hold up on a high ridge.

    This article walks through the technical choices that matter—what you can see, what you can’t, and how they work together. If you’re evaluating weather-resistant outerwear for mixed environments, understanding fabric architecture, finishes, and build quality will help you select a jacket that performs year-round without compromise.

    Understanding Technical Fabric Composition and Performance Standards

    Every jacket begins with fiber selection and yarn engineering, which drive durability, drape, and weight before a membrane or coating is ever added. Nylon 6,6 yarns offer high tenacity and abrasion resistance; polyester resists UV and often dries faster. Many modern shells blend recycled yarns to reduce impact without sacrificing performance when combined with robust weaves.

    Core fabric variables:

    • Yarn size and strength: Measured in denier (D) or tex; 20D–40D ripstop is common for lightweight shells, while 70D–100D face fabrics suit heavier-duty abrasion zones.
    • Weave structure: Plain weave for balanced durability and hand; ripstop introduces grid reinforcement against tears; double-weave (softshell) provides a smooth exterior with a lofted interior for breathability and stretch.
    • Mechanical stretch vs. elastane: Crimped or textured yarns add give without spandex, aiding recyclability and long-term stability.

    Key performance metrics to compare:

    • Waterproofness: Often reported as hydrostatic head in millimeters (mm). Around 10,000 mm suits everyday rain; 20,000–28,000 mm handles prolonged, high-pressure exposure.
    • Breathability: Expressed as MVTR (g/m²/24h) or RET (resistance to evaporative transfer; lower is better). Highly aerobic use benefits from RET < 6 or MVTR above ~20,000 g/m²/24h.
    • Wind resistance: Air permeability measured in CFM (cubic feet per minute). Hardshells approach 0 CFM; softshells allow controlled airflow (e.g., 5–20 CFM) for thermal comfort.
    • Abrasion and tear: Martindale or Taber abrasion tests indicate fabric longevity; higher cycles mean better resistance.
    • Water repellency: AATCC 22 spray test rates how well the face fabric sheds rain; durable water repellent (DWR) finish quality and longevity are crucial.

    These standards provide a common language. For real-world selection, match the metrics to your climate and activity level, and remember that patterning, venting, and layer integration can be as influential as a lab value in how a jacket feels during a fast hike or a wet commute.

    Outer Shell Materials: Weatherproofing Technology Explained

    The outer shell provides first-line defense against wind-driven rain and wet snow. Most weatherproof shells use a laminate or coating system layered with a protective face fabric and an interior backer.

    Common constructions:

    • 2-layer (2L): A face fabric bonded to a waterproof membrane, plus a free-hanging liner for comfort. Quiet and often warmer due to the liner, making it a good urban-to-trail pick.
    • 2.5-layer (2.5L): A face fabric and membrane with a printed or sprayed half-layer on the inside to protect the membrane. Very light and packable; ideal for fast-and-light carry.
    • 3-layer (3L): Face fabric, membrane, and a full liner scrim bonded together. Offers the most durable weather protection for sustained use and is the choice for harsh, high-output environments.

    Membrane technologies:

    • ePTFE (expanded polytetrafluoroethylene): Microporous, highly breathable, and reliably waterproof. GORE-TEX and GORE-TEX Pro are benchmark examples, known for stability across temperature swings.
    • PU (polyurethane) hydrophilic: Uses molecular chains to move moisture vapor. Typically softer and sometimes more affordable, with excellent wind and water resistance; breathability varies by formulation.
    • ePE (expanded polyethylene) and other new films: Emerging options designed to cut fluorinated materials and improve environmental profiles while maintaining waterproof, breathable performance.

    Face fabrics and finishes:

    • High-tenacity nylon 6,6 ripstop offers superior tear strength for alpine and bushwhacking scenarios.
    • Polyester faces can be more colorfast and quieter, fitting urban aesthetics while still handling trail abrasion.
    • DWR chemistry has shifted toward PFC-free formulas. While early versions wore off quickly, modern PFC-free coatings have improved beading and are easier to refresh after washing and tumble-drying.

    Softshell alternatives:

    • Double-weave softshells trade absolute waterproofness for air permeability and stretch, excelling in cool, dry conditions or stop-and-go movement where dumping heat matters most. They form a key piece in layering system design.
    Illustration 1
    Illustration 1

    When the objective is maximum storm protection without bulk, alpine-caliber 3L systems stand out. A practical example is a GORE-TEX Pro build tuned for sustained snow and wind exposure, as seen in The North Face’s Summit Series line; the women’s GORE-TEX Pro jacket showcases a face fabric and membrane package optimized for long-term durability and breathability under load. For urban-to-trail versatility, a 2L or 2.5L with mechanical stretch and a quieter face often strikes the best balance.

    Insulation Methods: From Synthetic to Down Fill Technologies

    Insulation strategies determine warmth-to-weight, packability, and performance in damp conditions. Many urban-to-trail jackets are uninsulated shells, but insulated options extend the comfort range and reduce reliance on midlayers.

    Down insulation:

    • Fill power indicates loft and warmth potential; 700–900 fill down provides exceptional thermal efficiency with minimal weight.
    • Construction matters: Sewn-through baffles are lighter and more compact but can create cold spots; box-wall baffles preserve loft by preventing compression across stitch lines, ideal for colder conditions.
    • Hydrophobic treatments help down resist moisture uptake, retaining loft in humid conditions; responsible sourcing programs like RDS (Responsible Down Standard) verify animal welfare practices.

    Synthetic insulation:

    • Staple fibers (e.g., PrimaLoft) mimic down clusters, offering better wet-weather performance and faster dry times. They’re often used in zoned applications to manage moisture near the shoulders and cuffs.
    • Continuous filament (e.g., Climashield-type) uses long strands that resist migration and can be more durable through repeated compression.
    • Sheet-style insulations deliver even warmth and reduce cold spots; loose-fill synthetics feel plusher and compress easily but require careful baffle design.

    Hybrid and mapped solutions:

    • Body mapping places down at the core for maximum warmth while using synthetic panels in moisture-prone areas—hood, shoulders, hem—to maintain performance if rain or sweat enters the system.
    • Fleece and gridded knits can serve as low-bulk, high-breathability panels in zones of constant movement.

    Quantifying warmth:

    • Clo values approximate thermal insulation; more clo equals more warmth at rest. Consider the temperature range you plan to use the jacket in and whether you run warm or cold.

    A practical example of lightweight down performance tuned for mountain movement is the men’s Summit Series Breithorn Hoodie. It demonstrates how high-fill down in an optimized baffle layout achieves notable warmth with minimal penalty in weight or pack space—useful traits whether you’re stashing a layer for a cold ridge or stepping out into a winter commute.

    Inner Lining and Moisture Management Systems

    If the shell blocks weather and insulation traps heat, the lining manages comfort by protecting membranes and moving sweat away from the skin. On 3L shells, this inner scrim shields the membrane and reduces cling during high-output movement. On 2L jackets, a separate liner (taffeta, mesh, or brushed tricot) improves next-to-skin feel and adds a modest buffer of air for thermal stability.

    Common lining materials and roles:

    • Nylon taffeta: Smooth, quiet, and snag-resistant—ideal for sleeves to keep midlayers sliding freely.
    • Tricot or brushed knits: Softer hand for collars and chin guards; adds comfort in cold and reduces irritation.
    • Mesh: Lightweight, promotes airflow, and works well as a drop liner in the torso for sweat management.
    • Protective scrims in 3L laminates: Designed to prevent abrasion to the membrane from the inside while aiding moisture vapor transport.

    Moisture movement relies on:

    • Capillarity: Wicking yarns and finishes spread sweat over a larger surface area to evaporate faster.
    • Chemical finishes: Hydrophilic treatments draw moisture into fibers, and hydrophobic treatments repel liquid while retaining vapor flow pathways.
    • Knit structure: Open, grid, or micro-pique knits create channels for vapor to escape and minimize cling.

    Anti-odor and antimicrobial treatments can control odor build-up in everyday use, especially in humid climates. The North Face’s approach to moisture management often integrates body-mapped wicking zones in high-sweat areas and uses proprietary technologies (such as FlashDry in base layers and liners) to speed evaporation. In practice, the interplay between liner materials and pit zips or core vents can make a shell feel dramatically cooler during city cycling or sustained ascents.

    Seam Construction and Durability Engineering

    Strong fabric is only half the story; long-term performance depends on how panels are joined and reinforced. Seams concentrate stress, invite water ingress, and often mark the first points of failure in poor builds.

    Stitching fundamentals:

    • Stitch type and density: Appropriate stitches-per-inch (SPI) prevents seam creep while avoiding over-perforation of the fabric. Technical shells commonly use a medium SPI with strong thread to balance strength and waterproof taping compatibility.
    • Seam allowances: Enough margin is left to support taping and prevent pull-through under load.
    • Critical reinforcement: Bar tacks at pocket openings, hem drawcord exits, and hood adjusters increase tear resistance. Box-and-X patterns stabilize harness-load points.

    Waterproof seams:

    • Taped seams: Heat-applied adhesive tapes (commonly 13–22 mm wide) seal needle holes on hardshells. Narrow tapes reduce bulk and maintain flexibility in articulated areas like the shoulders and elbows.
    • Bonded seams: Ultrasonic welding or adhesive bonding eliminates needle holes entirely, common on softshells and select waterproof panels. Bonding can reduce weight and bulk but typically requires precise temperature and pressure control in production.

    Wear mapping and overlays:

    • High-abrasion overlays at shoulders, elbows, and hipbelt contact zones extend the life of lighter face fabrics without overbuilding the entire jacket.
    • Laminated film reinforcements create a smooth profile for less snagging compared with stitched-on patches.
    Illustration 2
    Illustration 2

    Pattern engineering:

    • Articulated elbows, underarm gussets, and rotated shoulder seams guard against backpack strap rub and preserve range of motion.
    • Fewer seams in storm-prone areas (e.g., a yoke panel across the shoulders) reduce ingress points while giving a cleaner look suitable for city wear.

    Durable apparel construction blends all these techniques into a clean interior and low-bulk exterior. When inspecting a jacket, turn it inside out: consistent tapes, tidy seam-ends, and robust reinforcements are strong predictors of how it will fare after seasons of use.

    Collar and Cuff Design for Comfort and Protection

    Small design details around the collar, hood, and cuffs often determine whether you reach for a jacket every day. These zones seal out wind and water, interface with hats and gloves, and protect the face from chafe.

    Hood and collar considerations:

    • Collar height and shape: A taller, structured collar shields the neck and lower face in crosswinds. Look for a soft chin guard with brushed tricot or microsuede to reduce rubbing.
    • Brim structure: A laminated or wired brim keeps precipitation off your face and maintains shape in gusts.
    • Adjustments: Dual or tri-cord systems (front pulls and a rear volume adjuster) customize fit with or without a beanie or ball cap. Helmet-compatible hoods maintain mobility and vision when layered over a climbing or ski helmet.
    • Stowable or low-profile hoods: For urban-to-trail flexibility, a hood that lies flat without bulking behind the neck helps under a backpack or over a blazer.

    Cuffs and wrist gaskets:

    • Hook-and-loop tabs fine-tune glove interface and seal out drafts; look for clean edges and secure bartacks.
    • Internal storm gaiters or soft stretch knit cuffs add comfort and prevent snow or cold air from creeping inside. Thumb loops can assist layering without bunching.
    • Glove-friendly pulls and molded components make winter adjustments easier.

    Hem systems:

    • Single- or dual-sided drawcords with low-profile cord locks allow asymmetric tightening against wind. Hem shaping (a slight drop-tail) protects the lower back on a bike commute or a steep approach.

    The right collar and cuff package should feel invisible until the weather turns. A jacket that moves quietly, seals quickly, and avoids pressure points at the jaw and wrists will be the one you trust across seasons.

    Pocket Placement and Functional Design Elements

    Pocket architecture reflects a jacket’s intended use. Urban-to-trail designs combine streamlined exterior storage with technical access under a backpack or climbing harness.

    Common pocket types and placements:

    • Hand pockets: Fleece-backed for warmth; often set higher to clear hipbelts. A smooth zipper garage prevents chin and jaw abrasion when fully zipped.
    • Napoleon/chest pockets: Easy to reach with a pack on; ideal for a phone, map, or transit card. Laminated construction reduces bulk and visual clutter.
    • Interior dump pockets: Elasticized, oversized mesh pockets hold skins or gloves; they dry damp items using body heat.
    • Sleeve pocket: Useful for lift passes or small tools in snow environments; typically water-resistant with a hidden zipper track.

    Hardware and construction:

    • Water-resistant zippers (e.g., polyurethane-coated coil zippers) reduce the need for external storm flaps while keeping a slim profile. For severe weather, an external storm flap with structured snaps or Velcro provides redundancy.
    • Two-way center-front zippers improve fit when seated on a bike or train and offer quick venting from the hem up.
    • Pit zips and core vents deliver on-demand airflow without exposing the torso to rain. Mesh-lined versions provide debris and bug protection on shoulder season hikes.
    • Reflective elements and low-profile piping add visibility in urban settings with minimal aesthetic impact.

    Functional extras that matter:

    • RECCO reflectors on mountain-focused pieces can support organized rescue in avalanche-prone regions.
    • Media ports and routed cable loops keep earbuds tidy during commutes.
    • Minimalist gaiter-compatible powderskirts and snap systems in snowsport models maintain snow protection without constant bulk.

    Smart pocketing and venting transform a protective shell into a daily essential, letting you adapt storage and airflow in seconds as you move from a wet sidewalk to a steep, muddy trail.

    Testing Standards and Real-World Performance Validation

    Lab metrics are only part of the picture. Trusted outerwear teams validate material claims through standardized tests and targeted field use to ensure the finished jacket behaves as intended.

    Common lab standards:

    • Waterproofness: AATCC 127 or ISO 811 hydrostatic head tests quantify water penetration under pressure.
    • Spray testing: AATCC 22 evaluates DWR performance and beading.
    • Breathability: ASTM E96 and JIS L 1099 measure moisture vapor transmission; ISO 11092 (RET) assesses evaporative resistance via a sweating hotplate.
    • Air permeability: ASTM D737 tests wind resistance, crucial for softshell comfort ranges.
    • Abrasion and tear: Martindale or Taber indicate fabric and print durability; ASTM D1424 covers tear resistance for woven fabrics.
    • Thermal insulation: ISO 15831 uses a thermal manikin to assess clo values of complete garments.
    Illustration 3
    Illustration 3

    Prototyping and field testing:

    • Athlete feedback loops: Professional climbers, runners, and guides test pre-production runs to surface issues—zipper pull ergonomics with gloves, hem lift when reaching overhead, or collar chafe after a full day.
    • Environment-specific trials: Rain towers, cold rooms, and wind tunnels simulate harsh conditions; mixed-weather hikes and bike commutes evaluate noise, drape, and breathability in real life.
    • A/B comparisons: Swapping membranes or face fabrics on otherwise identical patterns reveals the true performance gains of material choices.

    The North Face’s Summit Series approach exemplifies how expedition-grade validation informs consumer-ready designs. When a shell holds up to repeated pack carry on granite or maintains breathability in storm skiing, the same jacket materials and construction principles translate into reliable protection on a city-to-trail day with variable weather.

    Care and Maintenance for Long-Term Jacket Longevity

    Even the best-engineered jacket depends on routine care to preserve waterproofing, breathability, and loft. A few deliberate habits extend lifespan and keep performance predictable.

    Care basics for shells:

    • Wash regularly: Dirt and body oils clog DWR and membranes. Use a technical detergent (free of fabric softeners) on a gentle cycle with cold or warm water. Rinse thoroughly.
    • Reactivate DWR: Tumble-dry low or medium heat if the care label allows. Heat helps restore water beading on PFC-free coatings. Periodically refresh with a spray-on or wash-in reproofing product.
    • Avoid softeners and bleach: They impair wicking and membrane performance.
    • Dry completely: Hang dry if unsure about heat; store only when fully dry to prevent mildew.

    Insulated jacket care:

    • Down: Wash with down-specific cleaners. Rinse well, then tumble-dry low with clean dryer balls until loft is fully restored; this can take several cycles. Store uncompressed to maintain baffle volume.
    • Synthetic: Similar wash routine, but they dry faster and are less sensitive to compression. Still, avoid long-term storage in stuff sacks.

    Field repairs and proactive maintenance:

    • Patch small nicks: Apply purpose-made repair patches or tape to stop snags from spreading, especially on high-tenacity shells.
    • Maintain zippers: Clear grit with a soft brush; occasional zipper lubricant prevents sticking and prolongs coil life.
    • Retire compromised seam tape: If tape peels in isolated areas, a reputable repair shop can re-tape panels and extend service life.

    Sustainability-minded options:

    • Reuse and repair first: Extending a jacket’s life reduces impact more than almost any material change.
    • Consider resale programs: The North Face Renewed initiative refurbishes and resells pre-owned gear, keeping high-quality products in circulation and out of landfills.
    • Thoughtful upgrades: When you do replace a jacket, choose versatile builds that cover more use-cases, reducing the total number of garments needed.

    With routine washing and mindful storage, performance fabrics deliver consistent protection for years, making them a smarter long-term investment.

    Conclusion: Choosing the Right Jacket for Your Adventures

    Versatile weather-resistant outerwear thrives on balance. The right jacket aligns materials, patterning, and features to your climate, pace, and packing preferences—and does so with a silhouette you’ll wear daily. Use the framework below to translate lab specs and design details into confident selection.

    Decision checkpoints:

    • Environment: Frequent heavy rain and wind favor 3L hardshells with robust face fabrics; intermittent showers and urban wear may be better served by 2L or 2.5L builds that are quieter and more supple.
    • Activity level: High-output movement calls for superior breathability (low RET/high MVTR) and venting; low-output, cold conditions benefit from higher-loft insulation and windproofing.
    • Insulation plan: If you run hot or want year-round flexibility, choose an uninsulated shell and manage warmth with modular midlayers. If simplicity matters, an insulated shell with mapped synthetic and/or high-fill down streamlines the system.
    • Fit and articulation: Try the jacket with your typical layers. Raise your arms, shoulder a pack, and sit on a bike; the hem, cuffs, and collar should stay sealed without pulling.
    • Construction quality: Inspect seam taping, reinforcement at stress points, and zipper smoothness. Clean interiors and consistent tapes indicate careful build practices.
    • Long-term care: A jacket that tolerates regular washing and easy DWR renewal will maintain performance longer, especially in gritty urban settings.

    The North Face has long translated alpine-grade insights into approachable designs for modern explorers, combining technical fabric technology with durable apparel construction that stands up to both commute and summit days. Whether you lean toward a storm-ready 3L shell like a GORE-TEX Pro build, a packable 2.5L for spring squalls, or an insulated piece similar in spirit to the Breithorn’s high-loft efficiency, prioritize jacket materials and construction that are honest about their strengths.

    Put simply: select a shell that fits your weather reality, choose insulation that matches your metabolism, and commit to basic care. Done right, one jacket can carry you from wet sidewalks to windy ridgelines with the confidence that every seam, zipper, and panel is working quietly in your favor.

    Frequently Asked Questions (FAQ)

    How can I tell if a jacket’s shell is truly weatherproof and breathable?

    Check hydrostatic head (waterproof) and breathability ratings. For frequent downpours and mixed activity, aim for 20,000 mm+ waterproof and 15,000 g/m²/24h MVTR or RET ≤ 13, with fully taped seams and a durable water repellent (DWR) finish. A 3-layer fabric usually offers better long-term durability than 2- or 2.5-layer options. For light city rain, lower ratings can suffice and may feel less clammy.

    Should I choose down or synthetic insulation for urban-to-trail use?

    Down delivers the best warmth-to-weight and compressibility; look for fill power 700+ for cold, dry conditions. Synthetic insulation retains warmth when damp, dries faster, and handles stop-and-go activity or wet climates better; compare by grams-per-square-meter weight. If you often encounter rain or sweat heavily, choose synthetic or a hybrid; if you prioritize packability for dry cold, choose down.

    What maintenance keeps technical jacket materials performing longer?

    Wash with a technical cleaner, close zips and hook-and-loop, and avoid fabric softeners; then tumble dry low to reactivate DWR. Reapply a spray-on or wash-in DWR after 3–5 washes or when water stops beading. For down pieces, tumble dry low with clean dryer balls to restore loft; store uncompressed and repair small tears promptly with adhesive patches to prevent fabric damage.

  • 7 Best Times to Buy Used Outdoor Gear vs New Equipment

    7 Best Times to Buy Used Outdoor Gear vs New Equipment

    Table of Contents

    Budget-Conscious Beginners: Starting Your Outdoor Journey Affordably

    Title: 7 Best Times to Buy Used Outdoor Gear vs New Equipment

    Finding the right balance between performance, price, and responsibility is central to every outdoor kit decision. Knowing when to buy used vs new outdoor gear can stretch your budget, lower environmental impact, and still keep you safe and comfortable outside. The “right” answer varies by activity, season, and how hard you are on equipment—and by understanding the performance trade-offs used equipment can bring, you can build a kit that matches your goals.

    The North Face designs technical apparel and equipment for athletes and modern explorers, and the brand’s mix of durable packs, insulated layers, breathable-waterproof shells, and activity-specific gear helps illustrate where secondhand value shines and where new technology pays off. Below, we outline seven scenarios with clear guidance on when to buy used gear and when new equipment is worth it.

    Early outings don’t demand a top-shelf kit. Focus on safety, fit, and weather protection, and look for dependable value in non-critical items. Buying used outerwear and accessories can free up budget for footwear and a protective shell—two categories where fit and fabric performance strongly influence comfort.

    Where used makes sense for beginners:

    • Insulated midlayers and fleece: Quality pieces hold up well and are easy to evaluate by sight and feel. Down loft, zipper function, and seam integrity are simple checks.
    • Rain shells and wind jackets: If the membrane is intact and seams are taped with no peeling, a wash and re-proofing can restore water repellency.
    • Daypacks: Lightly used packs offer excellent savings. Inspect buckles, hipbelt foam, and zippers.
    • Trekking poles: Test clamp locks and look for straight sections and undamaged tips.

    Where buying new pays off:

    • Footwear: Midsoles compress and outsoles wear; starting with fresh cushioning and precise fit reduces blisters and supports your stride.
    • Next-to-skin baselayers and socks: Hygiene aside, new technical fabrics wick more predictably when unworn.
    • Safety-critical gear: Helmets, harnesses, ropes, avalanche tools, water filtration elements, and stoves with questionable provenance should be purchased new.

    A practical beginner’s kit split:

    • Buy used: Lightweight fleece, synthetic puffy, breathable rain shell, 20–30L daypack.
    • Buy new: Trail shoes or boots, merino or synthetic baselayers, sun hat, first-aid kit.

    For beginners who want a trustworthy secondhand source, The North Face Renewed program refurbishes select apparel to brand standards, providing a quality baseline for used outerwear. New footwear and shells from The North Face can anchor the kit, while Renewed layers help you stretch dollars. Joining the XPLR Pass loyalty program earns rewards that can offset future upgrades, so you can start affordably and scale up as your trips evolve.

    Test Text 1

    Casual Weekend Hikers: Balancing Cost and Reliability

    A few hours on local trails each week puts moderate wear on gear. The priority here is reliability under light-to-medium loads and changing weather, without overspending. Buying used is often smart for items that aren’t safety critical and that show wear plainly.

    Buy used when:

    • Daypacks and waist packs are lightly scuffed but structurally sound. Check load-lifter stitching, zipper sliders, and back panel foam for cracks.
    • Trekking poles have tight joints and no lateral play. Replace worn baskets inexpensively.
    • Apparel like sun shirts, trail shorts, and softshell pants are intact. Seams and DWR can be revived with washing and treatment.
    • Rain shells are free of delamination and taped seams remain fully adhered.

    1.00
    1.00

    If you’re considering a pack upgrade, browsing a curated selection like The North Face’s Best Selling Backpacks can help you benchmark features—suspension comfort, pocket layouts, hydration compatibility—before deciding whether a well-kept used model hits your needs.

    Maintenance considerations:

    • After wet hikes, dry gear thoroughly to prevent mildew in used fabrics.
    • Re-tape or repair small abrasions with patches; it extends life and maintains value.
    • Track mileage on footwear to replace before cushioning fatigues.
    • Test Text 2

    Casual weekenders can confidently mix used packs and apparel with new footwear. This balance leverages used outdoor equipment value without sacrificing trail-day comfort.

    Seasonal Athletes: Maximizing Value for Specific Activities

    If you chase snow in winter or trail mileage in summer but spend the rest of the year cross-training, seasonal buying strategies reduce costs while keeping performance high during peak months. Timing and category-specific judgment matter most.

    Skiing and snowboarding:

    • Buy used: Insulated midlayers, shell pants and jackets (pending membrane and seam health), and resort-oriented gloves. Inspect for DWR beading, scuffs in high-wear zones, and intact powder skirts.
    • Buy new: Avalanche transceivers, airbags, and probes. Electronics and lifesaving equipment improve rapidly; reliability and latest standards justify new. Helmets should be new or from a trusted source with known impact history.
    • Test Text 3

    Mountaineering and snowshoeing:

    • Buy used: Hardwearing shells, insulated belay parkas, and gaiters. Look for abrasion resistance and solid zippers. Modern tech like FUTURELIGHT membranes and advanced insulations can still be found secondhand in excellent condition.
    • Buy new: Crampons, ice tools, and load-bearing safety gear. Sharpness, metal fatigue, and unknown histories are non-negotiable.

    Trail running:

    • Buy used: Apparel, hydration vests (check elastic rebound and bottle pockets), and rain shells.
    • Buy new: Footwear. Midsole foam degrades even unused over time; fresh shoes ensure responsiveness and reduce injury risk.

    Biking and shoulder-season pursuits:

    • Buy used: Wind shells, lightly used packs, and merino layers.
    • Buy new: Helmets and lights. Safety standards and battery performance improve year over year.

    Calendar-smart tips:

    • Shop used and new off-season when inventory shifts. Late spring for snowsports apparel; late fall for warm-weather kits.
    • For The North Face insulated layers, both down and synthetic (like ThermoBall) hold value and performance across seasons; secondhand pieces with solid loft are safe bets.

    By aligning purchases with your primary season, you can reserve budget for new, safety-critical equipment while capturing strong used value in apparel and non-load-bearing accessories.

    High-Performance Climbers: When New Technology Matters Most

    Climbing pushes gear to the edge of its performance envelope. Margins are thinner, and weight-to-strength ratios, breathability under harness pressure, and dexterity in gloves or layers become decisive. Here, clarity about what must be new versus what can be safely purchased used is essential.

    Always buy new for:

    • Ropes, harnesses, carabiners, cams, nuts, quickdraws, belay devices, and helmets. Metal fatigue, UV degradation, microfractures, and unknown fall histories make secondhand purchases risky, even from seemingly careful previous owners.
    • Slings and cordage: Aging and storage conditions affect fibers invisibly.

    Consider used, with caution:

    • Climbing apparel: Softshells, wind layers, and belay jackets can be evaluated visually and by feel. Check cuffs, shoulders, and hip areas for wear from rope and harness friction.
    • Packs: Crag and big-wall packs endure abrasion; inspect haul points, strap bar-tacks, and bottom fabric. Reinforced seams and undamaged framesheets are musts.
    • Approach shoes: Only if tread and edging zones remain firm, and midsoles haven’t collapsed.
    1.00
    1.00

    When new tech is worth it:

    • Breathable-waterproof membranes with enhanced air permeability (e.g., The North Face’s FUTURELIGHT) reduce sweat buildup under harness pressure and during high-output leads. For steep, technical days, that comfort gain can improve decision-making and safety.
    • High-loft yet compressible belay parkas with modern baffle construction trap heat without bulky cold spots, speeding transitions at hanging belays.
    • Ergonomic patterning and gusseting in pants and jackets increase mobility with fewer layers.

    Performance trade-offs used equipment may bring:

    • Reduced DWR on older shells means faster wet-out, adding chill during shade or wind on multipitch routes.
    • Packed-out insulation can compress under a harness, diminishing warmth precisely when you’re stationary on belay.
    • Stretched pack straps migrate under heavy racks, shifting weight awkwardly.

    For climbers, the safest rule is uncompromisingly new for anything that holds a fall or protects your head, combined with carefully vetted used apparel and packs to save weight and cost.

    Frequent Travelers: Durability Considerations for Heavy-Use Gear

    Athletes, guides, and adventurous travelers often put more miles on their gear in transit than on the trail. Airline handling, bus racks, and roof boxes stress hardware and fabrics differently than backcountry use. When durability and uptime matter, deciding when to buy used vs new outdoor gear is about zipper integrity, frames, and rolling components.

    Go used with confidence when:

    • Duffels and soft luggage have intact coated fabrics, no seam creep at handles, and smooth zippers. Scuffs are cosmetic; damage at stress points is not.
    • Daypacks maintain back panel rigidity and clean shoulder-strap stitching. Foam imprinting and minor abrasions are acceptable.

    Buy new when:

    • Rolling luggage wheels wobble or bearings grind. A single flight can finish a failing wheel assembly.
    • Telescoping handles rattle or stick; these parts are tough to replace and critical for long connections.
    • You need guaranteed weather protection for camera or work gear; fresh DWR and seam taping reduce risk.

    Heavy-use maintenance to extend used gear life:

    • Clean and lube zippers with silicone-based products to prevent blowouts.
    • Refresh DWR with a wash-in or spray-on treatment before rainy itineraries.
    • Patch abrasion points proactively on duffels and packs’ high-contact zones.

    If you’re outfitting for repeated travel and fieldwork, a quick scan of The North Face’s Outdoor gear & equipment can help you gauge current material specs—coated textiles, ballistic weaves, frame systems—before assessing used alternatives. The benchmark simplifies deciding whether a like-new secondhand option is a smart buy or if new will deliver longer service life at lower total cost of ownership.

    Sustainability-Focused Explorers: Making Environmentally Conscious Choices

    For many explorers, the goal is to lighten the footprint without compromising safety. Opting for secondhand is often the best first step—extending the life of a high-quality product avoids the emissions of manufacturing a new one. But sustainable decision-making also includes repairability, materials, and choosing items built to last.

    Sustainable choices that favor used:

    • Apparel and packs designed for repair: Bar-tacked seams, modular buckles, and standard zipper sizes extend service life. Prioritize used items with replaceable parts.
    • High-loft insulation that can be re-fluffed and maintained: Proper washing and drying restore down loft; synthetic options recover with careful laundering.

    When new is the greener long-term choice:

    • Items that will see daily or expedition-grade wear. A new, durable pack or shell that lasts a decade can outperform two or three disposable purchases.
    • Safety gear. Fewer replacements and the latest standards reduce waste and risk.

    Practical sustainability steps:

    • Choose PFC-free DWR in new shells to limit persistent chemicals in the environment.
    • Maintain used gear meticulously: wash tech fabrics per care labels, revive DWR, store down uncompressed, and keep UV-sensitive items shaded.
    • Prioritize brands with repair services and circular programs. The North Face Renewed keeps quality apparel in circulation; pairing Renewed layers with durable, repairable equipment extends total product life.
    • Resell or donate gear that no longer fits your needs. Closing the loop keeps functional equipment outside and out of landfills.

    By blending used apparel with a few strategic new purchases, sustainability-focused explorers reduce resource use while sustaining dependable performance in the field.

    1.00
    1.00

    Transitioning Gear Enthusiasts: Upgrading Your Technical Equipment Strategically

    As your skills and ambitions grow, so does the desire for gear that climbs steeper, hikes farther, and protects better in tough weather. Strategic upgrades let you capture meaningful performance gains without rebuilding your entire kit at once.

    Identify meaningful performance gaps:

    • Weather protection: Are you wetting out early, or overheating on the climb? Upgrading to a more breathable-waterproof shell can deliver the biggest comfort leap.
    • Warmth-to-weight: If your pack is heavy with older insulation, a modern down or advanced synthetic puffy can cut grams and boost warmth.
    • Carry comfort: If hipbelt or shoulder pain ends your day, improved pack suspension is transformative.

    Upgrade new when:

    • There’s a genuine technology inflection. Examples include air-permeable membranes, advanced baffle construction, and redesigned pack frames that distribute load better under movement.
    • The item is a foundation piece you’ll use year-round: a primary shell, 30–40L daypack, or versatile insulated midlayer from a proven line.

    Leverage used for:

    • Secondary or niche items you’ll use a few times per season: an ultralight wind vest, a summer-weight sleeping layer, or a summit-only shell.
    • Previous-season colors of proven models; you often get 90–100% of the performance at a steep discount.

    Resale and rotation strategy:

    • Keep receipts and maintain gear carefully to preserve resale value. Clean, repaired, and documented items fetch higher prices.
    • Rotate out overlapping pieces. If a new shell outperforms two old jackets, sell both and simplify your kit.
    • Use loyalty rewards such as XPLR Pass to stack savings on cornerstone upgrades, then backfill the rest of the system with quality used items.

    Decision checklist for each upgrade:

    • Is the new item solving a specific limitation you’ve experienced?
    • Will it replace multiple pieces or extend your season?
    • Does it pair well with existing layers to create a modular system?

    Transitioning enthusiasts succeed by investing in a few best-in-class pieces—often new—while sourcing complementary layers and accessories used. The result is a lighter, more capable kit that changes with your goals.

    Conclusion: A Practical Rulebook for Smarter Purchases

    There’s no single answer to the question of when to buy used vs new outdoor gear, but consistent principles emerge across activities and experience levels.

    General rules of thumb:

    • Always buy new: Safety-critical items (helmets, harnesses, ropes, avalanche electronics), footwear for serious mileage, and rolling luggage with failing components.
    • Often safe used bets: Insulated and fleece layers, breathable shells with intact membranes, daypacks with solid stitching, and trekking poles with secure locks.
    • Consider technology leaps: When breathable-waterproof performance, warmth-to-weight, or load-carrying comfort has clearly improved, new gear can extend your range and seasons.
    • Maintain relentlessly: Clean, re-proof, and repair to maximize life and value—whether the piece started new or used.
    • Align with your use: Heavy users should prioritize durability; seasonal athletes can time off-season deals and rent or borrow until the right piece appears.

    The North Face builds for durability and technical performance, and its ecosystem—from high-performance shells and insulated layers to durable packs and a sustainability-focused resale pathway—supports whichever route you take. With a thoughtful approach to the performance trade-offs used equipment can bring, you can assemble a capable kit that respects your budget, your objectives, and the environments you explore.

    Frequently Asked Questions (FAQ)

    When should I buy used vs new outdoor gear?

    Buy new for safety-critical items (ropes, harnesses, helmets, carabiners, avalanche transceivers) and for heavily used, fit-critical footwear. Used is often a smart choice for tents, backpacks, non-insulated shells, trekking poles, and camp cookware if they pass a thorough inspection. Aim for at least 40% savings and verify remaining lifespan and parts availability before choosing secondhand.

    How do I evaluate the condition of used gear before I buy?

    Inspect fabrics for tears, seam wear, zipper smoothness, and membrane delamination; make sure tents still bead water and aren’t UV-brittle. Confirm down loft, pole locks and stove valves function, and that pack straps and foams aren’t crushed. Ask for age, storage history, and any repairs, and check the model for recalls.

    What performance trade-offs should I expect with secondhand equipment?

    Older gear may be heavier and less breathable or water-resistant than current models, and membranes lose performance with wear. Insulation can pack down, midsoles compress, and coatings or adhesives age, reducing warmth, cushioning, and durability. If you need cutting-edge weather protection or ultralight weight for high-output or alpine objectives, new equipment typically delivers more consistent performance and warranty support.

  • Best Urban-to-Trail Jackets: Top Technical Outerwear for Modern Explorers

    Best Urban-to-Trail Jackets: Top Technical Outerwear for Modern Explorers

    Introduction: Understanding Urban-to-Trail Jacket Criteria

    Urban to trail jackets bridge city commutes and rugged paths without asking you to compromise. The best options combine precise weather protection with quiet confidence in fit and finish, moving from subway platforms to switchbacks while managing sweat, shielding from sudden showers, and pairing well with the rest of your wardrobe.

    Choosing correctly starts with a clear checklist. Consider weather-proofing (waterproof vs. water-resistant), breathability for active use, mobility through patterning and stretch, and weight-to-warmth balance. Pocket layouts should handle a phone, transit card, and trail map with equal ease; adjustability at the hood, cuffs, and hem should fine-tune microclimate control. Durability, care needs, and sustainability credentials matter, as does a silhouette that complements everyday wear.

    This performance jacket guide takes a materials-first approach, then moves into construction, fabric technology, and fit considerations. It closes with jacket recommendations tailored to how you move—whether that’s commuting, fast hiking, or weekend alpine missions—plus pragmatic advice on care, value, and where to buy.

    Key Materials That Define Performance Jackets

    Materials determine both capability and comfort. For shells, nylon is typically favored for abrasion resistance and tear strength; polyester offers better UV resistance and colorfastness. Look for ripstop or dobby weaves in 20D to 70D face fabrics depending on the balance of toughness and packability you need. Mechanical stretch woven into the face fabric improves mobility without over-relying on elastane.

    Waterproof-breathable systems hinge on a membrane (ePTFE, ePE, or PU) bonded to a protective textile. Three-layer (3L) laminates add a backer that protects the membrane and improves comfort; two-layer (2L) designs use a hanging liner; 2.5-layer shells apply a printed or raised coating to save weight. Durable water-repellent (DWR) treatments shed surface moisture; increasingly, brands use PFC-free finishes to lower environmental impact.

    Insulation options set the tone for cold-weather use. High-loft down (700–900 fill power) compresses small and provides best-in-class warmth-to-weight in cold, dry climates. Synthetic fills such as PrimaLoft and ThermoBall retain heat when damp and dry faster—ideal for shoulder seasons and wet environments. Fleece remains a versatile midlayer and stand-alone option; grid and high-loft fleeces offer excellent warmth-to-breathability ratios, while hard-faced fleeces add light weather resistance. Softshells combine woven stretch with a brushed interior or light laminate, excelling at mobility and breathability during active pursuits.

    Finally, liner and backer fabrics matter more than many realize. Tricot, micro-grid knits, and mapped brushed zones influence moisture dispersion, perceived warmth, and how easily the jacket slides over layers—a daily quality-of-life detail.

    Construction Techniques for Weather Protection

    How a jacket is built transforms raw materials into dependable shelter. Fully taped seams in waterproof shells block leaks at stitch lines; narrow micro-tapes reduce bulk and maintain fabric drape. Bonded and welded seams replace stitching in high-stress zones, lowering potential ingress points while trimming weight. A laminated front zip or an external storm flap with secure closures keeps wind-driven rain out of your core.

    Patterning drives mobility. Articulated elbows, underarm gussets, and shoulder yokes allow natural movement without fabric binding when you reach for overhead transit bars or scramble up a trail step. Two-way front zippers improve venting and make sitting on trains or belaying with a harness more comfortable. Thoughtful hood design—helmet-compatible for alpine shells, trim and stowable for urban-focused pieces—helps visibility in poor weather, with a stiffened brim and rear/side adjusters to dial in the fit.

    Venting strategies are equally critical. Pit zips remain the gold standard for rapid heat dump in waterproof shells. Mesh-lined chest or hand pockets double as discreet vents, particularly useful in light rain when zips can remain partially open. Cuffs with hook-and-loop tabs, hem drawcords, and draft-blocking drop hems round out the micro-adjustments that keep you dry, warm, or cool as conditions shift.

    Hybrid jacket construction—mixing panels of different fabrics—optimizes performance. Reinforced shoulders resist backpack abrasion, air-permeable underarm panels enhance breathability, and smooth face fabrics at the forearms shed grime and wear from everyday contact.

    Fabric Technology Breakdown and Comparison

    Weather-resistant fabric technology spans several families, each with strengths:

    • ePTFE-based membranes (e.g., classic GORE-TEX) deliver proven waterproofness and robust durability. Variants such as GORE-TEX Pro are engineered for extreme conditions with higher denier face fabrics and very high abrasion resistance.
    • ePE membranes represent a newer, PFC-free evolution, targeting a lower environmental footprint while maintaining waterproof performance.
    • PU-based membranes (e.g., many 2.5L and 3L proprietary systems) can be exceptionally soft and quiet. Air-permeable PU variants allow a small, controlled airflow that enhances moisture transport during high-output efforts.
    Illustration 1
    Illustration 1

    Within The North Face lineup, FUTURELIGHT is an air-permeable, nanospun membrane engineered to balance waterproofing with active breathability—well-suited to fast hikes or mixed urban-to-trail days. DryVent is a durable, waterproof-breathable technology found in rain shells and everyday protection, offering strong value and reliability. WindWall sits on the wind-resistant spectrum—ideal when you need to cut gusts without the full heat build-up of a waterproof membrane, as in softshell and fleece-backed pieces.

    Layer construction matters, too:

    • 2L: Comfortable drape and insulation-friendly, often with a mesh liner; great for urban use and travel.
    • 2.5L: Lightweight and packable for just-in-case rain; may feel crinklier but excels at emergency coverage.
    • 3L: Most durable with a protective backer; best for sustained weather and heavy use.

    Breathability metrics vary. RET (lower is better) reflects evaporative resistance, while air permeability (measured in CFM) indicates how readily air passes through the fabric—an excellent indicator for high-output activities. When your day includes a train ride, brisk walk, and ridge-top breeze, air-permeable 3L systems offer a refined comfort edge.

    Top Technical Jacket Recommendations

    Below are category-based picks that transition cleanly from city to trail, prioritizing versatile outdoor apparel with proven technical outerwear materials. Specific availability varies by season; use the features as a selection template.

    • Alpine hardshell for severe weather: For maximum storm proofing, a 3L GORE-TEX Pro shell delivers uncompromising protection and abrasion resistance for rock, ice, and deep-winter squalls. The women’s Tsirku GORE-TEX Pro Jacket exemplifies this class with a helmet-compatible hood, harness-accessible pockets, and a dialed fit; it’s overbuilt for city commutes, but it shines for winter storm days and mountain travel when failure isn’t an option.
    • Daily storm shell with active breathability: A 3L FUTURELIGHT shell balances waterproof protection and on-the-go comfort, ideal for shoulder seasons and mixed-intensity days. Look for pit zips, a trim hood, and hand pockets placed to clear a hipbelt. This is the “do-most-things” shell for urban to trail jackets.
    • Packable rain shell for travel and EDC: A 2.5L DryVent jacket packs into a hand pocket, lives easily in a tote, and deploys fast in downpours. It’s not designed for heavy abrasion, but for commuters and travelers who value weight and volume savings, it’s a smart, cost-effective layer.
    • Weather-resistant softshell for motion: A stretchy, wind-resistant softshell with a brushed backer handles cool, dry days and light mist while breathing far better than a rain shell. Choose this for high-output hikes, bike commutes, and shoulder-season training.
    • Insulated puffer for cold, dry climates: A responsibly sourced 700–800 fill-power down hoodie provides exceptional warmth with low carry weight. It layers neatly under shells on storm days and works as a top layer in clear, freezing conditions. Urban-friendly baffles and a clean face fabric make it city-ready.
    • Synthetic insulator for wet, variable weather: ThermoBall or PrimaLoft-style insulation holds loft when damp and dries quickly—ideal for coastal cities and shoulder seasons. Look for zoned quilting that reduces cold spots and a smooth liner for easy layering.
    • Fleece for midlayer and stand-alone wear: A classic, durable fleece with reinforced overlays stands up to backpacks and daily abrasion while offering timeless style. The Denali Fleece Jacket is an enduring example, pairing hard-wearing panels with plush warmth; it transitions from office to trailhead and layers seamlessly beneath shells.
    • 3-in-1 modular system for simplicity: Triclimate-style jackets pair a waterproof shell with a zip-in insulator. For many users, this single purchase covers most conditions across the year and reduces decision fatigue on busy mornings.

    As you compare, align the category with your climate and use case. High-output users should bias toward air-permeable or softshell options; cold-weather commuters may prioritize insulated pieces with windproof shells.

    Layering Systems and Versatility Features

    The foundation of comfort is a coherent layering system. Start with a moisture-wicking base in synthetic or merino blends; prioritize low-friction knits that glide under shells. Add a midlayer tuned to activity and temperature—grid fleece for breathability, synthetic puffs for wet-cold, or down for cold-dry. Finish with a shell calibrated to your precipitation and wind exposure; the more consistently wet your climate, the more a 3L waterproof shell pays dividends.

    Versatility features amplify performance across environments:

    • Venting: Pit zips, mesh pocket linings, and two-way front zippers let you micro-tune heat and moisture.
    • Adjustability: A well-patterned hood with rear and side pulls, laminated brims, glove-friendly cord locks, and cuffs that seal without bunching create a tight weather seal with minimal fuss.
    • Pockets with purpose: Harness- or hipbelt-compatible chest pockets keep essentials accessible on trail and out of crowded train doorways. A secure internal drop pocket handles gloves or a beanie.
    • Packability: Stow-in-pocket designs help a shell live in a commuter bag without taking over; insulated layers that compress easily are likelier to go everywhere with you.
    • Compatibility: Zip-in systems and roomy armholes reduce friction between layers and maintain range of motion when stacked.

    Aim for three-season coverage with two to three pieces that can be mixed and matched. A breathable 3L shell, a synthetic insulator, and a durable fleece provide a compact, high-function wardrobe for most urban-to-trail scenarios.

    Illustration 2
    Illustration 2

    Durability and Long-Term Value Assessment

    Durability emerges from the interplay of fabric choice, construction quality, and maintenance. Higher-denier face fabrics (40D–70D) stand up to commuter wear points—bag straps, turnstiles, and concrete brushes—better than ultralight (10D–20D) textiles. Reinforced shoulders and forearms extend lifespan for backpack users. Bonded overlays, bar-tacked stress points, and high-quality hardware such as water-resistant zippers and durable cord locks reduce early failures.

    Value is not just purchase price—it’s cost per wear. A well-chosen 3L shell might see you through five-plus seasons of daily commuting and weekend hiking with routine care. Synthetic insulators with zoned quilting resist migration and cold spots; fleeces with abrasion overlays avoid pilling at elbows and shoulders. Look for transparent material specs, repairability (replaceable pulls, patchable face fabrics), and brand support for product care.

    Sustainability can enhance long-term value. Recycled face fabrics, PFC-free DWR treatments, and down traceability standards reflect thoughtful sourcing. The North Face’s sustainability-focused resale program gives gear a second life and can recirculate value back to you when you’re ready to upgrade. Pair that with loyalty incentives such as XPLR Pass to stretch your budget over time.

    Comparison Summary: Materials and Performance

    Use these quick comparisons to match material choices to your conditions and priorities:

    • 3L waterproof-breathable shell

    – Best for: Frequent rain, wind, and abrasion; alpine and shoulder-season reliability – Pros: Durable, protective, comfortable backer – Trade-offs: Heavier, higher cost

    • 2.5L packable shell

    – Best for: Just-in-case rain, travel, ultralight carry – Pros: Light, compact, value-friendly – Trade-offs: Less abrasion resistance, clammy feel in extended wear

    • FUTURELIGHT-style air-permeable 3L

    – Best for: Mixed urban-to-trail days, fast hikes, variable intensity – Pros: Breathes during movement, stays protective in rain – Trade-offs: Premium pricing, still needs venting for sprints

    • Wind-resistant softshell

    – Best for: Cool, dry weather and high-output activity – Pros: Stretchy, quiet, highly breathable – Trade-offs: Not rainproof; requires back-up shell in storms

    • Down insulation (700–900 FP)

    – Best for: Cold, dry climates and static warmth – Pros: Top warmth-to-weight, compresses small – Trade-offs: Loses loft when wet without a protective shell

    • Synthetic insulation

    – Best for: Wet-cold, shoulder seasons, unreliable forecasts – Pros: Warms when damp, dries fast, easy care – Trade-offs: Slightly heavier/bulkier than down for the same warmth

    • Fleece midlayer

    – Best for: Breathable warmth and abrasion resistance under packs – Pros: Durable, easy to wash, versatile – Trade-offs: Wind passes through; pair with a shell in blustery weather

    Style Meets Function: Everyday Wearability

    Modern technical outerwear can fit into a workday as neatly as a weekend hike. Matte face fabrics read refined in the city, resist scuffs, and photograph well under indoor lighting. Clean front plackets, minimal branding, and streamlined pockets avoid the “expedition” look at the office while keeping trail function intact. Neutral palettes—black, gray, navy, olive—maximize mix-and-match potential; a single accent color or contrast zipper can nod to athletic DNA without overwhelming a minimalist wardrobe.

    Silhouette matters. A slightly longer drop-tail hem offers bike and train coverage while staying out of the way of a hipbelt. Trim-but-not-tight fits layer over a sweater or button-down yet slide easily under a shell. Quiet fabrics reduce swish and elevate perceived quality. Finally, details like a chin guard, soft zipper garages, and laminated cuff bindings improve all-day comfort, a subtle upgrade you’ll notice on long meetings and longer hikes.

    Care and Maintenance for Longevity

    A simple routine protects performance and lifespan:

    Illustration 3
    Illustration 3
    • Washing shells

    – Close all zippers and fastenings; wash inside-out in cold or warm water with a technical detergent. – Avoid fabric softeners and bleach; rinse thoroughly. – Tumble dry low to medium to help reactivate DWR, or warm iron on low with a towel barrier.

    • Restoring water repellency

    – If rain stops beading, clean first; then apply a spray-on or wash-in PFC-free DWR product. – Light heat after treatment improves bonding; follow the product’s instructions.

    • Caring for insulated jackets

    – Down: Wash gently with down-specific detergent; rinse well. Tumble dry low with clean dryer balls to restore loft; break up clumps periodically. – Synthetic: Wash cool, tumble dry low or line dry; avoid high heat to preserve fibers.

    • Fleece and softshells

    – Wash cold, avoid high heat drying to maintain hand feel and reduce pilling. – Brush off debris from overlays and spot clean stains promptly.

    • Storage and inspection

    – Store clean and fully dry; hang shells and insulators to preserve loft and face fabric integrity. – Periodically check seam tapes, zipper coils, and drawcords; early fixes prevent bigger issues.

    With this cadence, expect consistent weather protection and breathability season after season.

    Selection Guide: Finding Your Ideal Jacket

    Match your realities—climate, intensity, and carry habits—to the right build:

    • If your city is wet and windy and you hike most weekends:

    – Choose a 3L waterproof-breathable shell with pit zips and a structured hood. – Add a synthetic midlayer for wet-cold and a grid fleece for movement days.

    • If you mostly commute, pack light, and hike occasionally:

    – Pick a 2.5L packable rain shell; keep it in your bag daily. – Pair with a versatile synthetic insulator or a classic fleece for shoulder seasons.

    • If you run warm and move fast:

    – A softshell or air-permeable 3L minimizes sweat build-up. – Prioritize venting features and sleeves that push up easily.

    • If winters are cold and dry:

    – Invest in a high-fill down hoodie plus a windproof or waterproof shell. – Look for adjustable cuffs and hem seals to trap warmth.

    • If your routes include scrambling and heavy packs:

    – A 3L shell with reinforced shoulders/forearms and a 40D+ face fabric resists abrasion. – Harness-compatible chest pockets keep essentials reachable.

    Fit and features finalize the decision:

    • Fit: You should reach overhead without hem lift; cuffs seal over gloves; the hood moves with your head.
    • Pockets: Ensure secure storage for phone and transit pass, and that chest pockets clear backpack straps.
    • Weight: If it’s too heavy to carry daily, you won’t; balance protection with willingness to bring it.
    • Care: Choose materials you’re comfortable maintaining; durability improves with proper washing and DWR upkeep.
    • Sustainability and value: Recycled fabrics, PFC-free DWR, and strong resale or repair pathways lower lifetime footprint and cost.

    Where to Shop and Make Your Purchase

    For the most current fabric technologies, colorways, and size runs, shop directly through The North Face online or in brand stores. You’ll find the full spread of shells, softshells, fleeces, and insulated pieces—often with detailed material callouts to compare FUTURELIGHT, DryVent, WindWall, and insulation types side by side. If you prefer to try on multiple fits, authorized specialty outdoor retailers provide expert guidance and can help you tune features like hood volume and hem length to your preferences.

    Timing your purchase can increase value. New-season releases typically land ahead of peak weather; end-of-season periods may offer discounts on prior colorways. Joining XPLR Pass can unlock rewards over time, especially if you’re building a layered system. For sustainability-minded shoppers, The North Face’s resale channel extends access to well-cared-for pieces and keeps technical outerwear in circulation.

    However you buy, confirm return and exchange policies, review care instructions, and inspect construction details in person when possible. The right urban to trail jackets should feel intuitive the moment you zip up—equally at home on a rain-slicked block as they are on a windy ridgeline, ready to move when you do.

  • Hello world!

    Welcome to WordPress. This is your first post. Edit or delete it, then start writing!