Table of Contents
- Why Your Technical Shell Needs Regular Waterproofing Checks
- Understanding How Water Breaches Occur in Outdoor Apparel
- Our Advanced Testing Methods for Seam Integrity
- Signs Your Favorite Rainwear Needs Restoration
- The North Face Restoration Process Explained
- How We Seal and Reinforce Compromised Seams
- Preventative Care to Extend Shell Lifespan
- Getting Your Gear Ready for Your Next Adventure
- Frequently Asked Questions (FAQ)
Why Your Technical Shell Needs Regular Waterproofing Checks
Your shell jacket has carried you through surprise summer downpours, high-alpine sleet, and countless soggy trail mornings. Over time, the relentless cycle of water, sun, and pack straps takes its toll. What once shed rain like glass begins to bead inconsistently. Seams that were sealed tight now let moisture creep in. The good news: we’ve spent decades perfecting how to test, identify, and restore waterproof apparel to perform like new.
We understand that a compromised shell isn’t just uncomfortable. It’s a broken promise on the trail. That’s why we’ve built a rigorous restoration program and want to share what we’ve learned about keeping your technical outerwear dependable for years to come.
Water doesn’t ask permission before it finds a weakness. Every shell we design is built to repel moisture, but waterproofing is not a permanent coating. It’s a system: a tightly woven fabric, protective treatments applied to the surface, and sealed seams working together. When one element degrades, your jacket’s performance drops fast.
Think of your shell like a roof. A single compromised shingle might not matter in light rain, but under a heavy downpour, water finds its way inside. We’ve learned this lesson testing gear from Nepal to Patagonia. The sooner you identify performance loss, the easier and more affordable restoration becomes.
Regular waterproofing checks matter because minor damage spreads. A pinhole in a seam can expand into a crack. A worn water-repellent finish invites deeper saturation into the fabric weave. We recommend checking your shells at the start of each season and especially after heavy use or storage. A quick visual inspection takes five minutes and can save you from a wet, miserable backcountry experience.
What to do next: Inspect your shell’s most stressed areas: seams around the shoulders, underarm panels, and pocket edges. If water beads on these zones like it used to, you’re in good shape. If it soaks in flat, it’s time to think about restoration.
Understanding How Water Breaches Occur in Outdoor Apparel
Water is patient and relentless. It doesn’t break through your shell in one catastrophic moment. Instead, breaches develop through a combination of mechanical wear, chemical breakdown, and design stress points.
Our testing teams have identified three primary failure modes. The first is seam degradation. Seams are stitched holes in the fabric, which is why we tape them on the inside. Over years of movement, those tapes peel at the edges, or the adhesive loses grip. Sunlight and heat accelerate this breakdown. We’ve seen shells lose 30% of their waterproof performance in seams alone after two seasons of heavy use.
The second failure mode is surface coating breakdown. Most technical shells use a durable water-repellent (DWR) finish that makes water bead and roll off rather than soak in. This coating eventually wears away from friction, washing, and UV exposure. When it’s gone, water penetrates the outer fabric fibers and wicks down into the insulation or lining. You feel wet even though the shell itself isn’t torn.
The third mode is mechanical damage: small holes, scuffs, or tears that don’t seem serious. A single millimeter puncture or a thread-wide tear won’t keep water out if it reaches your seams. We’ve found that many outdoor enthusiasts are surprised by how little damage it takes. You might catch your jacket on a branch or rock and never notice, but water will find that weakness within a few hours of rain.
Understanding these modes changes how you care for your gear. It’s not just about avoiding major damage. It’s about routine maintenance before small issues compound.
Our Advanced Testing Methods for Seam Integrity
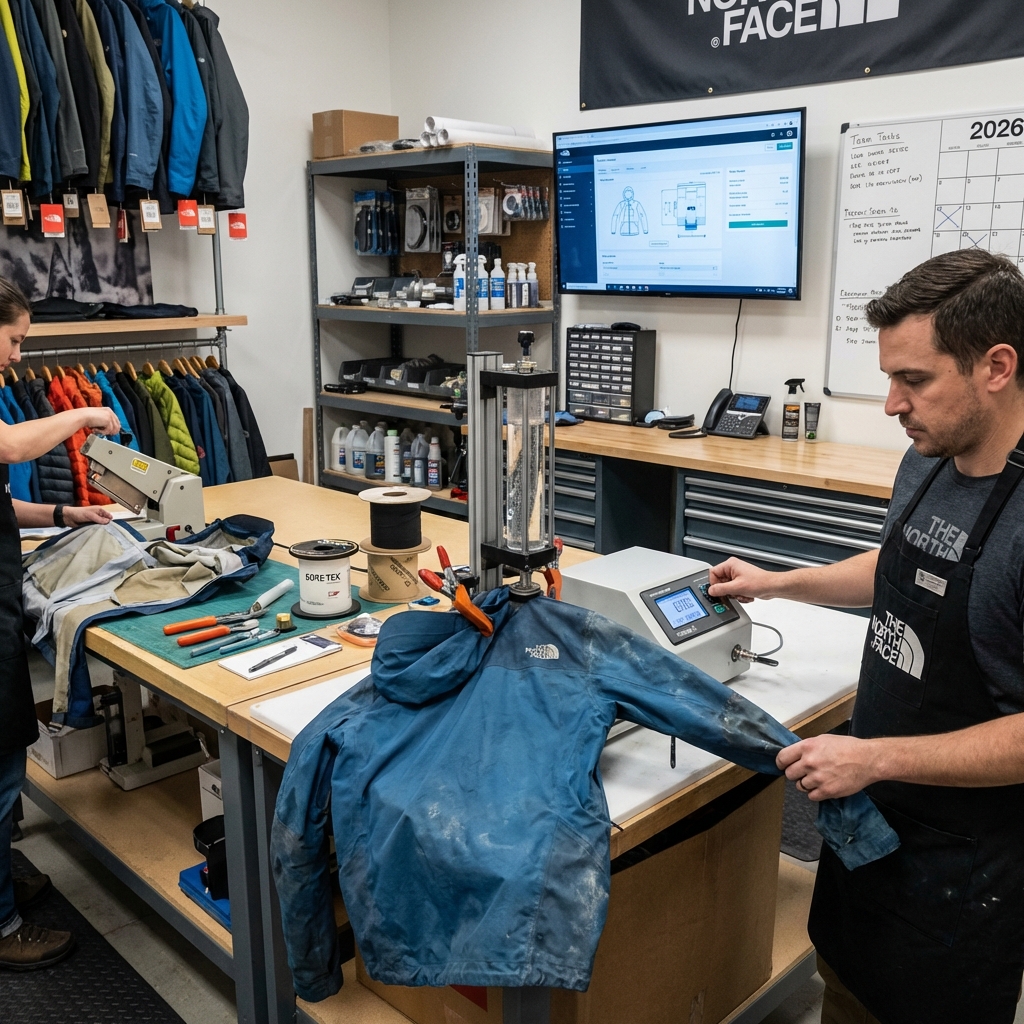
When you bring a shell to us for restoration, we don’t guess about what needs repair. We have dedicated testing protocols that pinpoint exactly where waterproofing has failed.
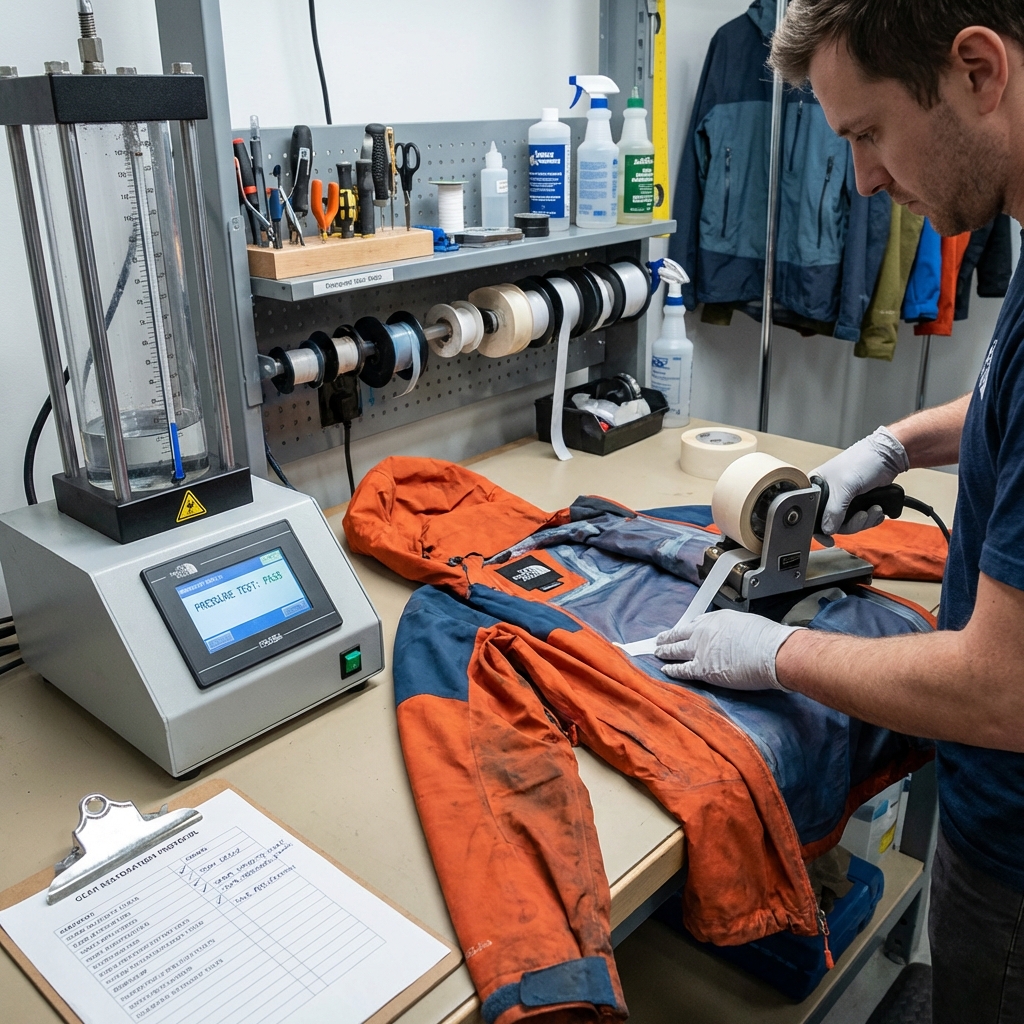
Our primary test is a hydrostatic pressure test. We fill a chamber with water and apply increasing pressure to a sample section of your jacket, measuring the exact point where water begins to penetrate. This tells us if the problem is in the DWR coating, the fabric weave, or the seams themselves. A shell that fails at low pressure needs surface treatment. One that fails only at high pressure likely has compromised seams.
We also run tape adhesion tests. We mechanically stress the seam tape in our lab to measure how well it’s still bonded to the fabric. Some jackets have tape that’s already 70% degraded even though they look fine from the outside. Catching this early means we can re-tape seams before they fail in the field.
For spotting micro-damage, we use wet inspection: we submerge sections of your jacket in dyed water and look for dye penetration under magnification. This reveals pinholes, stress cracks, and delamination that are invisible to the naked eye. On average, we find 3-5 defect areas per jacket that the owner had no idea about.
We also measure DWR performance using water droplet tests and contact angle measurement. If your jacket’s DWR is below our performance threshold, we know it needs re-treatment before any seam work. There’s no point in sealing a seam if water is still soaking through the fabric face.
What to do next: When you’re ready to restore a jacket, detailed testing saves money by preventing unnecessary repairs. We prioritize the damage that actually matters most.
Signs Your Favorite Rainwear Needs Restoration
You don’t need expensive equipment to know when restoration time has arrived. Trust your instincts and these clear signs.
The most obvious indicator is water saturation in areas that used to stay dry. If your underarms feel damp after an hour of rain, or your shoulders are soaked while your torso is dry, seams have likely failed. Water always takes the path of least resistance, so it pools at structural stress points first.
Watch for uneven water beading on the shell face. New shells shed water uniformly across the entire surface. If you’re seeing flat, dull water absorption on some panels while others still bead nicely, your DWR coating is patchy. This usually means it’s starting to fail overall.
Check the seam tapes by looking at the inside of your jacket in good light. If the tape edges are peeling, curling, or showing adhesive separation, that’s a clear sign seams are coming loose. Even if water hasn’t leaked through yet, you’re living on borrowed time. The same goes for any visible tape delamination or white chalking, which indicates adhesive breakdown.
Listen to your jacket too. If it makes a plastic-like noise when you move (rather than a whisper), the fabric coating may be cracking or separating from the base weave. This cracking causes water to wick between layers.
Finally, trust the smell test. A musty or damp odor that doesn’t fade after drying means moisture is being trapped inside and staying there. This usually indicates failed seams or compromised lining, and it’s a sign that restoration should happen before mold takes hold.
What to do next: If you notice even two of these signs, get your shell evaluated. Early intervention costs a fraction of replacing the jacket.
The North Face Restoration Process Explained
When your shell arrives at our restoration center, it begins a multi-stage evaluation and repair process. We’ve designed this to maximize the jacket’s remaining lifespan while being transparent about what’s repairable and what might warrant replacement.
First comes documentation and non-destructive testing. We photograph the jacket’s condition, record any owner-reported issues, and run the hydrostatic and tape adhesion tests mentioned earlier. This assessment determines the restoration scope and cost before we make any changes.
Next, we carefully clean the shell using techniques that don’t further degrade the fabric or existing treatments. We use low-pressure rinses and mild surfactants designed specifically for technical textiles. This removes dirt, salt deposits, and mildew that interfere with proper sealing and re-treatment.
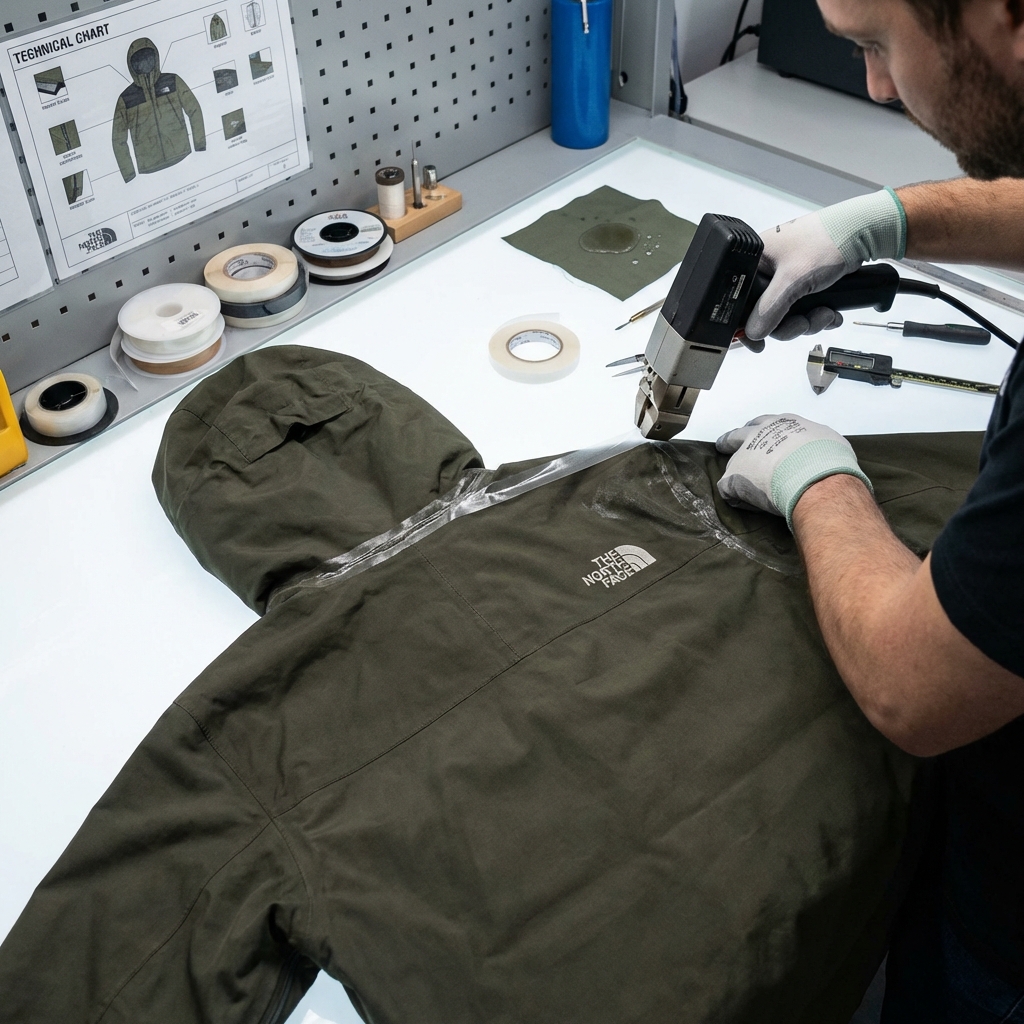
From there, we move into targeted repair. If seams are failing, we carefully remove the old tape, clean away old adhesive residue, and apply new seam tape designed for the specific fabric weight and weave of your jacket. This isn’t a quick patch. Each seam gets reinforced with the same hot-press adhesion process we use on new jackets.
If the DWR coating is worn, we apply a new water-repellent treatment. We have several options depending on whether you prioritize maximum durability or environmental responsibility. Our eco-conscious re-treatment uses fluorine-free compounds that perform almost as well as traditional options but break down more readily in the environment if accidentally released.
For punctures or small tears, we patch them from the inside with fabric patches sealed with the same tape and treatment system. The goal is invisible, durable repair that restores structural integrity without visible cosmetic change.
Finally, we run the full test suite again to confirm performance meets our standard. A restored shell must pass hydrostatic testing and tape adhesion testing at nearly the same level as new production. If it doesn’t, we revisit those areas.
What to do next: Bring your shell in for testing. Many jackets people think are done are actually great candidates for restoration at a fraction of replacement cost.
How We Seal and Reinforce Compromised Seams
Seam sealing is where technical precision meets practical durability. This is the work that determines whether your restored shell performs as promised.
We begin by carefully removing the old seam tape. This is manual work. A technician uses specialized tools to peel away the degraded tape without damaging the underlying fabric. If tape was glued poorly originally, this can take patience. We’ve found that rushing this step compromises the foundation for new sealing.
Once the old tape is removed, we clean the seam using compressed air and light abrasive methods to ensure the fabric surface is absolutely clean and slightly roughed. Dust, lint, or any adhesive residue creates weak spots in the new bond.
We then apply new seam tape using our hot-press system. This equipment applies heat and pressure simultaneously, fusing the new tape to both the outer and inner fabric layers. The temperature and pressure are precisely calibrated for each fabric type. A shell fabric needs different parameters than a lightweight rain jacket. Getting this right is what separates reliable restoration from repairs that fail again after a few months.
For heavily stressed seams, we sometimes double-tape: applying a base layer of tape and then overlapping it with a second layer that extends further across the fabric. This distributes stress and dramatically increases durability in areas like shoulder seams and hood attachments.
We also reinforce seam corners and branching points where multiple seams meet. These areas collect stress and are common failure points. We use slightly wider tape and sometimes apply short patch reinforcements at these critical junctions.
The entire process is then validated with pull tests that measure the shear strength of the new tape bond. A properly sealed seam should hold under forces that would tear the surrounding fabric before the tape gives way.
What to do next: Ask your restoration service about the specific tape material and adhesive type they’re using. Quality tape makes the difference between a repair that lasts two years and one that goes five.
Preventative Care to Extend Shell Lifespan
Your shell’s lifespan is determined as much by how you care for it between adventures as by how hard you use it in the field.
The simplest maintenance step is proper washing. Wash your shell every 5-10 outings, or whenever it’s visibly dirty. Use cool water and a mild detergent formulated for technical fabrics. Avoid standard laundry detergent, which can build up in the weave and degrade waterproofing. Machine washing on a gentle cycle works fine, but hand washing is gentler on seams if you’re being especially careful. Never use fabric softener or bleach.
After washing, dry your shell on low heat or air dry it fully. This matters because residual moisture accelerates mildew and degrades adhesives. Make sure it’s completely dry before storing.
Storage location matters surprisingly much. Keep your shell in a cool, dry place away from direct sunlight. Closets are ideal. UV light breaks down fabric coatings and can cause colors to fade. Heat accelerates all degradation processes. We’ve seen jackets stored near heating vents age twice as fast as those stored properly.
Between washes, refresh the DWR finish with a spray-on water repellent. These treatments are inexpensive and can be applied at home. Spray the dry jacket lightly and let it air dry or follow the product instructions. This extends the life of the original finish and keeps beading performance sharp. Many of our customers do this once a season and see dramatically extended intervals between professional re-treatment.
Inspect your shell regularly for new damage. A quick monthly look can catch a small hole before it becomes a major problem. Small punctures can often be sealed with temporary patch kits available at outdoor retailers, which buys you time before professional repair is necessary.
Avoid harsh chemicals, sunscreens on the fabric, and unnecessary friction. Backpack straps create wear patterns over time, so rotate how you wear your pack or use a pack cover to reduce direct rubbing.
What to do next: Add a once-monthly visual inspection to your routine and refresh DWR spray every season. These two habits alone extend shell life by 30-40% in our experience.
Getting Your Gear Ready for Your Next Adventure
Your restored shell is now ready to perform, but getting it fully dialed for your next adventure takes a bit more than just unpacking it.
First, test the restoration in controlled conditions before you head into serious terrain. Wear it around town in light rain. Check that seams stay dry, that the fit still feels right, and that the DWR coating is working. You’ll gain confidence knowing exactly what your restored jacket can do.
Layer strategically beneath your shell. We design shells to work with insulation layers underneath. A thin insulating layer wicks moisture away from your skin while the shell repels water from above. If you wear cotton or heavy sweatshirts under your shell, you lose most of its benefit. Our lightweight insulation options and moisture-wicking base layers are built to work with shells for maximum performance.
Know your shell’s limits. A restored shell performs like new, but it’s still one layer. In extended heavy rain, every jacket can eventually transmit some moisture through the fabric face if the coating isn’t quite perfect. Pair your shell with good layering strategy and accept that in truly extreme conditions, you manage moisture through layering and taking breaks to let things dry.
Store your shell correctly at your destination. Hang it to dry fully if it gets wet. Don’t stuff it into a compression sack when it’s still damp. Give it time to breathe, and it’ll stay ready for the next push.
Consider our XPLR Pass loyalty program if you’re a regular user of technical gear. Members get priority restoration turnaround, exclusive discounts on repair services, and first access to new technical products. If you’re investing in quality shells and keeping them in rotation, XPLR Pass pays for itself quickly.
Finally, remember that restoration extends life but isn’t permanent. Plan for regular maintenance. A shell that gets proper care and occasional professional restoration can stay with you for a decade or more. That’s better for your wallet and better for the environment than cycling through new jackets every few years.
What to do next: Schedule your restoration assessment today. We’ll test your shell thoroughly, give you an honest appraisal of what’s repairable, and get it back to you ready for miles ahead.
Ready for your next adventure? Gear up with apparel and equipment built for the wild. Explore the collection now.
Frequently Asked Questions (FAQ)
How often should I have my shell jacket’s seams inspected for waterproofing issues?
We recommend having your technical shell professionally inspected annually if you use it regularly in wet conditions, or every two years for occasional use. However, if you notice water seeping through seams during storms or see visible wear around the stitching, bring it in for testing right away rather than waiting for your scheduled check. Our seam integrity testing can pinpoint exactly where water breaches are occurring before they become major problems.
What’s the difference between re-sealing and full restoration for a compromised rainwear shell?
Re-sealing is our targeted fix when specific seams have failed, where we apply fresh waterproof tape and sealant to those areas to restore performance. Full restoration is a more comprehensive process we use when your shell has multiple compromised seams or general wear patterns, involving deep cleaning, seam inspection throughout the entire jacket, and reinforcement where needed. The choice depends on what our testing reveals about your jacket’s condition.
Can I restore the waterproofing on my shell at home, or do I need to bring it to you?
While we provide guidance on preventative care like gentle washing and drying, restoring seam integrity really requires our specialized equipment and testing methods to ensure lasting results. Our restoration process involves pressurized water testing and precision seam sealing that’s difficult to replicate without professional tools, so we recommend letting us handle the restoration work to get your gear back to peak performance.
Leave a Reply