Table of Contents
- When Your Gear Fails in the Field: Why Quick Fixes Matter
- Essential Repair Kit Items We Recommend Carrying
- Patching Tears and Holes in Our Technical Fabrics
- Sealing Seams and Waterproof Coatings on the Trail
- Fixing Broken Zippers and Fasteners in Remote Locations
- Reinforcing Backpack Straps and Load-Bearing Components
- Temporary Boot and Footwear Solutions for Continued Hiking
- Weather-Resistant Wrapping and Protective Techniques
- Preventing Further Damage During Your Emergency Repairs
- Our Durable Gear Design Minimizes Field Emergencies
- Upgrading to Our Next-Generation Repair-Resistant Materials
- Frequently Asked Questions (FAQ)
When Your Gear Fails in the Field: Why Quick Fixes Matter
You’re eight miles into a backcountry push when you hear the unmistakable sound of fabric tearing. A seam splits on your jacket. Water starts seeping through within minutes. In that moment, you need a solution that works now, not a plan to get home and sew it properly.
We’ve designed our gear to withstand incredible punishment, but we also know that the unexpected happens on every expedition. A sharp rock, a branch catching your pack, a worn zipper finally giving up after seasons of use. The difference between turning back and pushing forward often comes down to having the right repair knowledge and tools on hand.
Emergency field repairs aren’t about permanent fixes. They’re about buying time, staying dry, and protecting the integrity of your gear long enough to reach your destination safely. A temporary patch applied correctly can mean the difference between a mild inconvenience and a dangerous situation. We’ve learned this through thousands of field reports from athletes and explorers who trust us with their adventures.
What to do next: Before your next trip, assess which of your gear pieces are most vulnerable. An older jacket? Well-loved boots? That backpack you’ve carried through multiple seasons? Those are your repair priorities.
Essential Repair Kit Items We Recommend Carrying
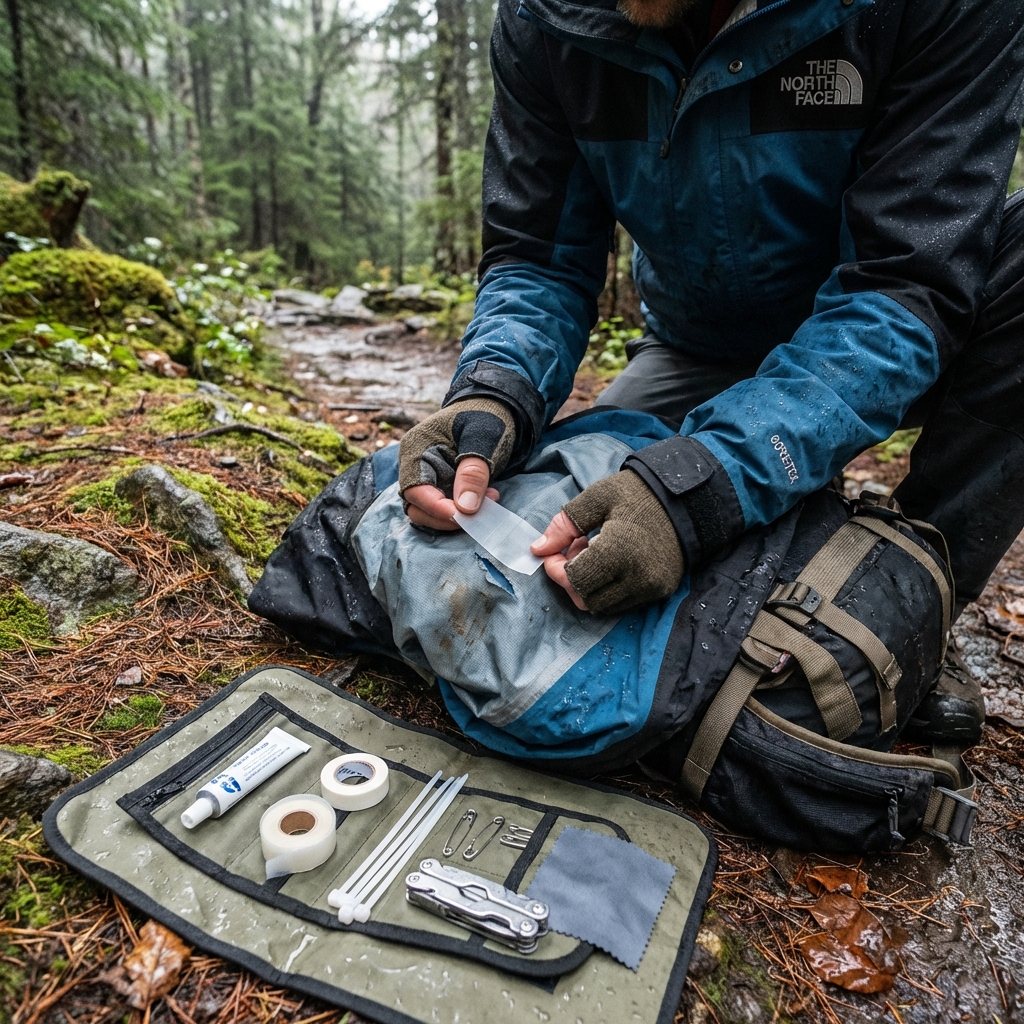
A field repair kit doesn’t need to be heavy or complicated. We recommend thinking of it in three categories: patching, sealing, and securing. Together, they weigh less than a granola bar but can save your trip.
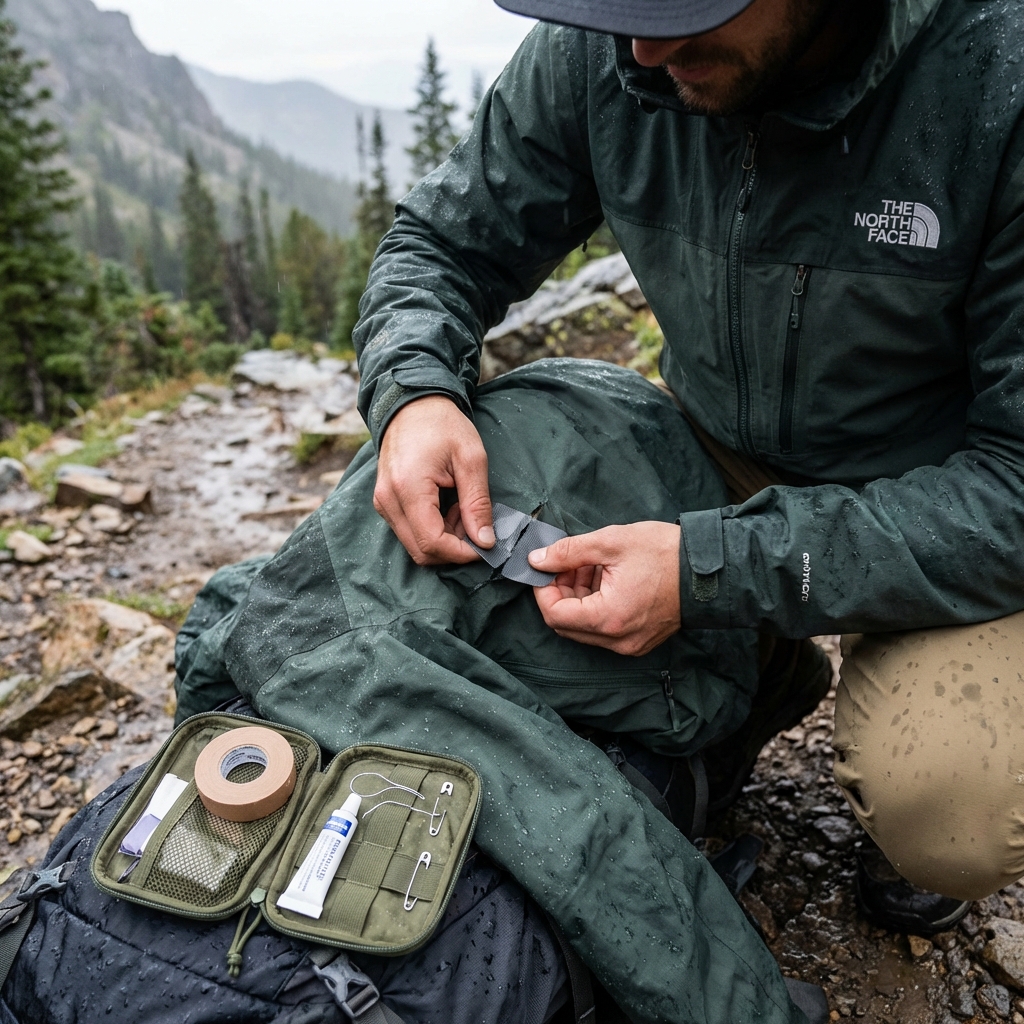
Start with adhesive-backed repair patches designed specifically for technical fabrics. Look for patches that work on both nylon and polyester without requiring heat application. A small square of Seam Grip or similar flexible fabric glue is essential; it bonds instantly without a press or iron. Add a few pieces of waterproof tape (the kind climbers use for blister prevention works well on fabric too). For seams, carry a small tube of waterproof silicone sealant that cures without UV light.
On the securing side, include several spare zipper sliders sized to match your gear. A small roll of duct tape wrapped around a pencil saves space. Pack 2-3 heavy-duty sewing needles and at least 20 feet of heavy-duty thread in a color that matches your most-used jacket. A thin wire or paracord serves double duty for fastening and emergency repairs. Finally, carry a small pair of scissors or a knife sharp enough to cut fabric cleanly.
Many of our customers ask us what we actually carry. Honestly, we keep it minimal: adhesive patches, Seam Grip, waterproof tape, spare zipper sliders, needle and thread, duct tape, and paracord. That’s it. Everything fits in a ziplock bag the size of your hand.
What to do next: Assemble your kit this week and test each item at home. Practice applying a patch to scrap fabric so you know how it feels when it’s actually working.
Patching Tears and Holes in Our Technical Fabrics
A clean tear in a jacket or pack is often easier to repair than a ragged hole. The key is understanding what you’re working with. Most of our technical outerwear uses nylon or polyester with a durable water repellent finish. Patches adhere best when you’ve cleaned the area thoroughly and dried it completely.
Start by assessing the tear. If it’s small (under an inch), an adhesive-backed patch applied to both sides usually holds. If it’s larger or involves a seam, you need a two-step approach. First, use Seam Grip or similar fabric adhesive to close the tear as tightly as possible. Hold it together for the time specified on the product (usually 30 seconds to a minute). Then reinforce with patches on both the inside and outside.
For our shell jackets and weather-resistant gear, apply the patch to the inside first if possible. This preserves the water-repellent finish on the exterior. Press firmly for at least 30 seconds. If you’re in wet conditions, find any sheltered spot, even under a rock overhang, and let the adhesive set for a few minutes before moving on.
Holes are trickier because there’s no material to bond together. Your patch becomes the material. We recommend using a patch that’s at least one inch larger than the hole on all sides. Again, clean, dry, and press. If the hole is in a load-bearing area (like a backpack pocket or a section that touches your body), reinforce with a second patch on the opposite side.
What to do next: Before your trip, identify any existing damage on your gear and practice patching it at home. This teaches you how the materials respond when you’re calm and dry.
Sealing Seams and Waterproof Coatings on the Trail
Seams are where water loves to find its way in. We seal every seam in our premium jackets from the factory, but field stress, UV exposure, and hundreds of miles of movement can break down that seal. A weeping seam often looks fine until you’re getting soaked.
To repair a leaking seam in the field, you need waterproof sealant that doesn’t require heat or special equipment. Silicone-based products designed for outdoor gear work best. Clean the seam with a dry cloth or bandana. Apply a thin, consistent bead of sealant along the entire seam, working on the inside if possible. Use your finger or a small stick to work it into the seam. The key is consistency; an uneven application leaves gaps.
This repair needs time to cure properly. If you can wait 20-30 minutes, even better. If not, keep moving but be mindful of that seam until you can stop and let it set. Silicone will be tacky for hours but does provide water resistance even while curing.
The water-repellent finish on the outer shell can also degrade. If you notice water beading up less than it used to, the DWR (durable water repellent) coating is wearing down. In the field, this is harder to address, but you can apply a thin layer of waterproof wax or specialized DWR refresh product to critical areas. Let it dry completely before packing.
What to do next: Inspect your current gear for seam condition. Run your finger along seams on your jacket and pack. If you see missing sealant or dark spots indicating moisture penetration, this is your first repair priority before the next trip.
Fixing Broken Zippers and Fasteners in Remote Locations
Few things are more frustrating than a zipper that won’t budge when you need to access your gear or seal yourself in against the weather. Most zipper failures fall into one of three categories: stuck, misaligned, or completely separated.
A stuck zipper often just needs lubrication. In the field, graphite from a pencil works surprisingly well. Run the pencil tip lightly along both sides of the zipper teeth, then work the slider gently back and forth. Don’t force it. Graphite is dry, so it won’t trap moisture or attract dirt like oil would. If you have a dry bar of soap, that works too.
Misaligned zippers happen when one side of the track rides up over the other. Stop immediately and gently tap the slider back into position using a rock or the heel of your boot. Don’t pull hard. Work it back and forth slowly until it catches properly. Once it’s tracking correctly, the pencil lubricant trick prevents it from jamming again.
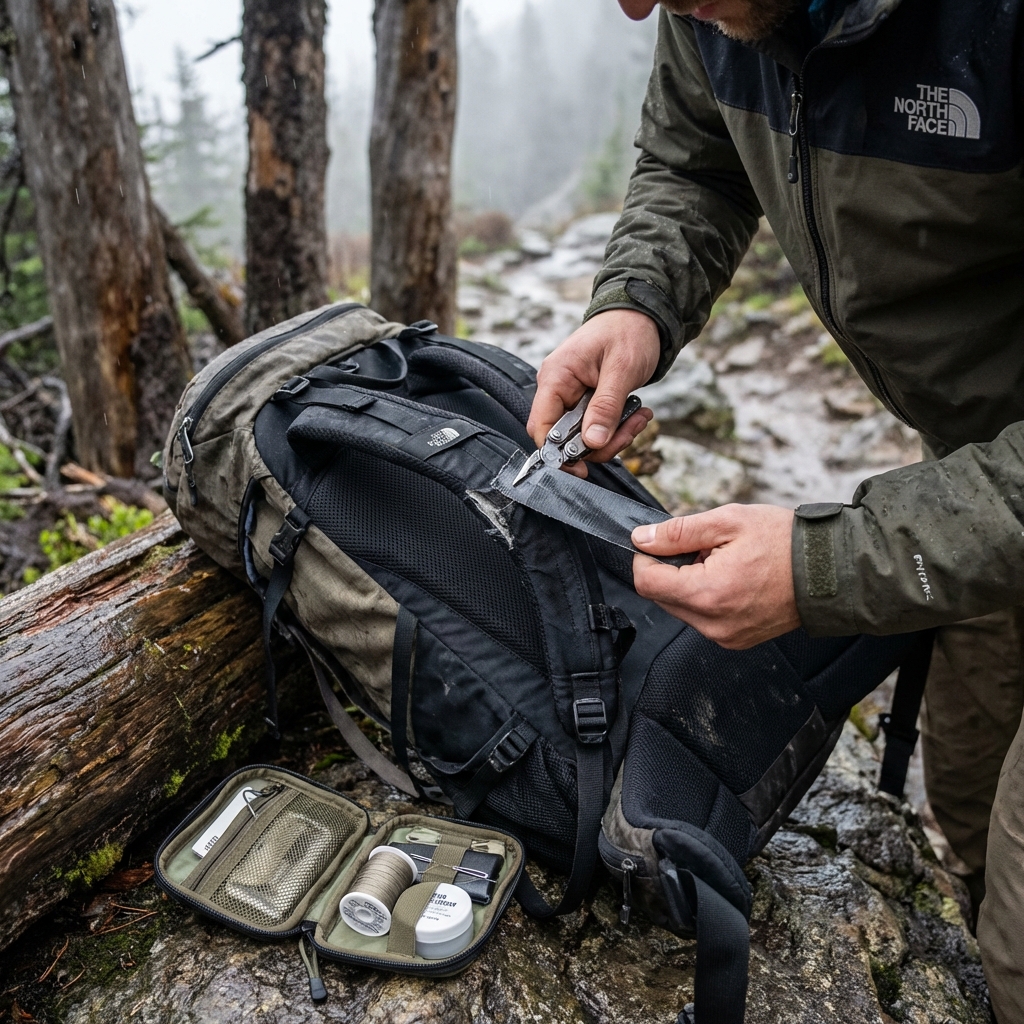
A completely broken slider is the hardest problem. This is where spare zipper sliders matter. If you know the size of your zipper (usually stamped on the slider), you can remove the broken one by carefully cutting a few stitches and sliding it off the track. Install the replacement the same way, then sew the stitches back or use thread and a needle to create a simple lock stitch. This isn’t elegant, but it works until you can replace the zipper properly.
Many modern zippers on our gear are two-way sliders, meaning you can separate them completely. If one slider fails, you can sometimes remove it and use the other. For three-season use, one slider is often enough, though it’s less convenient.
What to do next: Check every zipper on your pack and jacket right now. Open and close each one several times. If any stick, misalign, or feel rough, treat them to the pencil graphite method before your next adventure.
Reinforcing Backpack Straps and Load-Bearing Components
Backpack straps carry enormous stress, especially on multi-day trips. A strap failure can mean leaving gear behind or forcing an early exit. The good news: strap damage is often preventable and repairable.
Fraying edges are the earliest sign of trouble. Use stitching or waterproof tape to seal the edges before they progress. If you’re carrying heavy loads, wrap waterproof tape around the base of each strap where it attaches to the pack. This distributes stress and prevents the attachment point from tearing.
If a strap actually tears or separates, you need to reattach it. Using strong needle and thread (or paracord if necessary), create a simple cross-stitch pattern over the tear, going through both the strap and the pack material. This mimics how industrial stitching works. Make your stitches close together, maybe a quarter inch apart, and go over the area at least twice. It’s tedious but effective.
For our Summit AMK 55 Backpack and similar designs, the strap attachment uses reinforced webbing. If that’s damaged, you’re basically sewing through multiple layers. A longer, thicker needle helps. Go slow and create a pattern that distributes the load.
Load-bearing seams (the ones connecting the main bag body to the base) need the same logic. If you see a small separation, seal it immediately with Seam Grip and reinforce with stitching once it cures. Waiting allows the tear to propagate.
What to do next: Before loading your pack for a trip, visually inspect every strap attachment and load-bearing seam. Give each strap a firm tug to check for movement or flex you shouldn’t see.
Temporary Boot and Footwear Solutions for Continued Hiking
Boot failures are among the most serious field emergencies because your feet are non-negotiable. A small problem can become a serious injury if it turns into blisters or worse. Most boot emergencies involve sole separation, blister prevention, or lacing system failure.
Sole separation from the upper happens gradually but accelerates fast once it starts. In the field, you can stabilize this with strong tape wrapped around the entire boot, focusing on the separation area. Use overlapping wraps from the heel to the toe. This prevents the sole from flexing further and buying time until replacement. It’s not a permanent fix, but many explorers have hiked dozens of miles on taped boots.
For blister prevention and cushioning, moleskin or waterproof blister tape applied to hot spots can mean the difference between comfortable hiking and painful limping. Apply it early, as soon as you feel pressure or rubbing, not after blisters form. Clean and dry the area first.
Lacing system failures are often overlooked until they become serious. If eyelets crack or laces break, paracord works as an emergency replacement. Threading paracord is slower than laces, but it provides the same tension and support. Some hikers even prefer paracord because it’s more durable and less likely to come untied.
Our Summit Series Verto Boots use reinforced eyelets specifically to prevent this, but all boots benefit from careful inspection before a trip.
What to do next: Before your next hike, practice lacing your boots with paracord. Carry extra paracord and practice applying blister prevention tape to problem areas on your feet.
Weather-Resistant Wrapping and Protective Techniques
Sometimes the best repair is prevention. Once a tear or seam failure is sealed, protecting that repair from further weather stress is critical.
Waterproof tape becomes your best friend here. Wrap the repaired area completely, overlapping each layer by half an inch. This creates a water barrier and also reinforces the fabric physically. Waterproof tape is temporary, but it can last for weeks if applied correctly and the underlying repair is sound.
For patches that have cured, a secondary layer of tape over the top edge seals the patch margin and prevents water from sneaking underneath. This is especially important on seams or high-stress areas.
Plastic wrapping offers protection for gear you need to keep dry inside your pack. A simple waterproof dry bag around your sleeping bag or electronics provides insurance. But for active repairs on your body, wrapping should be minimal and secure. Loose plastic creates noise and friction; tight wrapping stays in place and looks neater.
In heavy rain, you might also wrap critical seams or patches with your rain cover or a plastic sheet before exposing them to the worst weather. This gives the repair maximum protection during vulnerable early hours.
What to do next: When you apply a field repair, plan to wrap it with tape or plastic. This adds 30 seconds but significantly extends the longevity of your fix.
Preventing Further Damage During Your Emergency Repairs
The moment you identify a problem, your job is twofold: fix it and prevent it from getting worse while you work.
Moisture is the enemy during repairs. Find the driest spot you can, even if it’s just behind a large boulder or under low-hanging branches. Let your gear air dry for 10-15 minutes before applying patches or sealant. Moisture prevents adhesives from bonding properly, making your repair fail faster.
Dirt and debris also compromise repairs. Wipe the area with a clean cloth or your bandana before touching it with patches or sealant. If the fabric is muddy, use your water bottle to rinse it, then dry again. This extra minute saves your repair.
Avoid moving or loading the repaired area while adhesive cures. If you patch a backpack strap, don’t immediately pack the bag heavily and start hiking. Give it time. If you patch a jacket seam, don’t immediately hit heavy rain. This seems obvious, but in the field, urgency often wins over patience. Resist that urge.
Handle the repair gently during movement. A curing patch might be 80 percent strong within 20 minutes, but it’s not truly reliable for several hours. Adjust your hiking style to minimize stress on that spot. Avoid scrambling or technical terrain if possible. If your repair is on a shoulder strap, redistribute weight to your hip belt.
What to do next: When you apply a repair, mentally note the time and plan your next 30 minutes accordingly. Build in buffer time for adhesive to set.
Our Durable Gear Design Minimizes Field Emergencies
Here’s something we want to be clear about: the need for field repairs isn’t a sign of failure on our part. It’s reality. We build gear that lasts for years and handles serious abuse, but we also acknowledge that no material is indestructible.
What we’ve done is design gear to fail slowly, predictably, and in ways that are often repairable. Our stitching patterns are reinforced at stress points. Our seams are sealed from the factory. Our materials are chosen specifically for durability and repairability. We use zippers that are less likely to jam. We reinforce strap attachment points. These choices make repairs easier when they’re needed.
We’ve also engineered our technical fabrics to take patches well. The nylon and polyester we use bond predictably with standard adhesives. You’re not fighting against the material when you repair our gear.
Testing with athletes and explorers over decades has shown us where problems emerge first. We’ve incorporated that knowledge into every design revision. A patch that works easily on one jacket might be frustrating on another. We’ve made choices that favor your experience in the field.
This isn’t marketing speak. This is learned experience. We want you to succeed on the trail, and that means designing gear that can be repaired when necessary.
What to do next: Look at the details on your current gear. Notice the stitching patterns, the seam sealing, the attachment construction. This is where we’ve invested in durability and repairability.
Upgrading to Our Next-Generation Repair-Resistant Materials
As we look forward, we’re investing in new materials and construction methods that reduce the need for emergency repairs in the first place. Some of these innovations are already in our gear. Others are coming soon.
Self-healing fabrics are on the horizon. These materials use micro-capsules of healing agents that break open when fabric tears, allowing the material to partially seal itself. It’s not science fiction; it’s already being tested in specialized applications. We’re working toward making this accessible in our mainstream jackets and packs.
We’re also refining our adhesive seam-sealing process to create stronger, more durable bonds that resist the hours of movement and weather stress that currently cause failures. Newer sealing formulations cure faster and maintain flexibility longer.
Construction techniques matter too. We’re testing new stitching patterns that distribute stress more evenly across seams, reducing the concentration points where failures often start. Reinforced webbing at attachment points is becoming standard rather than premium.
Most excitingly, we’re developing materials that are easier to repair. Fabrics that bond more reliably with field-applicable adhesives, zippers that are more resistant to jamming, and wear-resistant surfaces that maintain their protective properties longer.
This evolution benefits everyone. It means fewer repairs needed, faster repairs when they are, and greater confidence in your gear far from help. We’re not trying to make gear that never fails. We’re making gear that fails less, repairs easier, and keeps you safe and dry on every adventure.
Carry your repair kit anyway. Accidents happen, and preparedness matters. But with each generation of our gear, you’ll find that preparation becomes insurance rather than necessity.
What to do next: Explore our latest technical innovations on our gear pages. Notice which jackets and packs feature our newest materials and construction methods. These represent the future of durable, repairable outdoor gear, and they’re available now.
Ready for your next adventure? Gear up with apparel and equipment built for the wild. Explore the collection now.
Frequently Asked Questions (FAQ)
What should we pack in a field repair kit for emergencies?
We recommend carrying a compact repair kit with seam sealer, adhesive patches designed for our technical fabrics, a multi-tool with scissors, duct tape, and waterproof tape. Add a few safety pins, needle and thread, and zip ties to handle most common failures on the trail. We’ve found that keeping these essentials in a small pouch weighs almost nothing but can save your adventure when gear gets damaged far from home.
How do we temporarily waterproof gear until we can get professional repairs?
We suggest applying waterproof tape to sealed seams as an immediate fix, and wrapping vulnerable areas with our recommended weather-resistant tape for extra protection. For fabric tears, our adhesive patches work effectively when applied to clean, dry surfaces. These temporary solutions buy you time to get back to civilization where we can provide full repairs or replacement through our service team.
How can we prevent small gear issues from becoming major problems during repairs?
We encourage you to stop and address damage right away rather than pushing through, since continued use typically makes tears larger and lets water penetration worsen. When applying patches or seam sealer in the field, give each repair time to fully cure before putting gear back into heavy use. Our technical fabrics are designed to be durable, but combining smart field repairs with careful handling keeps your gear performing until you can get proper maintenance done.
Leave a Reply