Author: monica@rankgpt.com

  • Lightweight Puffers vs Traditional Winter Jackets: Our Sub-Zero Performance Comparison

    Lightweight Puffers vs Traditional Winter Jackets: Our Sub-Zero Performance Comparison

    Table of Contents

    The Cold Weather Gear Challenge We All Face

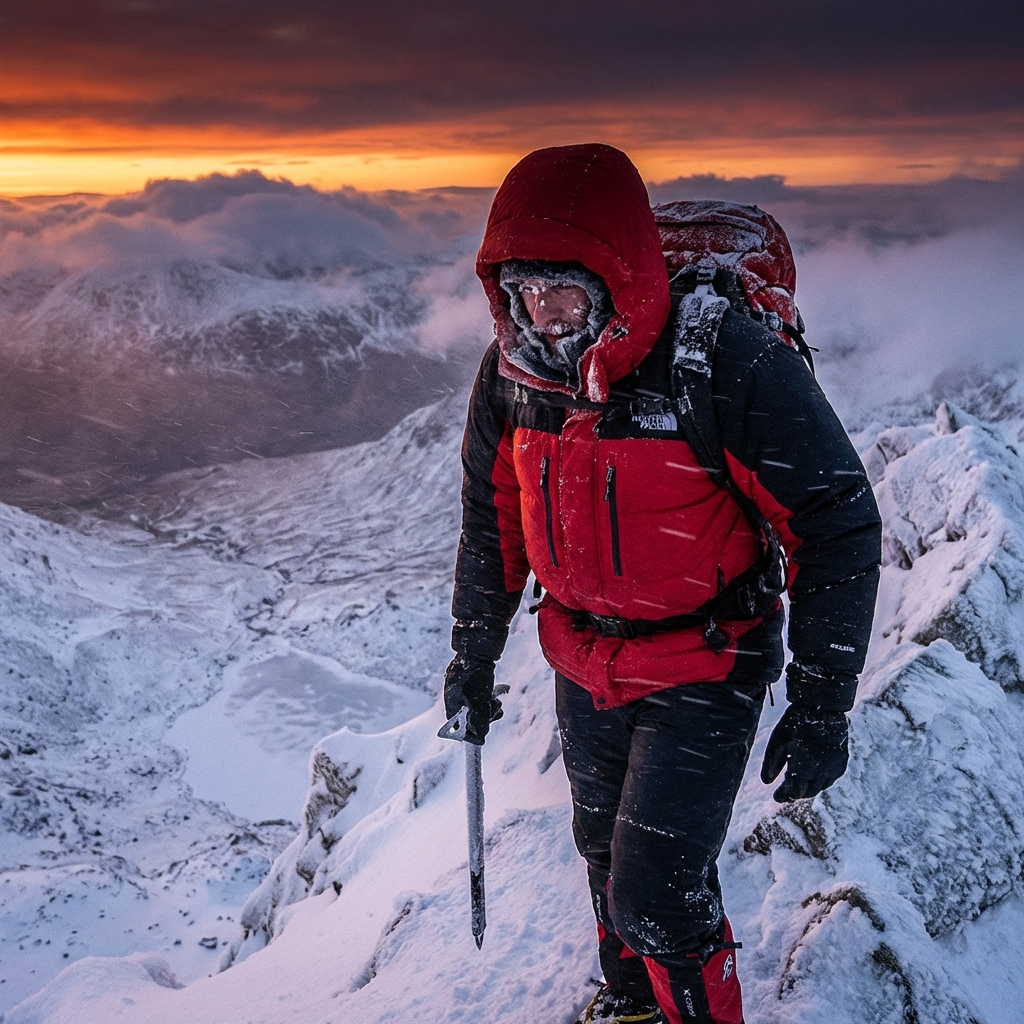
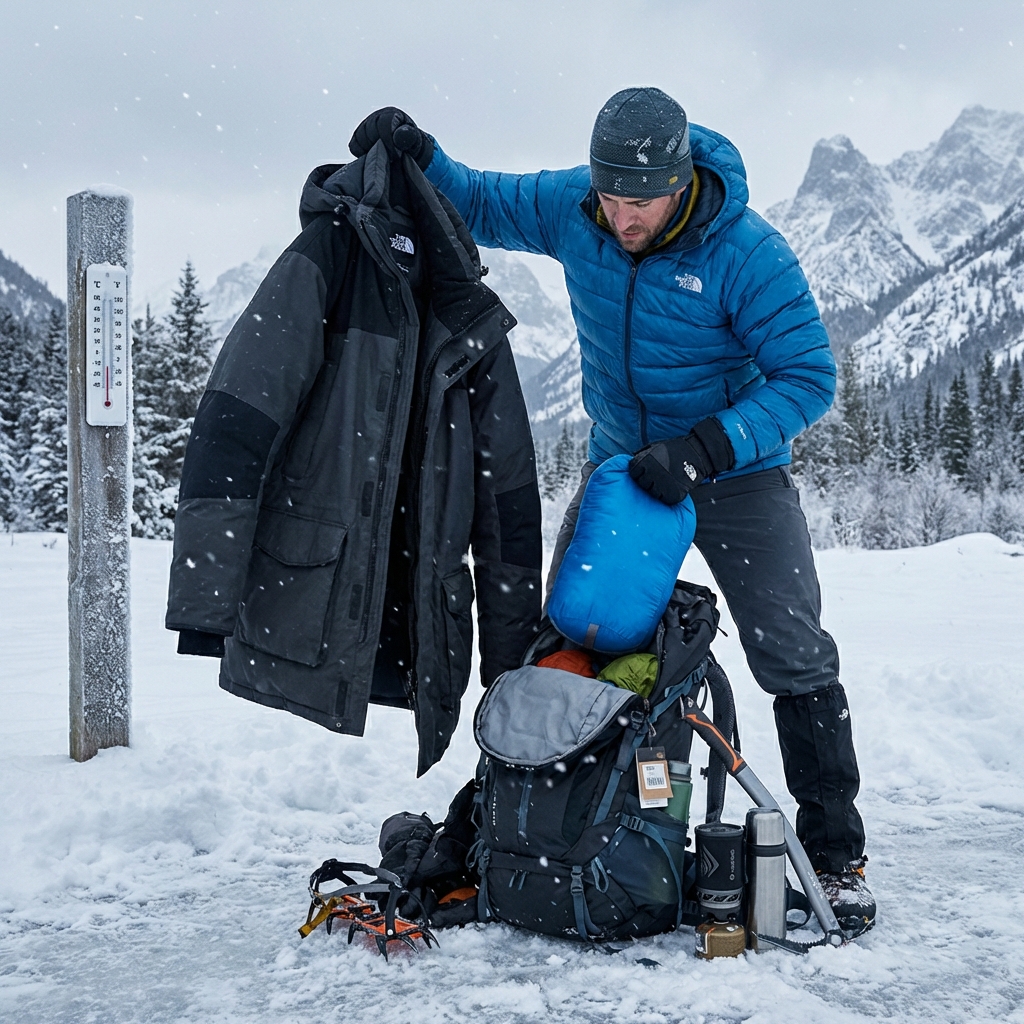
    You’re standing at the trailhead in December, facing temps that’ll dip below freezing before lunch. Your pack is already heavy. Adding a bulky winter coat means sacrificing space for other essentials: extra layers, a stove, fuel, or that emergency bivy. This is the tension every winter adventurer knows: you need serious insulation, but you can’t afford to haul deadweight.

    We’ve spent decades solving this exact problem. Lightweight packable puffers exist because we listened to explorers and alpine athletes who demanded warmth without the bulk. It’s not a luxury; it’s a practical necessity when you’re moving through variable conditions or carrying everything on your back.

    The choice between a traditional winter jacket and a modern lightweight puffer isn’t just about comfort. It’s about efficiency, confidence, and whether your gear works with you or against you on the mountain.

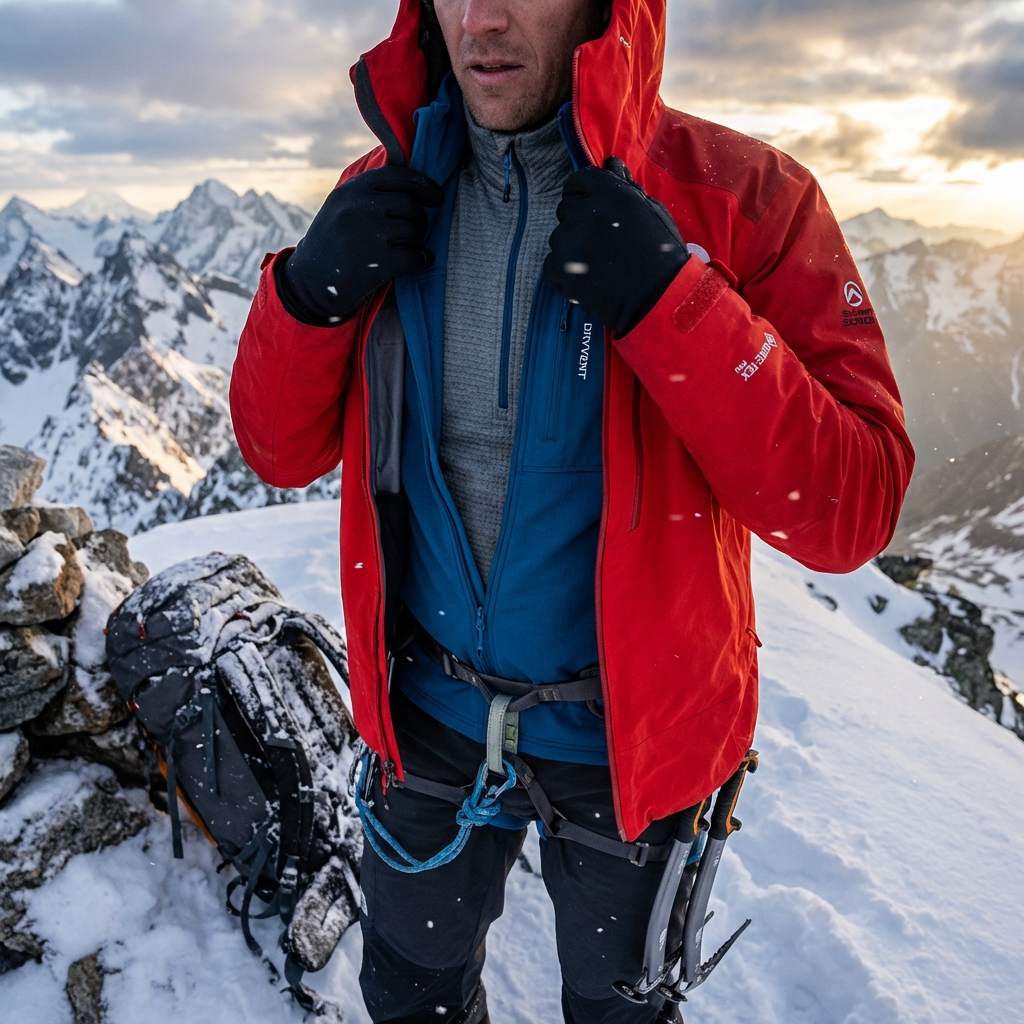
    Why Traditional Winter Jackets Fall Short

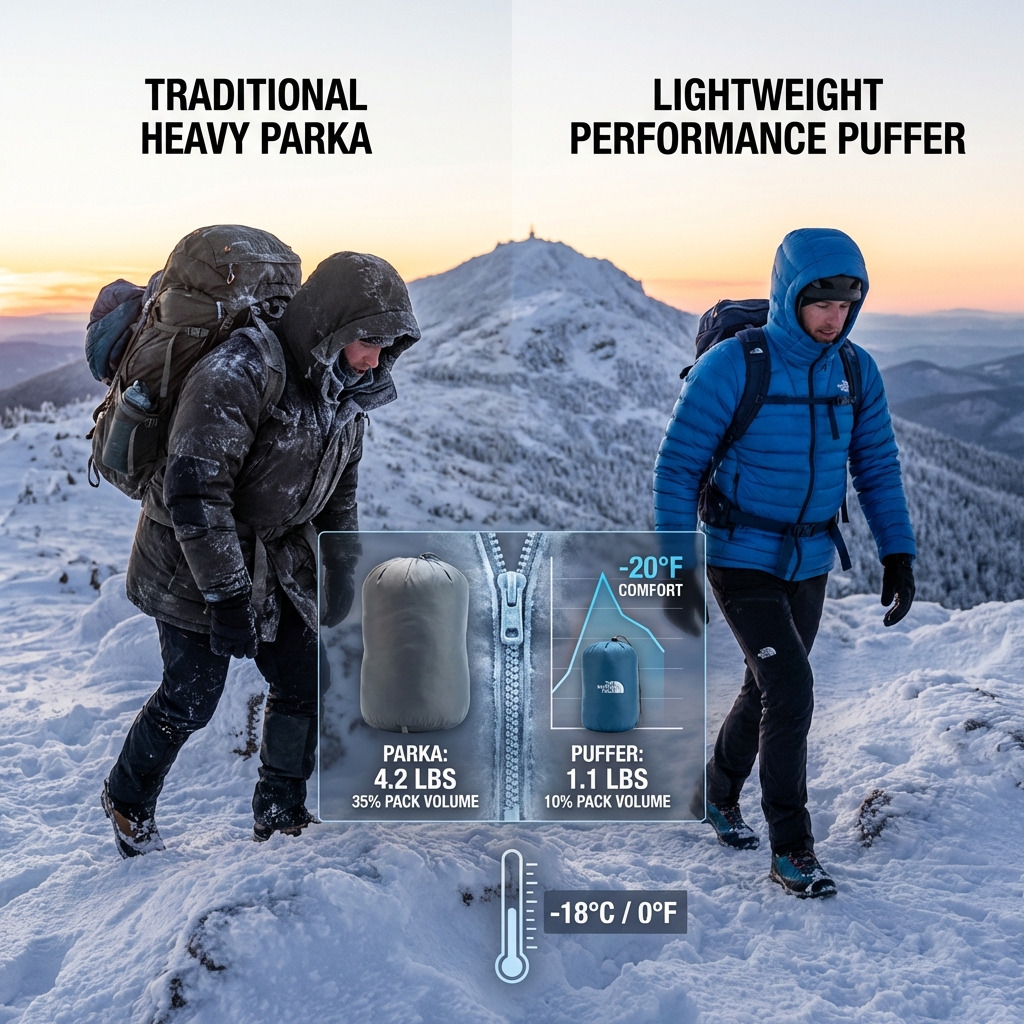
    Heavy insulated parkas have their place, but they’re not the answer for most winter adventures. A classic down or synthetic fill parka often weighs 3 to 5 pounds and compresses poorly, hogging precious pack space even when you’re not wearing it. That dead weight affects your pace, your endurance, and your overall efficiency on the trail.

    Temperature management becomes another issue. A traditional winter coat’s bulk and density mean you’re either overheating during movement or underdressed for static moments. There’s rarely a middle ground. The jacket doesn’t layer well either, forcing you into an all-or-nothing approach when conditions shift through the day.

    We also see durability concerns with older synthetic fills. They flatten, lose loft, and stop insulating after a season or two of regular use. Down parkas, while long-lasting, lose performance instantly when wet and require meticulous care and drying. Neither approach matches the needs of the modern explorer who demands reliability and low maintenance.

    How Our Lightweight Puffers Deliver Superior Performance

    Our lightweight puffers start with a different philosophy: maximum insulation per ounce, minimum packed volume. We use premium down, down-alternative synthetics, and hybrid constructions that trap warmth efficiently without the unnecessary bulk of a traditional cut.

    Take our Breithorn Hoodie. It delivers sub-zero protection in a jacket that weighs under two pounds and packs into something smaller than a water bottle. That’s not marketing shorthand; it’s engineered insulation density. We achieve it through thoughtful baffling patterns that prevent down shift, strategic panel placement, and shell fabrics that add minimal weight while providing wind and moisture resistance.

    Performance means your body stays warm while your workload stays manageable. Move hard and you’re not trapping heat in a heavy shell. Stop for a snack and you’ve still got enough loft to maintain core temperature. That flexibility is what separates a piece of gear you actually reach for from one gathering dust in your closet.

    Illustration 1
    Illustration 1

    Packability and Pack Weight: Where We Excel

    Here’s a concrete scenario: you’re planning a three-day winter traverse with summit plans and descent contingencies. Your pack capacity is fixed. Every ounce counts. A traditional heavy winter parka claims 2 to 3 percent of your total carry weight before you’ve added food, fuel, or climbing gear. Our lightweight puffers sit closer to 0.5 to 1 percent, freeing 5 to 10 pounds you can redirect toward redundancy and safety.

    Packed volume matters just as much. A traditional parka stuffed into a pack corner wastes usable space and creates awkward pressure points. Our puffers compress into a fist-sized bundle. Clip it to your belt loop or tuck it into a backpack pocket when you’re not wearing it. When conditions turn, you’re geared up in seconds without rearranging your entire load.

    This efficiency adds up across a day or a multi-day trip. Less strain on your legs, lower fatigue, better decision-making in cold conditions. The math is simple: lighter gear means you can move further, climb higher, and recover faster.

    Temperature Rating and Insulation Technology Breakdown

    We rate our puffers using comfort and limit ratings, not fairy tales. A lightweight puffer’s “comfort temperature” tells you the range where you’ll stay warm during moderate activity. The “limit temperature” is where it still provides survival insulation if you’re not moving.

    Our down puffers typically offer comfort ratings between minus 10 and minus 30 Fahrenheit, depending on the model and fit. Down delivers exceptional warmth-to-weight because each feather cluster creates tiny air pockets that trap heat. It’s nature’s insulation, refined. When we use premium 800+ fill-power down, you’re getting maximum performance from minimal material.

    Down alternatives solve the moisture problem. Modern synthetics hold insulating value even when damp, which matters in humid alpine environments where moisture creeps in despite your best layering. We engineer these fills to mimic down’s compressibility while adding weather resistance you can’t get with traditional down alone.

    Hybrid construction combines both. A synthetic face provides wind and splash protection; down insulation underneath handles core warmth. This approach lets us offer year-round versatility. Layer it under a shell in deep winter, wear it solo during shoulder seasons, and pack it for contingency on any trip where temperature swings are possible.

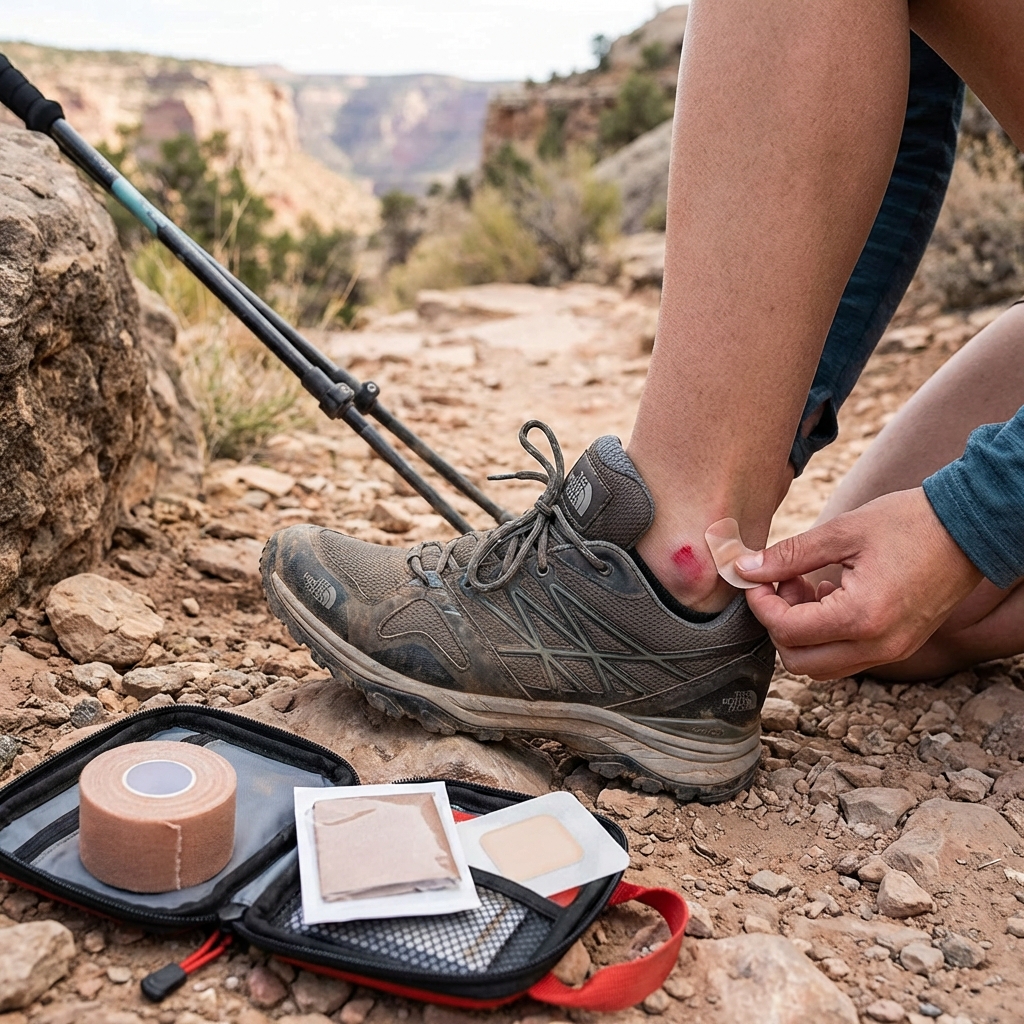
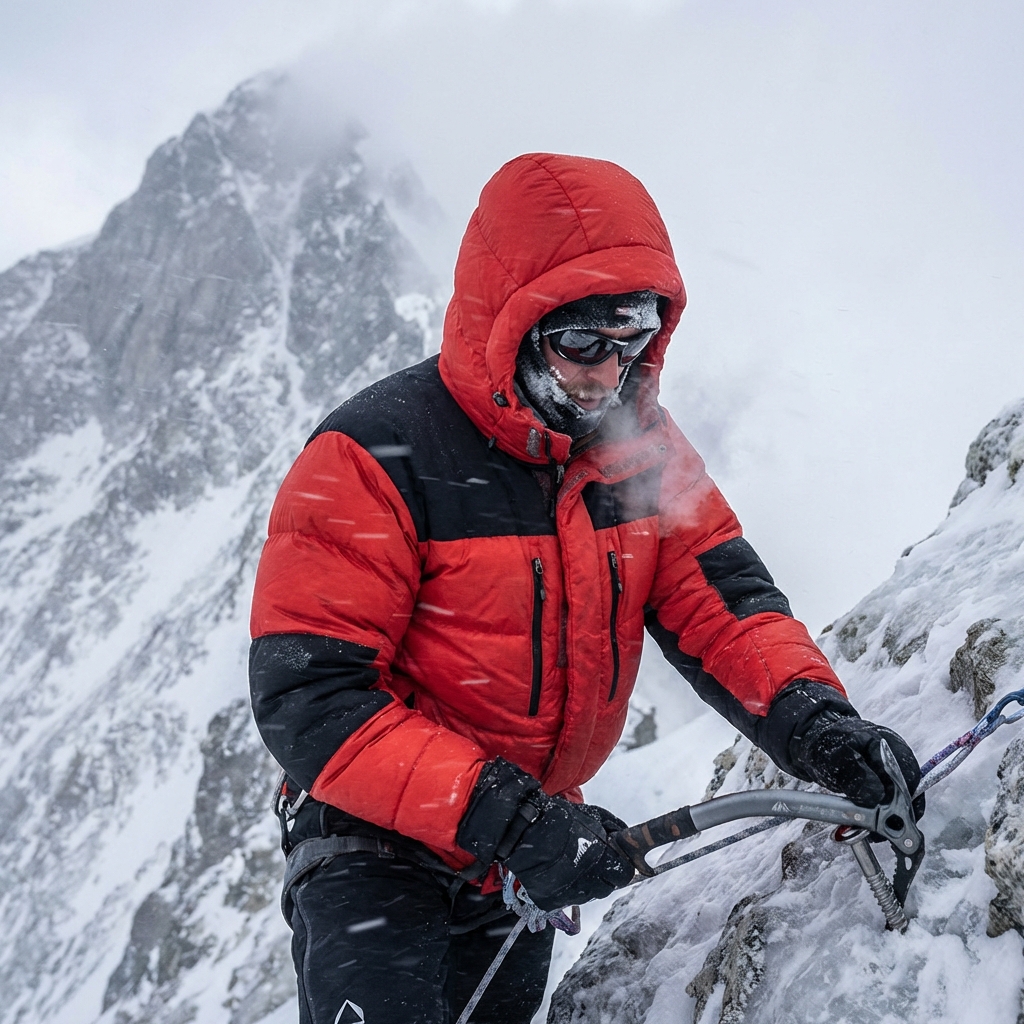
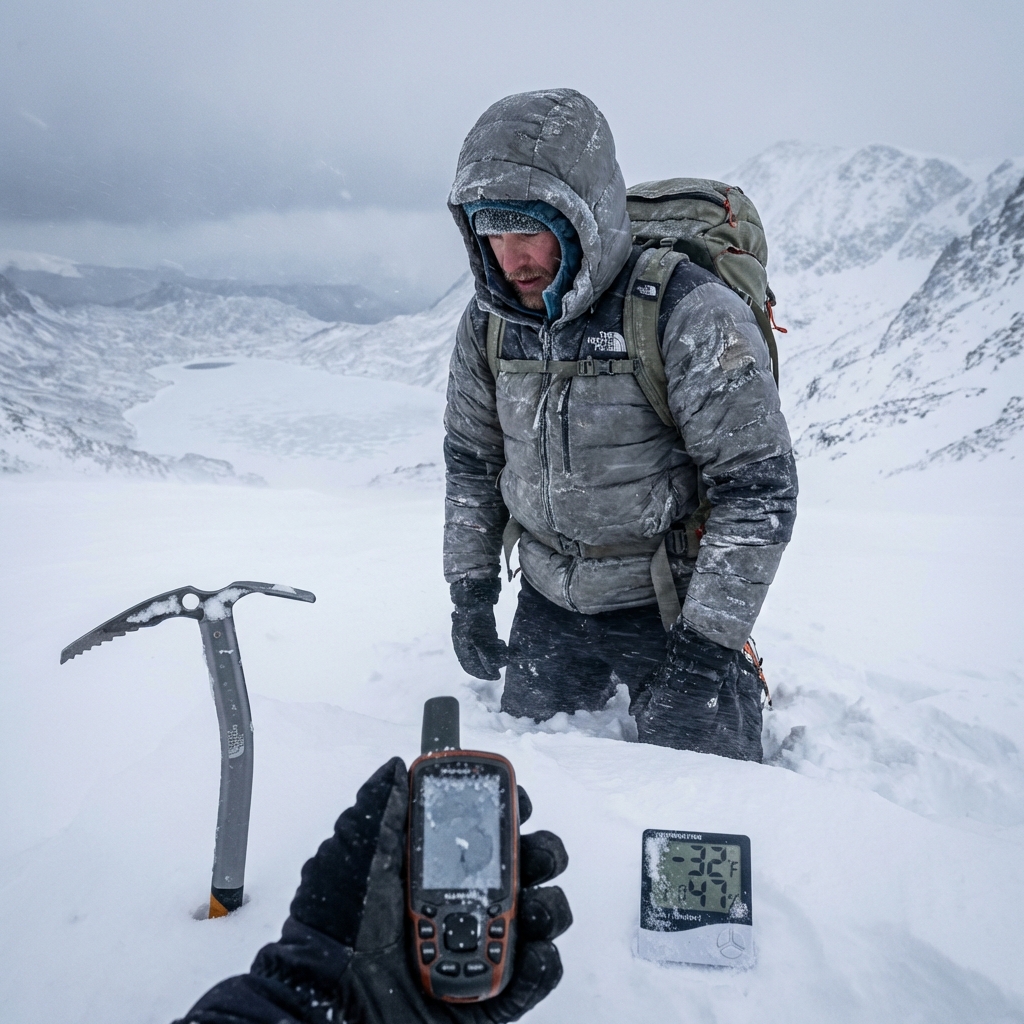
    Real-World Durability in Extreme Conditions

    Durability isn’t about how long a jacket sits unused in your closet. It’s about how it performs after fifty camps, a hundred miles of brush, and countless cycles of packing and unpacking. Our puffers are built for that kind of work.

    High-denier shell fabrics resist punctures and abrasion. Internal baffling keeps insulation in place even after years of compression and movement. Reinforced seams, especially around hoods, sleeves, and the hem, handle the stress points where jackets fail. We use quality zippers and hardware rated for cold temperatures, where plastic becomes brittle and inferior metal seizes.

    Field testing is non-negotiable. Our gear gets worn by alpinists climbing Denali, backcountry skiers pushing into November in the Rockies, and winter hikers on multi-week expeditions. When feedback comes back that a hood needs adjusting or a pocket needs repositioning, we iterate. That’s how gear improves between seasons.

    Your investment should last a decade of regular use, not just one winter. We design for that timeline, and it shows in the durability specs and warranty support we offer.

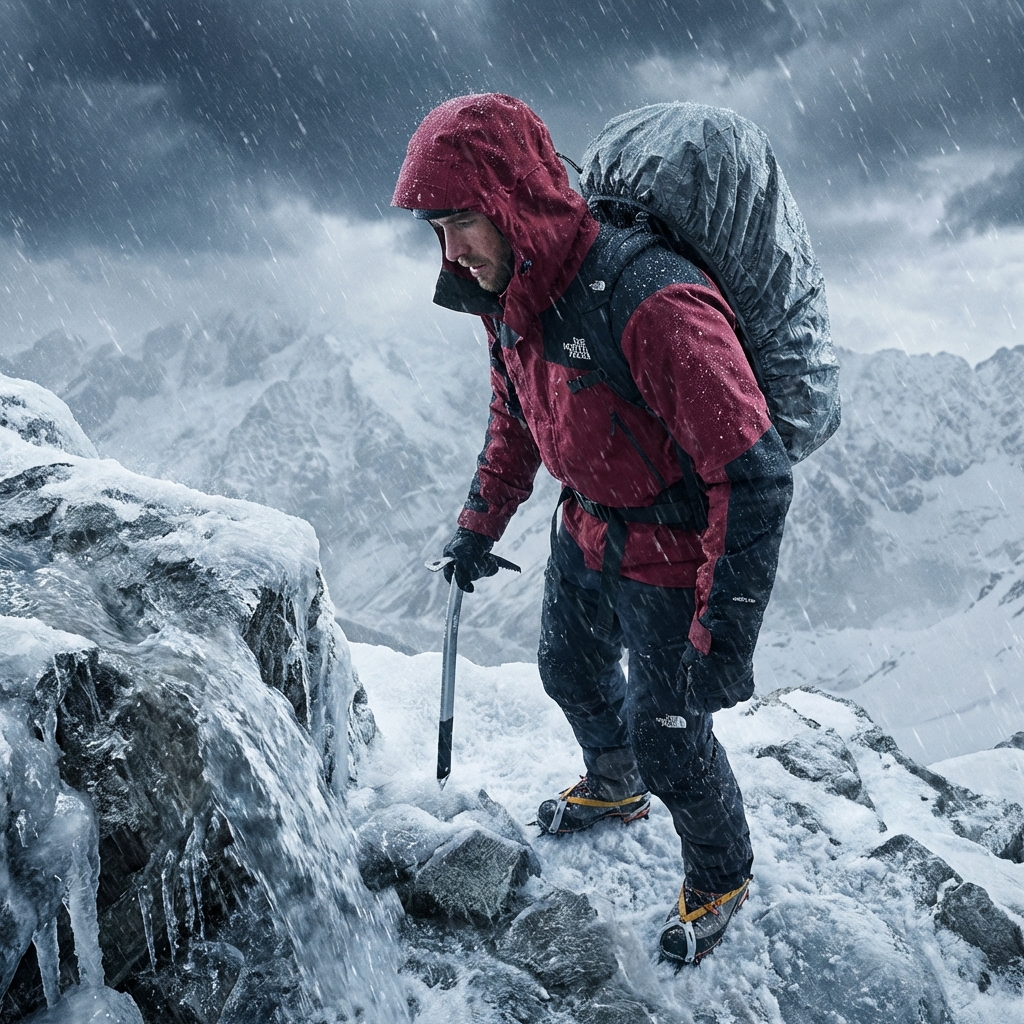
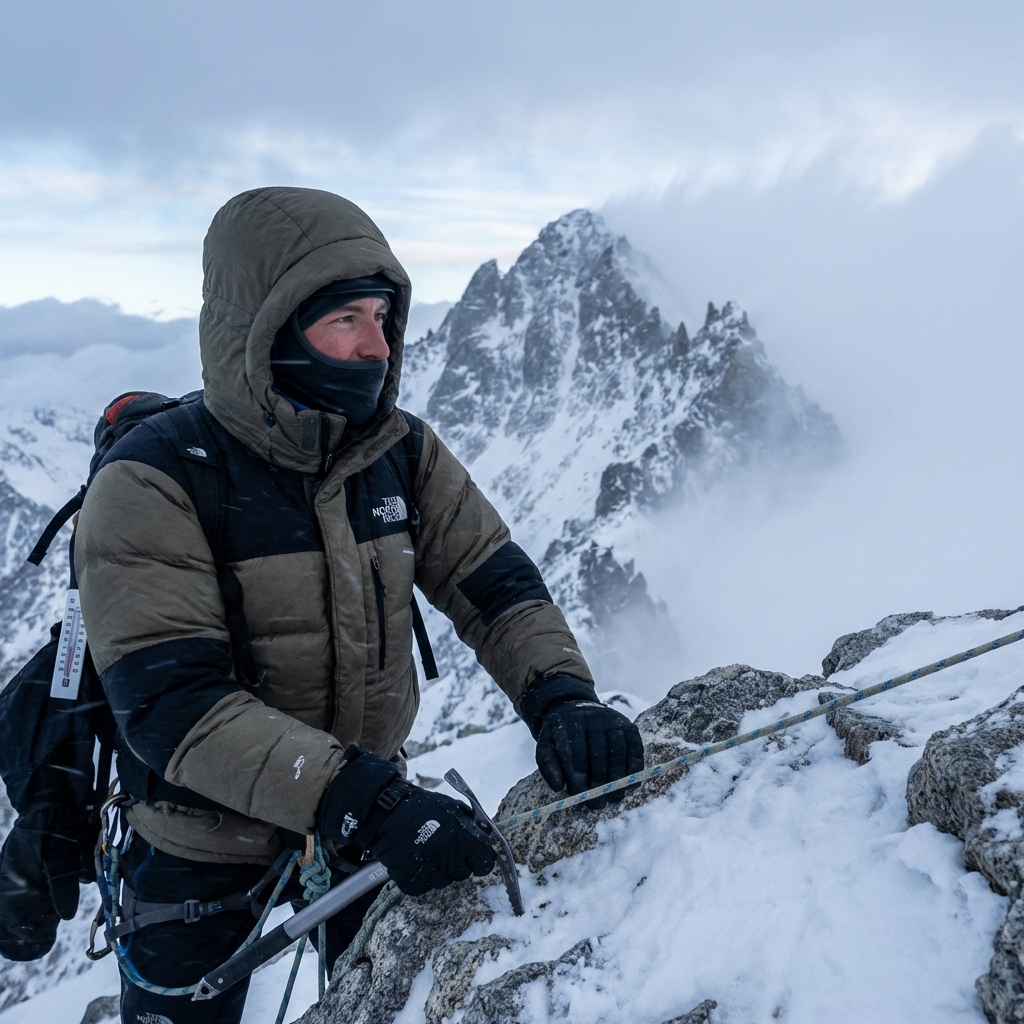
    Versatility Across Winter Activities

    Illustration 2
    Illustration 2

    A lightweight puffer isn’t a one-trick jacket. It’s your platform for layering across every winter pursuit you choose.

    Alpine climbers wear it under a hardshell when conditions demand full protection. Backcountry skiers layer it over a base and under a shell during climbs, then shed the shell for downhill speed. Winter hikers wear it solo on transitional days when the temperature hovers above freezing. Mountaineers moving through the summit zone keep it as their innermost insulation system, where it stays dry and effective even when outer layers absorb spindrift and ice.

    The key is the slim, athletic cut. We don’t add unnecessary padding or bulk. You move freely under other layers, and the jacket compresses to nothing when you pack it. You’re not fighting your gear or struggling with layering combinations. Everything works together.

    This versatility means you can own one or two puffers and apply them across three seasons and half a dozen activities, rather than buying specialized jackets for each pursuit.

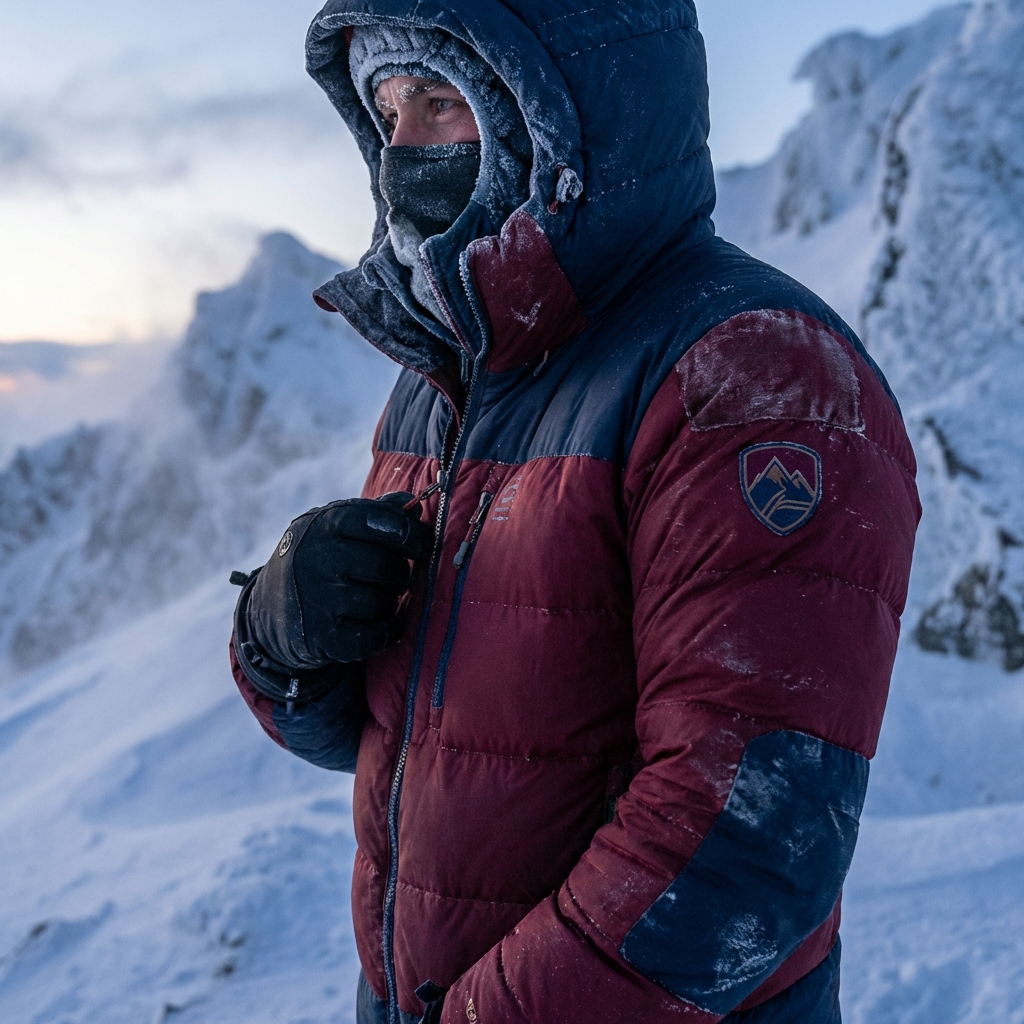
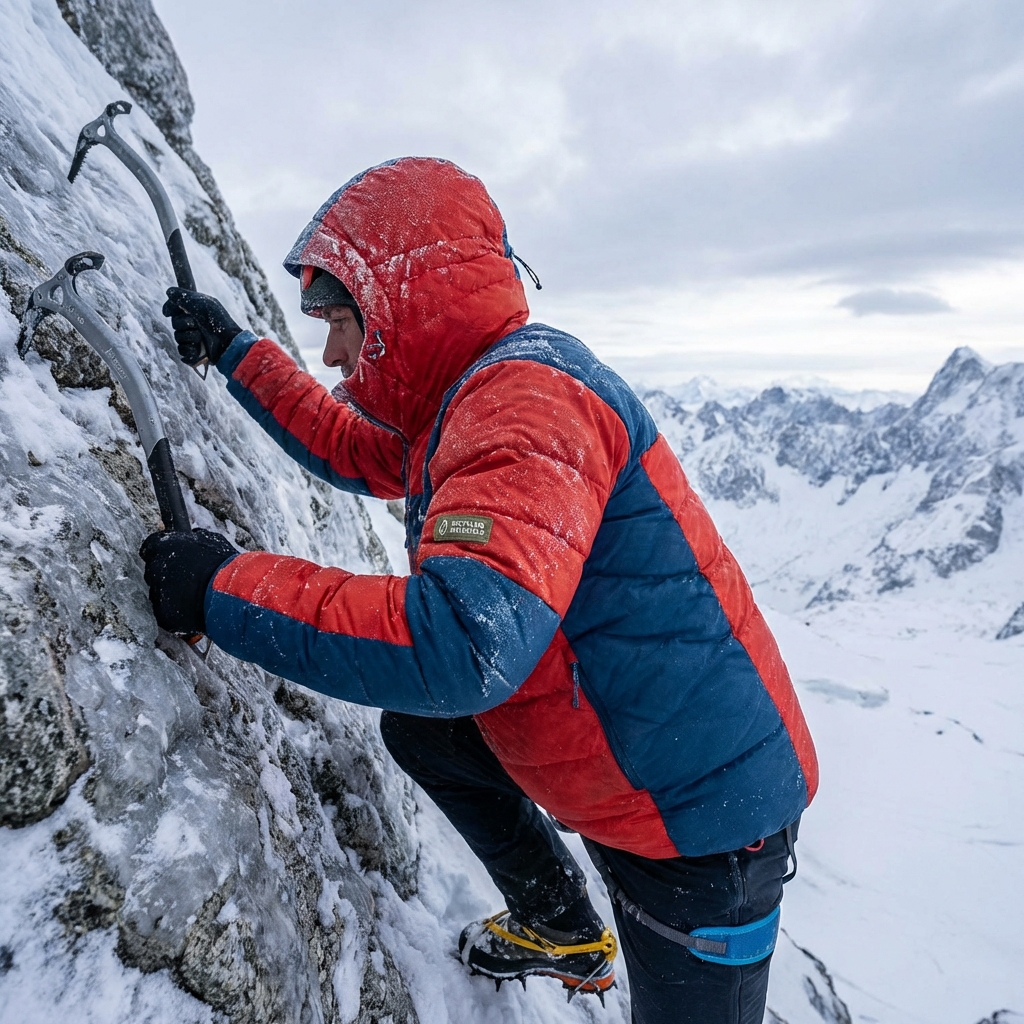
    Design Features That Set Our Puffers Apart

    We sweat the small details that matter on the trail. Hand pockets positioned to let you regulate warmth without fully unzipping. A hood designed to fit over a climbing helmet or beanie without bunching. Stretchy side panels that let you move and breathe during effort. Pit zips for emergency venting when you’re pushing hard. Hem drawcords that seal without restricting movement.

    Collar construction is a good example. A traditional winter parka has a heavy, stiff collar that doesn’t fit close to your neck and takes up pack space even when compressed. We engineered a collar that seals around your neck and can flip down and stow if you’re wearing it over a helmet. Sounds minor; it changes how the jacket functions in real conditions.

    We also think about maintenance. Our shells use durable water-repellent treatments that shed light moisture without the weight of fully waterproof membranes. Seams are taped where it matters: collar, hood, shoulder. The result is a jacket that stays dry when you need it without the bulk of a true hardshell or the complexity of a separate rain layer.

    Why Our XPLR Pass Members Choose Our Solution

    Our XPLR Pass loyalty program reflects our philosophy: we reward explorers who commit to getting outside. Members gain early access to new gear, exclusive colors, and special pricing on innovation like our latest lightweight puffer designs.

    More importantly, XPLR Pass members get a community perspective on gear performance. Fellow explorers share how they layer, what works in specific conditions, and how they’re solving the same problems you face. That peer feedback shapes our product decisions and helps you make smarter gear choices before you buy.

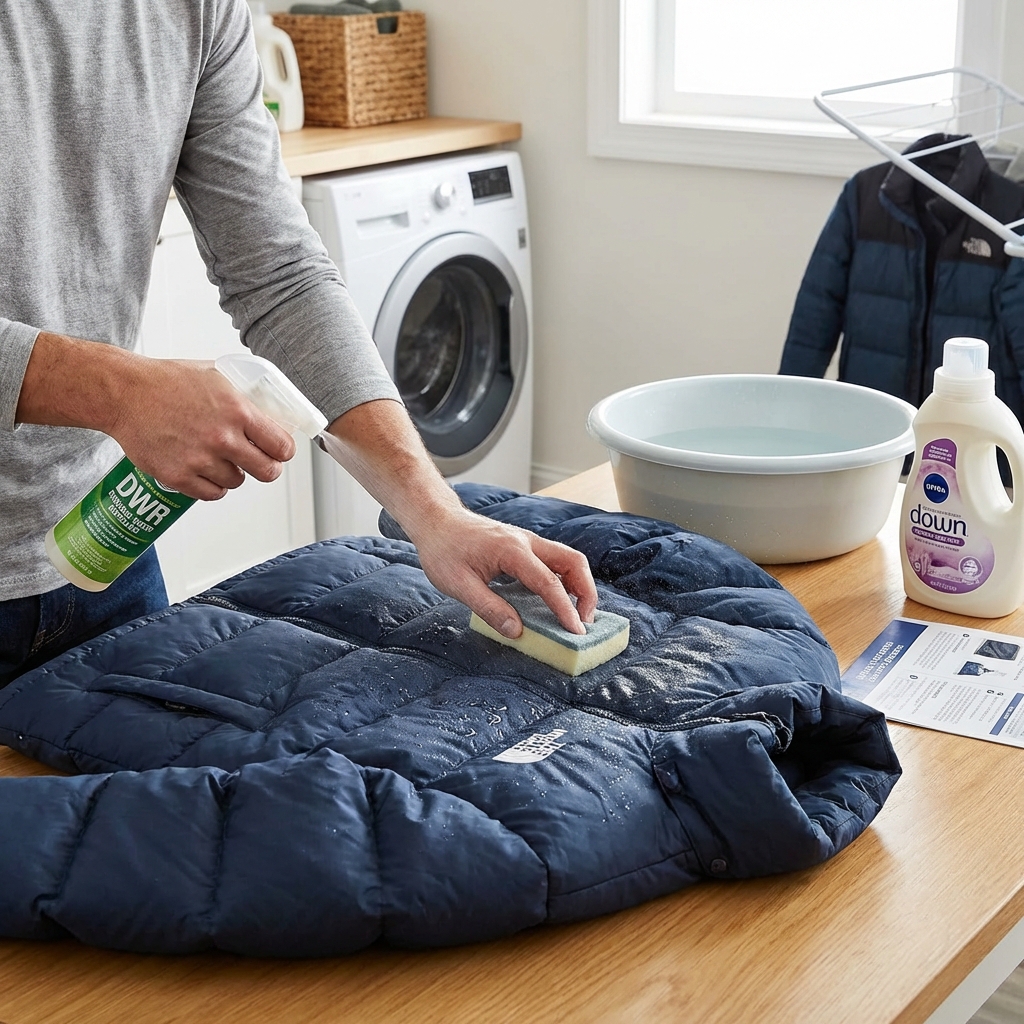
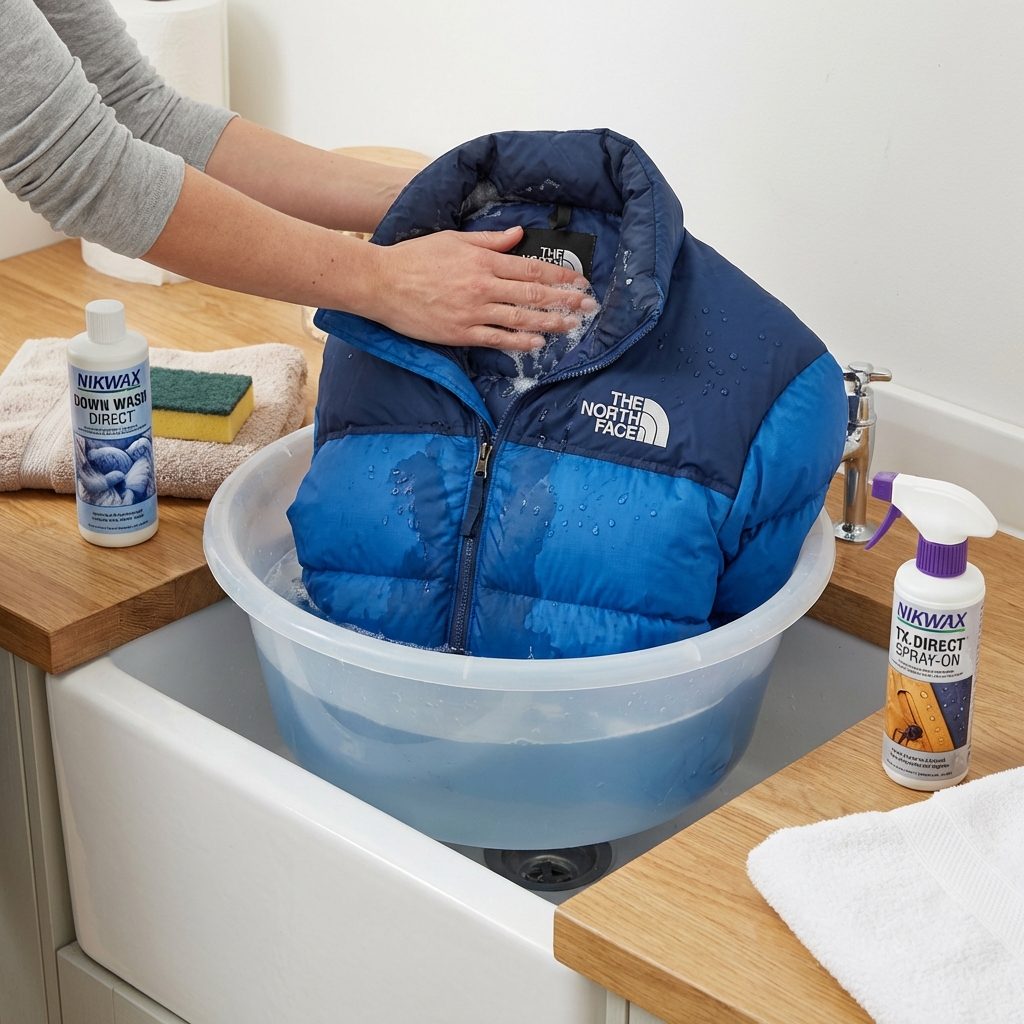
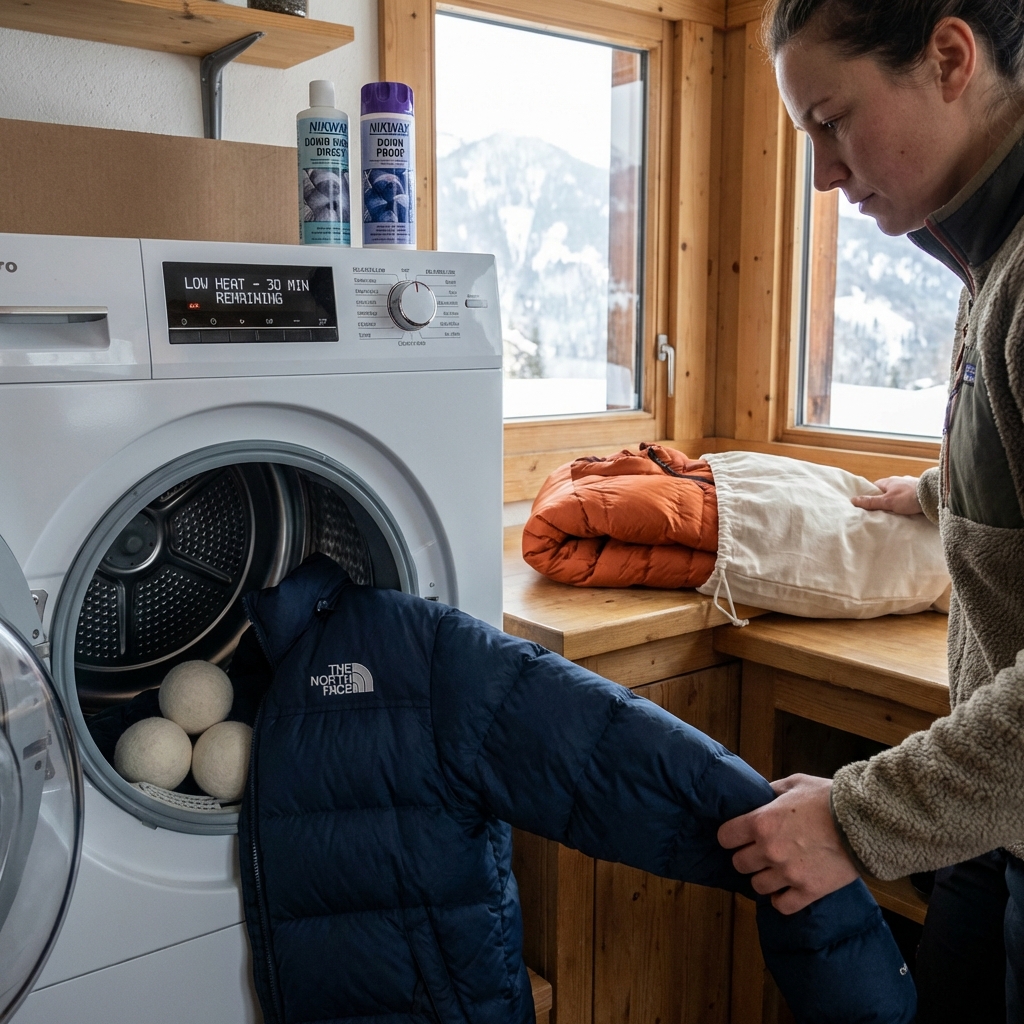
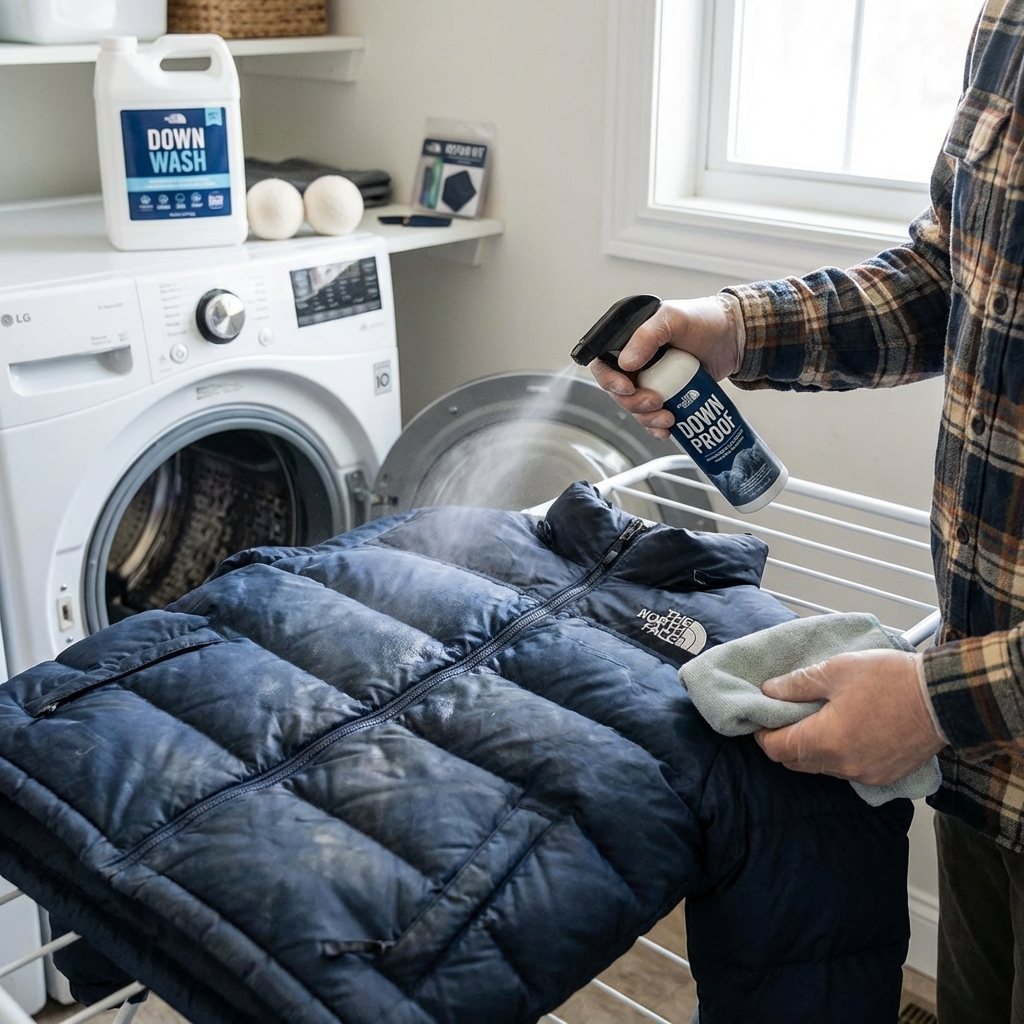
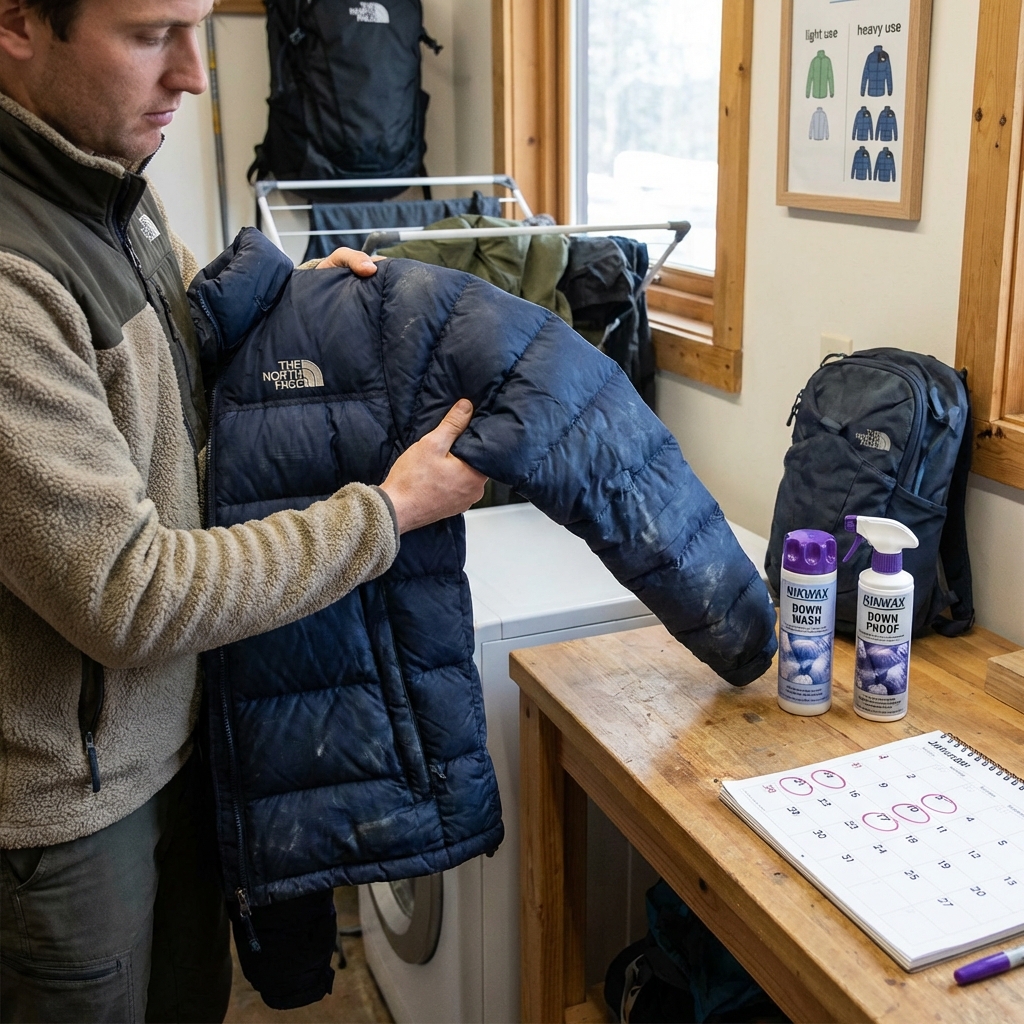
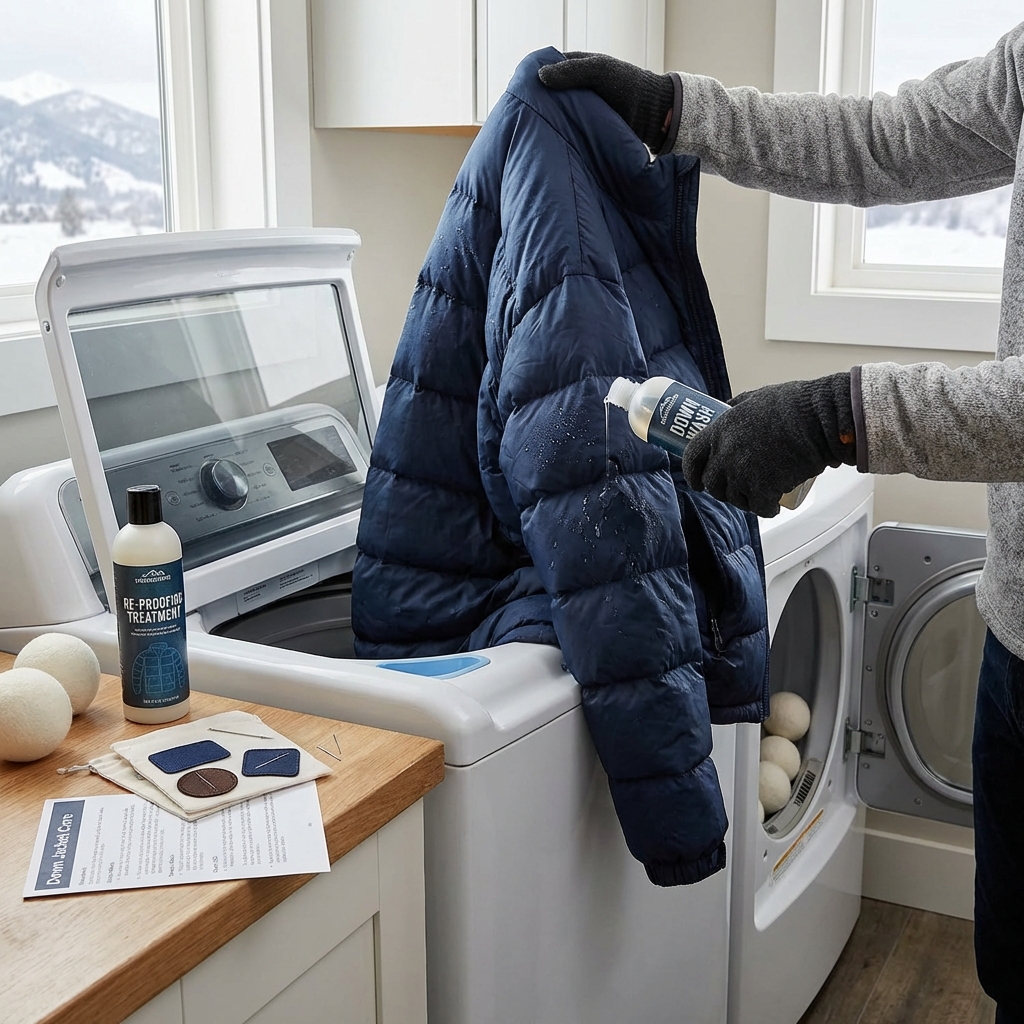
    Members also receive detailed care and maintenance guides for extending the life of your insulation. Proper washing, drying, and storage preserve down loft and synthetic fill performance season after season. That knowledge compounds the value of your purchase, turning a quality jacket into a long-term investment you understand how to maintain.

    Making Your Sub-Zero Winter Jacket Decision

    The path forward is clear: start with your actual use cases. Will you be moving hard (climbing, skiing) or moving slow (winter camping, photography)? Will you need weather resistance or are you layering under a shell? How much pack space can you afford to spend on insulation?

    Illustration 3
    Illustration 3

    For most winter adventurers, our lightweight puffers address the core need: serious insulation in a package that doesn’t compromise your mobility or efficiency. Browse our Men's Jackets and Coats collection to compare models by weight, temperature rating, and insulation type. Read the product specs carefully. A 2-pound jacket rated to minus 20 Fahrenheit solves a different problem than a 1-pound layering piece rated to zero.

    Consider your climate. If you’re in the Pacific Northwest’s damp cold, a synthetic-fill puffer excels. In the dry cold of the Rockies or Alaska, premium down is unbeatable. Hybrid constructions split the difference and work across most winter regions.

    Your Path to Confidence in Extreme Cold

    Owning the right puffer transforms how you approach winter. You move faster because you’re not hauling deadweight. You make better decisions because you’re not overheating or underdressed. You extend your season and your range because you’ve solved the core insulation problem with equipment that actually performs.

    We’ve built our lightweight puffers for explorers who take winter seriously and refuse to compromise. The cold doesn’t negotiate; neither do we. When you’re standing at that trailhead next December, you’ll appreciate the difference between gear you trust and gear you tolerate.

    Start with one piece that fits your most common winter activity. Learn how it layers. Understand what temperatures suit different configurations. Use that knowledge to expand your system. That methodical approach builds confidence faster than trying to solve every scenario with a single jacket.

    You’ve got the mountains to explore and the winter season ahead. We’ve built the gear to get you there safely, efficiently, and ready to move when conditions demand it.

    Ready for your next adventure? Gear up with apparel and equipment built for the wild. Explore the collection now.

    Frequently Asked Questions (FAQ)

    How much lighter are our lightweight puffers compared to traditional winter jackets?

    Our lightweight puffers typically weigh between 12-16 ounces, while traditional winter jackets often tip the scales at 2-3 pounds or more. We’ve engineered our designs to eliminate unnecessary bulk without sacrificing warmth, so you get exceptional insulation that takes up minimal space in your pack. This weight difference becomes especially noticeable on multi-day expeditions or when you’re layering for variable conditions.

    What temperature range should I expect from your packable puffers in sub-zero conditions?

    Our puffers are engineered to perform reliably down to -20 degrees Fahrenheit and beyond, depending on the specific model and how you layer it with our base and mid-layers. We rate each puffer based on real-world testing in extreme conditions, and we’re transparent about those ratings on every product page so you know exactly what to expect. The key to sub-zero performance is pairing our technical insulation with proper layering, which our gear is specifically designed to accommodate.

    Can I wear your lightweight puffer as a regular jacket, or is it only for serious expeditions?

    We designed our puffers to work hard on the mountain and transition seamlessly to everyday life, whether that’s hiking to your favorite trailhead or walking through the city. The technical performance is built in, but our modern aesthetic and tailored cuts mean you’ll reach for them year-round. That versatility is exactly why our XPLR Pass members love integrating our puffers into their regular rotation instead of relegating them to expedition-only status.

  • Best Waterproof Mountaineering Shell Jackets for Alpine Success in 2026

    Best Waterproof Mountaineering Shell Jackets for Alpine Success in 2026

    Table of Contents

    Why Alpine Conditions Demand Specialized Waterproof Protection

    Alpine mountaineering strips away comfort. Wind gusts past 60 mph. Precipitation shifts from rain to sleet to snow within an hour. Your shell jacket becomes your only barrier between safety and hypothermia. This is where specialized waterproof mountaineering shells separate themselves from casual rain jackets—they’re engineered for sustained exposure, extreme weather shifts, and technical movement on rock and ice.

    We’ve spent decades perfecting shells that handle these demands. This guide walks you through what we’ve learned and how to choose the right protection for your next alpine objective.

    Standard rain jackets fail in the alpine environment. Most offer decent water resistance for a day hike or commute, but they lack the engineering required when you’re above treeline for hours, moving across exposed terrain at altitude.

    Alpine conditions create a perfect storm of challenges. You face sustained wind that amplifies cold and strips away body heat. Precipitation intensity varies wildly: heavy downpours, graupel, and spindrift all demand different responses from your shell. Add altitude into the mix, and your body generates less heat while fighting harder to breathe. A standard jacket doesn’t account for these extremes. It typically sacrifices breathability to achieve waterproofing, trapping sweat and creating internal dampness that defeats the whole purpose.

    We design our mountaineering shells assuming you’ll wear them for 8 to 12 hours straight. They need to shed water completely while venting the moisture your body creates, even when you’re working hard on steep terrain. Reinforced seams, strategic venting, and purposeful fabric choices all serve this singular goal: keeping you dry from both sides.

    What to do next: Assess your typical alpine conditions. If you’re above 10,000 feet or exposed for extended periods, a true mountaineering shell is essential, not optional.

    What Makes Our Shell Jackets Different from Standard Rainwear

    The gap between our mountaineering shells and regular rain jackets comes down to intentional design choices across every layer.

    We start with the fabric itself. Most casual jackets use basic polyurethane coatings that block water but also trap vapor. Our shells employ Gore-Tex or our proprietary DryVent technology, which uses microporous membranes that let water vapor escape while turning away liquid water. The difference feels immediate: you don’t feel clammy after climbing hard.

    Construction details matter just as much. We tape every seam, not just the stress points. Our shells include pit zips or strategically placed vents that let you regulate temperature without removing the jacket. Hem reinforcement, reinforced pocket seams, and abrasion-resistant panels on the shoulders and chest protect against pack straps and rock contact. Standard rain jackets skip these details because they’re overkill for everyday use. We include them because they’re survival-critical above treeline.

    Cut and fit differ too. Our alpine shells are designed to work over substantial layers without binding. Sleeves are cut longer to prevent gap exposure when you reach overhead on steep ice. The hood integrates with a helmet without slipping or creating wind tunnels. These might sound like small refinements, but each one addresses a specific failure mode we’ve learned through thousands of hours of field testing.

    What to do next: When comparing shells, check the seam tape. If only main seams are taped, it’s not built for alpine work.

    Key Features That Define Our Mountaineering Shell Technology

    Alpine-proven shells share consistent engineering hallmarks. Understanding these features helps you evaluate what you’re actually getting.

    Waterproofing rating matters, but it’s not the whole story. We test our shells to withstand sustained water pressure far beyond the standard 10,000 mm rating. Our mountaineering models hit 20,000 mm or higher, meaning they’ll shed water even when you’re pressed against wet rock or sitting in a bergschrund.

    Breathability works in tandem with waterproofing. A jacket that sheds all water but traps all vapor is just a sauna suit. We target 15,000+ grams of breathability (g/m2/24h) so your body can shed moisture even during hard climbing. This requires the right fabric pairing: typically Gore-Tex 3L or our DryVent membranes bonded to durable outer shells.

    Hood design gets overlooked but proves critical. Our alpine hoods are sized to fit over climbing helmets without excess fabric that flaps in wind. The brim is stiffened to maintain visibility on steep terrain. Drawcords are positioned so you can tighten them one-handed, even in gloves.

    Pack compatibility changes how you move uphill. We integrate soft, low-profile backpack straps so your jacket sits smooth under a climbing pack’s shoulder harness. Some shells use stiff fabrics that bunch awkwardly; ours breathe and compress without creating pressure points.

    What to do next: Test the hood fit with your climbing helmet before committing. A hood that rides too high or too low becomes a distraction on technical terrain.

    How Our DryVent and Gore-Tex Integration Keeps You Dry and Breathable

    Illustration 1
    Illustration 1

    We use two main membrane technologies across our mountaineering line, and each serves a slightly different purpose.

    Gore-Tex Pro is the industry gold standard for maximum performance. We use it in our Summit Series jackets where the demands are highest. Gore-Tex’s expanded polytetrafluoroethylene structure creates billions of micropores—each one small enough to block water droplets but large enough to let water vapor through. It’s genuinely breathable in ways that basic coatings simply aren’t. The Tsirku Gore-Tex Pro Jacket pairs this membrane with reinforced outer fabrics that handle rock contact and pack straps without tearing.

    Our DryVent technology is our proprietary alternative, engineered to match Gore-Tex performance at a lower weight and cost. DryVent uses a different polymer structure that achieves comparable breathability while being slightly more durable in certain abrasion scenarios. We’ve tuned DryVent specifically for sustained alpine climbing where you need reliable performance without premium price tags. It’s not a compromise—it’s a different engineering choice optimized for where you’ll actually use it.

    Both membranes require proper care to maintain performance. We bond them to durable knit or woven inner liners that protect the membrane from snags and body oils. When you come off the mountain, we recommend gently rinsing your shell in cool water and air-drying it completely. This removes salt from sweat and debris that could clog the pores.

    What to do next: Check if your target jacket uses Gore-Tex Pro, standard Gore-Tex, or DryVent. Each is legitimate; the choice depends on your budget and specific use case.

    Choosing the Right Shell for Your Alpine Objectives

    Not every mountaineering shell fits every objective. Matching your shell to your typical climbing means you get the right balance of protection, weight, and packability.

    If your alpine objectives are technical rock above 10,000 feet with exposed ridges, you want maximum weather sealing and pack durability. You’ll benefit from our heavier-duty shells with reinforced shoulders and aggressive water-shedding fabrics. These add weight but earn it through reliability on high-consequence terrain.

    Alpine snow climbing and glacier travel require breathability above all else. You’ll be moving steadily uphill for hours. A shell that vents well becomes non-negotiable; otherwise, you’ll create an internal humidity layer that turns into ice when you stop at the summit. We prioritize membrane breathability in our glacier-focused designs, accepting slightly less aggressive water-shedding in exchange for vapor transmission.

    Mixed climbing (rock and ice in one push) demands versatility. Look for shells that balance breathability and ruggedness. You need pit zips to cool down during rock sections, then enough weather-proofing to handle exposed ice fields. The Eastwall Gore-Tex Jacket exemplifies this middle ground: it performs across multiple alpine disciplines.

    Your pack volume also shapes the choice. If you’re hiking to a remote cabin with luggage capacity, weight matters less. If you’re pushing a technical ice route carrying minimal gear, lighter shells become critical. We offer compact shells that compress to barely larger than a liter bottle, while our full-featured models add grams for durability you’ll appreciate on sustained high-altitude pushes.

    What to do next: Define your most common alpine activity—rock, snow, mixed, or glacier travel—then prioritize the shell features that support that specific goal.

    Our Summit Series jackets represent the pinnacle of alpine engineering. These aren’t entry-level shells; they’re built for climbers and mountaineers pushing serious objectives.

    The Summit Series models excel on multi-day expeditions above 15,000 feet. They pair Gore-Tex Pro with 3-layer construction that handles extreme cold, wind, and sustained precipitation. These jackets cost more than lighter alternatives, but they work on Denali, the Cascades, and the European Alps because they’re genuinely engineered for those environments. Climbers choose them specifically when failure isn’t an option.

    Our alpine line sits between Summit Series and casual rain jackets. These use DryVent technology and are designed for day climbs and weekend trips to peaks under 12,000 feet. They’re lighter than Summit models, pack smaller, and cost less. Performance remains excellent for their intended use; they just accept slightly lower durability for weight savings.

    We also offer lightweight shells for fast and light alpine climbing. These are minimalist jackets designed for climbers who move fast and travel light. They shed water effectively but aren’t rated for sustained exposure in extreme conditions. If you’re pushing a technical peak in summer with good weather forecasted, these shine. If you’re on a glacier in spring expecting variable conditions, you want something heavier-duty.

    What to do next: Compare the specifications and intended use for models in your price range. Don’t assume heavier always means better; match the shell to your actual climbing objectives.

    Layering Strategy: Building Your Complete Alpine System with Our Shells

    A mountaineering shell only works as part of a complete system. The layers beneath matter as much as the shell itself.

    Base layers come first. Merino wool or synthetic materials pull sweat away from your skin and maintain insulation even when damp. Cotton fails in the alpine—it retains moisture and loses insulating value. We design our baselayers with thoughtful fit and strategic panels so they work under climbing harnesses and packs without bunching.

    Insulating layers sit between your base and shell. This is where you build warmth. In cold, dry conditions, a lightweight synthetic insulated jacket traps warm air. In wet conditions, you need something that insulates when damp. We recommend our synthetic insulation or down layers depending on expected conditions. On glacier travel where dampness is likely, synthetic outperforms down.

    The shell becomes your outermost defense. In heavy rain or wind, you wear only your base, insulation, and shell. In transition weather, you might layer the shell over a fleece for added wind protection. The key is designing your system so the shell can move freely and vent adequately without the base and insulation layers restricting it.

    Illustration 2
    Illustration 2

    Accessories matter too. A technical balaclava worn under your hood keeps your face protected while allowing you to remove it quickly if needed. Gaiters seal the gap between your pants and boots, stopping snow from funneling upward. Gloves need to play well with your shell’s cuffs. We engineer everything to work as an integrated system.

    What to do next: Assemble a complete alpine outfit and wear it during a long training hike. You’ll discover fit issues and comfort problems before you’re at altitude and it’s too late to adjust.

    Durability and Longevity: Why Our Shells Outperform in Extreme Conditions

    We build our mountaineering shells expecting them to survive years of hard use. Durability comes through specific material and construction choices.

    The outer fabric matters significantly. We use ripstop weaves that prevent small tears from spreading. Heavier denier fabrics resist punctures from rock contact. We add abrasion-resistant panels on the shoulders, chest, and elbows where packs and gear cause the most wear. These panels are made from thicker, tougher material bonded to the main shell fabric.

    Seam construction determines longevity more than most climbers realize. We use thread rated for the demands your jacket will face. Seams are double-stitched on stress points, then sealed with waterproof tape applied to the inside seam. This creates a redundant system: if the tape fails, the seam still holds; if the thread breaks, the tape maintains the water seal. Standard jackets use single-stitched seams with tape only, creating a single point of failure.

    Zippers are reinforced with welted fabric on both sides to prevent the slider from blowing under load. Our pit zip sliders are oversized so you can operate them while wearing thick gloves. Pocket zippers use marine-grade sliders rated for saltwater exposure; they’re overbuilt for alpine climbing but perform flawlessly for years.

    Many climbers keep their shells for a decade or longer if they care for them properly. Occasional rinses, complete air-drying, and storing them loosely folded (not compressed) keeps the fabrics and membranes in working condition. We’ve had customers report wearing shells through dozens of major peaks without loss of waterproofing.

    What to do next: After each use, let your shell dry completely before storing. Dampness stored in a compression bag breeds mold and damages the membrane.

    Sustainability Through Our Resale Program: Extending Your Gear’s Lifecycle

    We believe the most sustainable gear is gear that lasts and gets used for as long as possible. Our resale program supports that philosophy.

    When your shell approaches the end of its useful life with you, our resale platform gives it a second home. We authenticate each piece, assess condition, and price it fairly so someone else can own quality alpine protection without paying full price. This extends the jacket’s useful lifecycle and reduces demand for new production.

    The process is straightforward. You list your shell through our platform, we handle authentication and shipping, and you receive payment for the sale. Buyers get inspected, ready-to-use shells at accessible prices. We’ve built this to be frictionless for everyone involved.

    Extending gear lifecycles is how we reduce our overall environmental footprint. Manufacturing new jackets requires energy, raw materials, and water. If your shell functions perfectly but you’ve moved to a different climbing discipline, resale becomes the most sustainable choice. It’s better for the environment and better for climbers starting their alpine journey on a tighter budget.

    We’re also committed to materials innovation. We’re testing and integrating more recycled fabrics into our mountaineering shells. Recycled polyester performs just as well as virgin polyester for shell fabrics. As our suppliers develop more recycled technical materials, we integrate them into our designs.

    What to do next: Plan your gear purchases knowing you can resale or trade shells you’ve outgrown. This reduces the psychological barrier to upgrading when your needs change.

    Maximizing Your Investment with XPLR Pass Rewards and Benefits

    Our XPLR Pass loyalty program recognizes that serious climbers deserve tangible benefits for their ongoing commitment.

    Members earn points on every purchase, including shells. Those points convert directly into discounts on future gear. For someone buying a new shell every few years, this adds up to meaningful savings. More importantly, XPLR Pass members get early access to new product releases and Summit Series limited editions before public availability.

    The program also includes exclusive experiences. Members get invitations to training clinics where we teach technical skills like self-rescue and weather assessment. You learn directly from our sponsored athletes and mountain guides. These events happen in alpine environments, so you’re testing gear in real conditions while sharpening your skillset.

    Resale program members earn XPLR Pass points on sales, turning unused gear into currency for future purchases. If you buy a shell, climb hard in it, then resale it when your needs shift, you’ve earned points that offset your next purchase.

    Travel benefits matter too. We partner with alpine huts and mountain lodges to offer XPLR Pass members discounts on lodging. If you’re planning a multi-day climbing trip, these discounts add up quickly.

    What to do next: Enroll in XPLR Pass before your next shell purchase. Even if you’re not a frequent buyer, the points and early access to new products justify the free membership.

    Illustration 3
    Illustration 3

    Real Alpine Stories: How Our Shells Performed When It Mattered Most

    The stories that matter most come from climbers who trusted our shells on objective terrain.

    One climber shared how her shell kept her alive during an unexpected overnight bivouac on Mount Rainier. Weather shifted rapidly; summit attempt became survival situation. She wore her Tsirku Gore-Tex shell through wind gusts above 50 mph and heavy precipitation. The pit zips let her manage internal temperature. The helmet-compatible hood stayed in place through violent wind. She spent 14 hours in that shell without water seeping through, and she emerged without hypothermia.

    Another team climbing an alpine rock route in the Cascades discovered their shells’ durability when they encountered unexpected rock fall. One climber’s shoulder took glancing impact from debris. The shell sustained abrasion and a small puncture, but didn’t tear further. The reinforced panels we built into that area contained the damage. After return from the climb, the shell was repaired with a patch kit and went back to the mountains.

    A glacier guide wearing one of our lightweight shells for mobility pushed an early-season expedition on Mount Baker when conditions turned from clear to whiteout in 30 minutes. The shell kept her dry through sustained heavy snow while remaining breathable during hard climbing. She reported that the shell’s low weight (under 10 ounces) meant she could stash it in a compact pack until needed, then deploy it quickly without throwing off her pack balance.

    These aren’t marketing tales. They’re reports from real climbers in situations where performance directly impacted safety and success. Your shell will be tested similarly on your objectives.

    What to do next: Before your first expedition in a new shell, use it on local alpine climbing. Understand how it breathes, how vents operate, how the hood sits on your helmet. Familiarity removes variables when conditions get serious.

    Getting Started: Your Guide to Owning the Perfect Shell Jacket

    Choosing and preparing your first serious mountaineering shell is an investment worth doing right.

    Start by defining your primary alpine objective. Peak elevation, expected season, typical weather patterns, and terrain type all shape what shell actually fits. Someone pursuing technical rock routes needs different engineering than someone pushing high-altitude snow climbing.

    Visit a retailer or our website and try on shells in your size. A shell worn over your typical climbing layers should move freely without excess fabric. Shoulder seams should sit at your actual shoulder. Arm length should reach your wrist when arms are at rest. Pit zip closures should be accessible with one hand. The hood should fit with your helmet while maintaining visibility.

    Once you’ve chosen a shell, understand its care requirements. Rinse it gently after muddy or salty climbs. Allow complete air drying before storing. Store it loosely folded, never vacuum-compressed. Some shells benefit from occasional hydrophobic treatment using products we recommend.

    Break in your shell on lower-stakes objectives before committing to your biggest goal. Alpine climbing introduces enough variables without adding an unfamiliar jacket into the mix. Use it on local peaks, on training hikes, and in variable weather. You’ll discover how it vents, where it might rub, and whether you’ve chosen well.

    When you’re ready for your serious objective, you’ll wear that shell with confidence. You’ve tested it. You understand it. You know it performs. That confidence matters on exposed terrain at altitude.

    Our team is here to help. Visit our website to explore our complete mountaineering shell line, connect with our specialists, and join XPLR Pass to start earning rewards on your alpine investment. We’ve designed every shell assuming you’ll push your limits. Now go do it.

    Ready for your next adventure? Gear up with apparel and equipment built for the wild. Explore the collection now.

    Frequently Asked Questions (FAQ)

    What makes our mountaineering shell jackets different from standard rain jackets?

    Our shells are engineered specifically for alpine environments where conditions shift rapidly and demands are extreme. We integrate advanced fabrics like DryVent and Gore-Tex that manage moisture from both outside precipitation and internal body heat, keeping you dry without overheating during high-exertion climbing. Standard rainwear lacks the breathability and durability our shells provide, plus we design ours with reinforced seams, strategic ventilation, and packability that serious mountaineers need.

    How do I choose the right shell for my climbing objectives?

    We recommend evaluating your typical conditions and activity intensity. If you’re tackling technical alpine routes in variable weather, our premium Gore-Tex models offer maximum protection and breathability for sustained effort. For less technical mountaineering or mixed use, our DryVent options deliver excellent performance at a lower weight and cost. Check our product descriptions for activity-specific details, or reach out to our team to match your objectives with the right jacket.

    Can I use XPLR Pass rewards when purchasing shell jackets?

    Yes, our XPLR Pass members earn points on every purchase, including our mountaineering shells, and can redeem those rewards toward future gear. We designed this program to help you build your complete alpine system over time while getting real value back on your investment in quality equipment.

  • How to Care for Your Down Puffer and Restore Water Resistance at Home

    How to Care for Your Down Puffer and Restore Water Resistance at Home

    Table of Contents

    Why Your Favorite Down Puffer Loses Its Water Resistance

    Your down puffer has earned its place in your rotation. It’s been with you through alpine starts, unexpected downpours, and that brutal stretch above treeline. But lately, water beads up less readily on the shell. Rain starts soaking through instead of rolling off. The loft feels a touch flatter than it used to. You’re not imagining it, and the jacket isn’t done for. The water-repellent coating that protects down insulation degrades over time with use, washing, and UV exposure. The good news is we can restore that performance at home using straightforward techniques and the right products.

    The outer shell of your puffer isn’t naturally water-resistant. We apply a durable water-repellent (DWR) finish to the fabric during manufacturing. This coating causes water to bead and roll away rather than soak in. Think of it like wax on a car: over time, friction, detergents, and sunlight wear it down.

    Down insulation itself is vulnerable when wet. Water collapses the air pockets that trapped warmth, and the insulation clumps. That’s why we layer DWR protection on top. But here’s what happens: every trip into the backcountry, every run through a washing machine, every sunny day in your pack slowly strips away that invisible shield. Sweat, sunscreen, and environmental contaminants accelerate the process. Within one to two seasons of active use, most puffers lose noticeable water shedding ability.

    The layer doesn’t disappear completely all at once. Instead, it fades gradually. You’ll notice it first on high-contact areas like shoulders and collar, where friction is greatest. Once you recognize those signs, restoration is both simple and crucial to keeping your jacket performing in the conditions where you need it most.

    Understanding Down Insulation and DWR Coatings

    We stuff our puffers with either 700-fill or 800-fill down (measured in ounces per pound of down weight). Higher fill power means the down clusters are more lofted and efficient, trapping more warm air in less space. But that insulation only works when it’s dry.

    DWR coatings are polymer-based treatments applied to fabric fibers. They make the surface oleophobic and hydrophobic, meaning water and oils slide off. Most of our jackets use fluorocarbon-free DWR, which maintains performance without persistent environmental chemicals. The coating bonds to the fabric but doesn’t create a waterproof seal like taped seams or membranes do. Its job is simpler and essential: keep the outer shell dry so down stays lofted.

    Over time, the coating weakens because:

    • Body oils and sweat residue build up on the fabric
    • Detergent residue from washing coats the fibers
    • UV rays break down the polymer chains
    • Mechanical abrasion from pack straps and pack movement degrades the surface

    Reapplying DWR revives that property without replacing any down or shell material. It’s the easiest way to restore an aging puffer to nearly new performance.

    Signs Your Puffer Needs Re-waterproofing Treatment

    Water beading is the clearest sign. Fill a sink or spray bottle with clean water. Sprinkle a few drops on the outer shell in a few spots. Fresh DWR-treated fabric will form tight beads that roll off almost immediately. If water spreads flat, wicks into the weave, or takes more than a few seconds to bead, your DWR is fading.

    Illustration 1
    Illustration 1

    You might also notice the jacket feeling heavier after light rain, or dampness appearing at your shoulders and back after a few hours in wet conditions. The loft may seem slightly compressed compared to when you first bought it. Some people describe it as the jacket feeling a touch less “puffy,” though that’s often more perception than reality.

    Timing matters. If you use your puffer year-round or take it on monthly trips, plan for DWR refresh every 12 to 18 months. Less frequent users might stretch it to two years. We recommend testing with the water-bead method twice a year if you’re unsure. Catching the decline early means easier restoration and better protection during that next trip when weather turns.

    What You’ll Need for Our At-Home Refresh Process

    You don’t need much, and you likely have some items already. Grab a large basin or your washing machine, cool water, a gentle down-specific detergent (or a technical gear wash like Nikwax Tech Wash), a soft sponge or cloth, and our DWR treatment. We recommend products designed for down gear rather than general fabric sprays; they’re formulated to work with the delicate nature of down-insulated construction.

    For drying, you’ll want access to a dryer with a low-heat tumble setting, or a well-ventilated space where you can hang the jacket and occasionally reshape it by hand. A tennis ball or two in the dryer helps fluff the down during the final stage. Avoid dryer sheets and fabric softeners, which coat fibers and reduce DWR effectiveness.

    Optional but helpful:

    • A gentle brush for stubborn spots
    • A spray bottle for targeted DWR application
    • A mesh laundry bag to protect the jacket during machine washing
    • A clean, dry towel for excess water removal

    Setting aside one evening for the full process is realistic. The actual hands-on work takes 20 to 30 minutes; the rest is waiting for rinses, treatment application, and drying time.

    Step-by-Step Guide to Cleaning Your Down Puffer

    Start by examining your jacket for stains, odors, or visible dirt. Check pockets and remove anything stored inside. If you see major stains, spot-clean them with a damp cloth and gentle soap before proceeding.

    Fill your basin or washing machine with cool water (cold is fine; hot damages down and reduces DWR effectiveness). Add a capful of down-specific detergent or technical gear wash. The goal isn’t a bubble bath; gentle agitation removes body oils and residue without harsh scrubbing. Machine-wash on a delicate or permanent-press cycle, or hand-wash by submerging and gently swishing the jacket for two to three minutes.

    Drain and rinse thoroughly. This step is important and often rushed. Down holds detergent residue stubbornly. Rinse at least twice, squeezing gently (never wring) to remove soapy water. Keep rinsing until the water runs clear. Residual detergent blocks DWR from bonding properly, so patience here pays off.

    Once the water runs clean, gently squeeze out excess water. Press the jacket against the basin or sink edge rather than twisting it. Lay it on a clean towel and pat dry. You’re aiming for damp, not soaking wet, before moving to treatment application.

    Applying DWR Treatment Like a Pro

    Read your DWR product’s instructions first; application methods vary slightly. Most spray-on treatments are applied to damp fabric. Some are mixed into the rinse cycle; we’ll focus on the spray method since it gives you control over coverage.

    Hang your damp jacket on a sturdy hanger in a well-ventilated space outdoors or in a garage. Shake it gently to even out the down. Spray the DWR evenly across all outer surfaces, holding the bottle 6 to 8 inches away. Work systematically: front panels, back, sleeves, hood if applicable. Cover the entire exterior. Don’t oversaturate any one spot; you want light, even coverage.

    Illustration 2
    Illustration 2

    Pay special attention to high-wear areas: shoulder seams, collar, the upper back where a pack strap sits. These spots see friction and lose DWR first. A second light pass over these zones helps restore coverage where it matters most.

    Let the treatment air-dry fully. Most products need 24 hours of air drying to cure and bond properly. Don’t put the jacket away damp or in direct sunlight during this window. Once dry, run your water-bead test again to confirm coverage. Water should bead up and shed within seconds.

    Drying and Fluffing for Maximum Loft Recovery

    After DWR application has cured, move to heat-assisted drying if you want the down to fully re-loft. This step is optional but valuable. Place the jacket in your dryer on low heat or air-only setting. Add one or two tennis balls (clean, no dye). The balls tumble against the down, breaking up any remaining clumps and helping the fill power re-express itself.

    Run the dryer for 20 to 30 minutes on low heat, or 40 to 50 minutes on air-only. If your dryer has a “perma-press” setting, that’s ideal. Stop and check progress halfway through, reshaping the jacket by hand if needed. Down should feel lofted and puffy, not compressed or damp.

    Remove the jacket and hang it again for another hour to cool and fully expand. The down will shift slightly as it cools, so let it settle. You should notice a visible difference in fluffiness compared to the damp state before drying.

    This heat-tumble process also helps the DWR cure completely, hardening the protective layer. Once the jacket is fully dry and cool, test the water beading again. You should see tight beads forming and shedding immediately across the entire shell.

    Why Professional-Grade Products Make the Difference

    We field-test our recommendations extensively. Consumer-grade water-repellent sprays often contain silicone or wax compounds that work on nylon but can leave residue on down garments, altering breathability and feel. Professional-grade DWR products designed for technical insulated gear bond more effectively to the specific fabrics we use and don’t alter the jacket’s handling or performance.

    The fluorocarbon-free DWR treatments we endorse work just as well as older PFC-based formulas without contributing to environmental contamination. They’re also often more durable, lasting longer between refresh cycles. Investing in a quality product means you’ll repeat this process less often and your jacket will perform more reliably in the field.

    Cheap detergents and fabric softeners may seem economical upfront, but they leave coating residue that actually reduces DWR effectiveness. We recommend using the same technical-gear detergent brands we trust for general washing. Consistency matters here: the products have been engineered to work together.

    Extending the Life of Your Technical Gear

    Storage habits matter as much as cleaning. Keep your puffer in a breathable cotton or mesh storage bag during off-season, not compressed in a vacuum sack. Prolonged compression damages the down structure and makes it harder for insulation to re-loft. A cool, dry closet is ideal. Avoid basements prone to moisture or attics subject to heat extremes.

    Between trips, hang your puffer outside for an hour or two to air out. Body moisture and odors dissipate naturally, extending the time between full washes. Minor dirt and dust shake out easily. This simple habit cuts your washing frequency in half, which directly extends DWR coating life since every wash slightly diminishes it.

    Inspect your jacket regularly. If you notice loose stitching, small tears, or seam separation, address these immediately. A small tear in the shell or lining can let down escape and allow water intrusion. We offer repair services, or a skilled tailor familiar with down gear can patch most issues inexpensively. Catching damage early prevents larger problems.

    Illustration 3
    Illustration 3

    Consider rotating puffers if you use them heavily. We design jackets like our Nuptse Jacket for long-term durability, but even the best gear performs better when it gets a break between seasons. This approach reduces wear on any single jacket and spreads maintenance across several pieces.

    Common Mistakes That Damage Down Insulation

    Hot water is the enemy. It damages down protein structure and accelerates DWR degradation. We always recommend cool or lukewarm water. Even warm water can reduce the lifespan of your jacket significantly.

    Never dry-clean down jackets, even if a cleaner insists it’s safe. Dry-cleaning solvents strip DWR, dry out down, and leave chemical residue. Machine washing on gentle settings or hand washing is always the right call.

    Wringing or twisting the jacket forces water deeper into down clusters and can rupture the down itself, causing feather leakage. Squeeze gently or press against a sink edge. It takes longer, but the jacket stays intact.

    Oversaturating with DWR spray creates buildup that can make the fabric stiff or slightly uncomfortable. Light, even coatings work better than heavy ones. One to two thin passes is better than one heavy application.

    Skipping the rinse cycle after washing is probably the most common mistake we see. Detergent residue blocks DWR from bonding properly, and you’ll wonder why your treatment didn’t work. Rinse until the water truly runs clear. Patience here directly impacts performance.

    Finally, don’t assume your puffer is ruined if water stops beading. Water resistance is a maintenance item, not a permanent property. A 30-minute restoration effort with this process brings aging jackets back to solid performance. We’ve designed our puffers to last years of active use with proper care. Stay proactive about DWR refresh, and your trusted jacket will keep protecting you through countless seasons ahead.

    Ready for your next adventure? Gear up with apparel and equipment built for the wild. Explore the collection now.

    Frequently Asked Questions (FAQ)

    How often should I reproof my down puffer to keep it performing like new?

    We recommend re-waterproofing your puffer every 1-2 seasons of regular use, depending on how frequently you’re out in wet conditions. You’ll notice water beading on the fabric less effectively when the DWR coating starts to wear down, so that’s your cue to refresh it. The good news is that our at-home treatment process takes just a couple of hours and costs far less than replacing a jacket.

    Can I machine wash my down puffer, or will that damage the insulation?

    You can safely machine wash your down puffer on a gentle cold cycle if you use a specialized down-specific detergent, which we detail in our cleaning guide. The key is avoiding regular laundry detergent and fabric softeners, as these break down the natural oils in the down and reduce its loft and warmth. We always recommend checking your jacket’s care tag first, since some of our specialty pieces may have specific requirements.

    What’s the difference between using our professional-grade DWR products versus cheaper alternatives?

    Our formulations are engineered specifically for technical fabrics and down-filled gear, so they bond properly with the materials and maintain breathability while restoring water resistance. Cheaper products often leave a stiff residue or wash out quickly, which means you’re spending money on repeated treatments instead of getting lasting performance. We design our products to work with your gear’s construction, not against it.

  • Best Used Gear Pre-Purchase Inspection Checklist for Jackets, Puffers, and Hiking Boots

    Best Used Gear Pre-Purchase Inspection Checklist for Jackets, Puffers, and Hiking Boots

    Table of Contents

    Why Smart Used Gear Purchases Matter for Serious Explorers

    You’ve probably felt that moment on the trail when your gear just works. A jacket sheds rain without fuss. Your boots grip scree confidently. That’s the magic of quality outdoor apparel, and it’s exactly why buying used makes sense for committed explorers like you.

    We’ve built our reputation on technical innovation and durability that lasts decades. Our jackets and boots aren’t disposable. They’re designed to outlive trends and perform through countless miles of genuine adventure. When you buy used gear from us, you’re investing in proven performance at a fraction of the original cost.

    Here’s the practical reality: quality outdoor gear holds value because it holds up. A well-maintained puffer jacket or pair of hiking boots from us will still deliver the protection and comfort you need, even after years of use. The catch is knowing what to look for. Buying secondhand requires a trained eye, and we want you to shop with confidence.

    By learning our used gear inspection checklist, you protect yourself from hidden defects while unlocking incredible value. You’re also extending the lifecycle of thoughtfully engineered equipment, which aligns with how we think about sustainability and responsible consumption.

    What You Really Need to Know Before Buying Used Outdoor Gear

    Used gear inspection isn’t about perfectionism. It’s about understanding function. A small scuff on a jacket’s exterior means nothing if the waterproof membrane is intact. Conversely, a pinhole in that membrane or compromised seams can ruin a trip.

    We recommend focusing your inspection on three core areas: fabric integrity, waterproofing effectiveness, and hardware reliability. These elements determine whether your gear will protect you when conditions get serious. Everything else is cosmetic.

    Before you inspect, know what you’re buying. Is this a three-season jacket or a summit-grade shell? Are these approach shoes or technical alpine boots? Different gear categories have different demands. A lightweight packable puffer serves a different purpose than a down parka built for extreme cold. Understanding the intended use tells you which defects matter most.

    Start every inspection by checking the product label and documentation. Verify the model, intended use, and original specifications. This baseline knowledge shapes what you should expect to see and what red flags to watch for. Ask the seller for history: How many seasons of use? What terrain? Any repairs? This context is invaluable.

    Our Step-by-Step Jacket Inspection Criteria

    Begin with the exterior. Look at the shell fabric under good lighting. Run your hands across the surface, feeling for stiffness or brittleness that might indicate UV damage or age. Our technical shells are designed to flex and move. Fabric that feels rigid or sounds papery when you move it suggests the protective coating may be failing.

    Check for rips, holes, or pilling across the entire jacket. Small punctures matter more than you might think. Even a pinhole-sized hole in the outer shell can allow water to wick into insulation or linings. Look at high-stress areas: collar edges, cuff seams, the hood opening, and where the jacket meets pockets. These spots take the most abuse on trail.

    Next, inspect the interior. Pull back linings and examine the underside of the shell fabric. You’re looking for discoloration, flaking, or separating layers. If our waterproof membrane is peeling away from the outer fabric, that jacket won’t shed rain effectively anymore, no matter what else looks fine.

    Check all closures. Snap the collar, test the hood attachment, and verify the hem closure works smoothly. A jacket with a broken collar snap or loose hood attachment will leak in the field, even if everything else passes inspection.

    Illustration 1
    Illustration 1

    Essential Checks for Pre-Owned Puffer Jackets

    Puffer jackets have their own inspection rhythm. Start by holding the jacket to light and looking for feather leakage. Down and synthetic insulation can escape through worn spots, tiny holes, or degraded baffles. You might see small clusters of down fibers bunched around stitching or seams. A few loose fibers are normal; visible migration suggests baffle failure.

    Press your hand into the insulation. Quality puffing should spring back quickly. If the insulation feels compacted and doesn’t loft fully, it’s lost its ability to trap heat effectively. This happens with age, compression, and moisture exposure. Check multiple spots around the jacket, especially the shoulders and upper back where pack straps create pressure.

    Examine the baffles themselves. Our puffer construction uses box baffles or quilted patterns to keep insulation evenly distributed. Look inside any open zippers or seams to see if the baffles are intact and properly stitched. Broken stitching between baffles means insulation shifts during wear, creating cold spots.

    Test the weight and packability. A puffer that should compress into a small pouch but remains puffy and heavy likely has absorbed moisture and lost performance. Genuine down absorbs water readily, and once saturated, it takes time to dry and may never fully recover its original loft.

    Hiking Boot Evaluation Guide for Used Purchases

    Boots demand the most rigorous inspection. Start with the outsole. Look at the tread pattern. Our hiking boots use aggressive lugs and high-quality rubber designed for technical terrain. If the lugs are worn smooth or if chunks are missing, traction will suffer on wet rock or loose scree. Run your thumb across the tread. You should feel distinct raised ridges, not a flattened surface.

    Flex the boot sole forward and backward. A boot with a rigid, responsive sole will support your foot through technical scrambling. If the sole flexes too easily or feels mushy, the midsole may be breaking down. You’re looking for firmness that springs back when you release pressure.

    Check the upper. The boot shaft should feel snug and properly formed. Leather or synthetic uppers should show patina from use, not deep creases that suggest structural breakdown. Press around the toe box, heel counter, and ankle collar. These areas need firmness to prevent blisters and lateral foot roll.

    Inspect the insole. Pull it out and check for compression, odor, or separation from the upper. A degraded insole means you’ll need replacement immediately. Most of our boots use removable insoles, so this is fixable, but factor it into your offer price.

    Fabric Damage Assessment and Wear Patterns

    Understand which wear patterns signal normal use versus accelerated decline. Fading on a jacket’s shoulders and back is normal. Pilling on abrasion points where pack straps rub is expected. Weathered zippers that still function smoothly are fine. These are cosmetic markers of a well-used piece of gear.

    Red flags look different. Seam separation, where stitching has pulled away from the fabric, indicates potential waterproofing failure. Stains that won’t come clean might be permanent dye transfer or contamination. Discoloration combined with stiffness suggests UV damage or chemical exposure that may have compromised the fabric’s integrity.

    Use the sniff test carefully. Genuine mold or mildew odor means the gear has absorbed moisture and may harbor damage you can’t see. Musty but clean-smelling gear often just needs airing out. If a jacket smells like mildew but cleans fine, the underlying fabrics may still be healthy.

    Assess pilling objectively. Light pilling on fleece linings or synthetic shells is cosmetic and common. Heavy pilling, especially on the outer shell, indicates lower-quality fabric or extreme wear. Our technical shells are engineered to resist pilling, so heavy pilling on a used piece suggests it’s been heavily used and may be nearing end-of-life.

    Seam Integrity and Waterproofing Tests

    Seams are the waterproofing weak point. We seal our seams with tape during manufacturing, but that tape degrades over years and heavy use. Hold the jacket to bright light and trace every seam visually. Look for tape separation, missing tape, or visible stitching holes where water can infiltrate.

    Illustration 2
    Illustration 2

    Flex the jacket gently along seams. If tape is peeling away, you’ll see it lift. Press lightly on taped seams to feel for brittleness. Tape that cracks when bent rather than flexes with the fabric is failing and needs replacement. This isn’t a dealbreaker on a secondhand purchase, but it’s a factor in pricing and condition assessment.

    Run the water test if possible. Fill a spray bottle with clean water and mist the jacket’s exterior seams and zippers. Check the interior lining for moisture within 30 seconds. No seepage means seams are still performing. Quick moisture appearance suggests tape failure or seam issues.

    For puffers, the baffles themselves act as waterproofing components because they prevent insulation from clumping when wet. Inspect for any tears or holes in the baffle material. A small hole won’t cause catastrophic failure immediately, but it opens a pathway for moisture to migrate and compress insulation clusters.

    Zipper and Hardware Functionality Review

    Zippers take a beating. Pull each one slowly and listen for smooth operation. A zipper that sticks, skips, or requires force to move may have bent sliders, misaligned teeth, or debris lodged inside. Our jackets use quality YKK or equivalent sliders designed to last, but wear happens.

    Test partial zip and full-range movement. Some zippers fail at specific points along the track. Identify those trouble spots before you buy. A slider that feels rough but moves can sometimes be cleaned and lubricated with graphite powder, making it functional again. A bent slider is harder to repair.

    Check the zipper tape itself. If fabric is torn away from the zip’s edge, that’s a red flag for structural failure. The tape holds the slider in place; once compromised, the zipper will inevitably fail.

    Examine all other hardware: snap buttons, cord locks, D-rings, and carabiners. Press snaps firmly to confirm they hold and release properly. Cord locks should grip fabric securely without slipping. D-rings should be firmly attached with no wobble. Broken hardware is often replaceable, but it indicates where the gear may have experienced impact or stress damage.

    Our XPLR Pass Resale Program Advantage

    We created our resale program because we believe in gear longevity and community access. Every item in our resale inventory is inspected by our team using the same criteria we’re sharing with you. We stand behind our used gear, which means you get confidence alongside value.

    Members of our XPLR Pass loyalty program unlock exclusive benefits on resale purchases, including enhanced returns and priority access to newly listed inventory. You’re not just buying a secondhand jacket or boots. You’re joining a community of explorers committed to responsible gear consumption and getting equipment that we’ve personally verified meets our standards.

    Our resale program also funds sustainability initiatives and supports access to outdoor experiences for underrepresented communities. When you buy from us, you’re voting for the kind of outdoor industry culture we’re building together.

    How We Ensure Quality in Our Resale Inventory

    We don’t list items without thorough inspection. Our team physically examines every jacket, puffer, and boot using the exact checklist we’ve outlined here. We test waterproofing, verify hardware function, assess fabric integrity, and document the condition honestly in product descriptions and photos.

    We photograph the condition from multiple angles so you know exactly what you’re getting. Minor wear is normal and expected. Major defects are clearly noted or the item doesn’t make it into our resale catalog. We prioritize accuracy over volume because our reputation depends on your trust.

    Defective or heavily worn items are either restored by our repair partners or responsibly recycled. We don’t push questionable gear into the resale market. This means our inventory is genuinely inspected and verified, giving you confidence that you’re buying smart secondhand gear, not salvaging damaged equipment.

    Complete Pre-Purchase Inspection Checklist You Can Trust

    Illustration 3
    Illustration 3

    Use this checklist for any used jacket, puffer, or hiking boot purchase. Rate each item as Pass, Minor Issue, or Fail. Minor issues are cosmetic or easily fixable. Fail items suggest you should negotiate price or walk away.

    All Jackets and Outerwear:

    • Outer shell: no rips, holes, or excessive pilling
    • Interior lining: intact, no separation or discoloration
    • All seams: taped and not peeling, no visible stitching gaps
    • Waterproof membrane: no visible flaking or brittleness
    • Zippers: smooth operation across full range, no skipping
    • Snaps and buttons: click and release properly
    • Hood: securely attached, closure works
    • Cuff closures: adjustable and functional

    Puffer Jackets (Additional Checks):

    • Insulation: responsive loft, springs back when pressed
    • No feather leakage or visible baffle damage
    • Baffles: intact seams visible through any openings
    • Weight: feels appropriate for type and season
    • Compressibility: packs down when compressed, expands when released

    Hiking Boots (Additional Checks):

    • Outsole: aggressive tread visible and intact, no missing chunks
    • Sole flex: responsive, not mushy or overly rigid
    • Upper: firm structure, no deep creases or deformation
    • Insole: removable and in good condition, no compression
    • Heel counter: solid, provides lateral support
    • Interior: no cracks in synthetic upper, leather supple not brittle
    • Seams: no separation, especially around toe and heel
    • Laces and eyelets: functional and secure

    Choose Confidence When You Shop Our Used Gear Selection

    Buying secondhand gear is smart. It extends the lifecycle of thoughtfully engineered equipment and delivers exceptional value. But it requires knowledge. By using this checklist and understanding what signals real defects versus cosmetic wear, you’re equipped to make confident purchases.

    Our resale program removes the guesswork. Every item has been inspected by our team using these same standards. We’ve verified the waterproofing, tested the hardware, and assessed the condition honestly. When you shop our used inventory, you’re getting gear that we’ve personally stood behind.

    You deserve outdoor apparel and boots that perform when it matters. Used gear from us delivers that performance at resale prices, backed by our commitment to quality and your complete peace of mind. Start exploring our resale collection today, knowing exactly what you’re getting and why it’s worth your investment.

    For further reading: Summit Series Verto FA Boots.

    Ready for your next adventure? Gear up with apparel and equipment built for the wild. Explore the collection now.

    Frequently Asked Questions (FAQ)

    What should I prioritize when inspecting a used jacket or puffer before buying?

    We recommend starting with the fabric and seams since those are the hardest and most expensive to repair. Check for tears, pilling, and water damage, then carefully examine all seams for separation or stitching damage. If the outer shell and seams are solid, you’re looking at a piece that will perform when you need it most.

    How can I tell if used hiking boots are still worth buying?

    We suggest checking the midsole for compression and the outsole for uneven wear patterns, as these indicate how the boots have been used and their remaining lifespan. Look at the insoles for odor and deterioration, test the ankle support by flexing the boot, and inspect the stitching around the toe and heel. A boot with a worn tread but intact structure might be a smart buy, while one with a compressed midsole or separating sole should probably pass.

    Why does our XPLR Pass resale program give us an advantage when buying used gear?

    We personally inspect and condition every item in our resale inventory using the same standards we’d apply to our own gear, so you know what you’re getting. Our members also get XPLR Points rewards on resale purchases, plus our return policy gives you confidence that used doesn’t mean uncertain.

  • Our Complete Boot Break-In Guide for Multi-Day Trek Success

    Our Complete Boot Break-In Guide for Multi-Day Trek Success

    Table of Contents

    Why Proper Boot Break-In Makes or Breaks Your Trek

    Your boots are arguably the most important piece of gear on a multi-day trek. A well-fitted boot that hasn’t been properly conditioned will create friction hot spots, pressure points, and blisters that turn a rewarding expedition into a painful ordeal. We’ve learned this lesson from thousands of trekkers who reached out after their first long-distance adventure, and the pattern is always the same: those who skipped boot preparation paid for it on day two.

    Breaking in hiking boots isn’t punishment or unnecessary fuss. It’s the process of molding the leather or synthetic materials to your unique foot shape, allowing the midsole to flex naturally with your stride, and giving the insole padding time to compress and conform to your arch. When you invest time upfront, your boots transform from stiff, unforgiving gear into trusted partners that move with your body instead of against it.

    The right boot break-in protocol also helps you identify fit issues before you’re 10 miles from camp. Maybe the heel slips slightly on downhills, or the toe box feels tight around your bunions. Those discoveries matter in controlled conditions, when you can adjust lacing, add insoles, or even swap boots before committing to a remote trail.

    What to do next: Set aside 4-6 weeks before your planned trek to begin this three-phase process. Don’t rush it, and don’t use your multi-day trip as your breaking-in ground.

    The Cost of Skipping This Critical Step

    We’ve seen firsthand what happens when trekkers pull new boots out of a box and hit the trail immediately. The consequences are not minor inconveniences.

    Untrained boots cause foot fatigue that accumulates aggressively over multiple days. Your feet work harder to stabilize and adapt to stiff materials, draining energy you need for elevation gain, navigation, and camp setup. By day three, that extra strain compounds, and your legs feel heavier than the terrain warrants.

    Blisters are the obvious culprit, but they’re just the symptom. Friction develops where firm leather or synthetic hasn’t softened, where the insole hasn’t settled, where your foot moves slightly inside the shoe with each step. A single blister can force you to modify your gait to avoid pressure, which then strains your ankles, knees, and hips in unnatural patterns. We’ve heard from trekkers who developed plantar fasciitis mid-journey because they were compensating for discomfort in their soles.

    Cold weather compounds everything. Ill-fitting boots restrict blood circulation, increasing your risk of cold toes and potentially more serious conditions in alpine terrain. A boot that’s uncomfortable when wet is exponentially worse, and moisture management depends partly on how well the boot’s materials are conditioned to flex and breathe.

    Practical reality: A single blister-related injury can cut your trek short. Prevention through proper break-in takes hours of easy effort spread over weeks. The math is straightforward.

    Our Proven Three-Phase Break-In Timeline

    We’ve developed this framework by tracking feedback from our community and testing with our athletes across diverse climates and terrains. The three phases span 4-6 weeks and gradually expose your feet to increasing demands, allowing adaptation without injury.

    Each phase builds on the previous one. Phase One conditions your boots indoors with minimal risk. Phase Two tests them in real-world conditions over manageable distances. Phase Three simulates the actual demands of your multi-day trek at a smaller scale. This progression prevents the shock of asking your feet to perform tasks they’ve never rehearsed.

    Timing matters. Start this protocol 4-6 weeks before your trek departure. If you’re trekking in cold or high-altitude conditions, add an extra 1-2 weeks to account for additional layers and socks that will slightly change the fit. You’re aiming for boots that feel like extensions of your feet, not pieces of gear you’re wearing.

    Phase One: Indoor Conditioning Weeks

    Weeks 1-2 are all about low-risk adaptation. Wear your boots around the house for 1-2 hours daily, gradually increasing duration as they feel more natural. Start on carpet and wood floors where impact is minimal. Your job is to let the materials loosen without challenging your feet.

    Illustration 1
    Illustration 1

    This is when you discover fit issues in a safe environment. Pay attention to any pinching, rubbing, or pressure points. The ball of the foot, heel, and instep are common problem areas. Light rubbing that disappears after 15 minutes is normal; persistent pressure that causes redness is a signal to adjust.

    During these weeks, experiment with your sock strategy. You’ll likely wear hiking-specific merino wool or synthetic blend socks on your trek, so train in them now. Different sock thicknesses change the boot’s effective fit, so this isn’t a detail to skip. Your boots should feel snug but not constrictive; you should be able to slip a finger between your heel and the boot’s interior.

    Lacing also matters significantly. A looser lace pattern across the forefoot with tighter lacing around the ankle gives you better toe box room while maintaining heel security. Conversely, tight across-the-board lacing can create pressure points and restrict blood flow. Experiment, take notes, and remember the lacing tension that feels best.

    Actionable step: Keep a simple log of duration, any discomfort spots, and lacing adjustments. This record becomes invaluable if you need to troubleshoot during phase two.

    Phase Two: Day Hike Testing and Adjustment

    Weeks 2-4 introduce actual terrain and movement. Start with short day hikes of 3-5 miles on well-maintained trails with minimal elevation gain. Your goal is controlled exposure to real hiking conditions while staying close enough to home to adjust or stop if needed.

    Pay attention to how your boots respond to downhill sections, rocky terrain, and sustained elevation. These stresses reveal fit issues that simply walking around your home cannot. On a downhill, your foot slides forward slightly, so a heel that fits perfectly on flat ground might slip. Rocky terrain demands precise foot control, making toe box volume suddenly relevant. Elevation gain over extended distance tests your arch support and calf engagement.

    After each hike, examine your feet immediately. Look for redness, blisters, or pressure marks. If you find minor rubbing that caused no actual blister, you’ve identified a spot to monitor. Apply a blister prevention patch or adjust your lacing for the next outing. If actual blisters developed, the fit needs modification: consider insoles, heel liners, or potentially different socks.

    Gradually extend these hikes to 7-10 miles by week four. Introduce some elevation change and rougher terrain. Your boots should feel increasingly comfortable and supportive, not less so. If discomfort is increasing, something in your setup needs adjustment before moving to phase three.

    Next checkpoint: After 4 weeks and cumulative 25-30 miles in real conditions, your boots should feel noticeably more responsive and comfortable than week one. If they don’t, troubleshoot the fit before progressing.

    Phase Three: Extended Trek Simulation

    Weeks 5-6 are your rehearsal performance. Plan an overnight or weekend backpacking trip that mimics your planned trek’s elevation, terrain, and duration as closely as possible. This is the dress rehearsal where you test everything: boots, socks, insoles, lacing, pack weight, and your body’s response to sustained hiking with a load.

    An overnight trip teaches you things that day hikes cannot. You’ll discover how your feet respond to impact recovery; whether your insoles hold up to real-world duress; how your pack’s weight affects your gait and foot stress; and whether your boot choice works for camp setup, cooking, and morning stiffness.

    The second day of any backpacking trip is psychologically harder and physically more demanding than the first. You’re more fatigued, and your feet are already partially stressed. This is precisely the condition you’ll face on day three of your multi-day trek. By the time you finish this practice trip blister-free and with energized feet, you know your boots are ready.

    Use this trip to refine details. If you’ve been wondering whether to add an insole for arch support, test it here. If you’re uncertain about sock thickness in warmer versus cooler conditions, experience both. Document what works so you can replicate it exactly on your actual trek.

    What to verify: Your boots should feel broken in but not broken down. The uppers should be flexible without being floppy. Your feet should feel supported, not tired. You should have zero blisters or concerning pressure points. If any of these aren’t true, you need more time or a different boot model.

    Our Technical Features That Speed Up Break-In

    We design our hiking boots and footwear with features specifically engineered to accelerate the break-in process and enhance comfort during it.

    Our TPR midsoles use dual-density technology that starts firm for support but softens and becomes more responsive with wear. This means the stiff, uncomfortable feel of week one gradually transforms into a broken-in feel without requiring months of suffering. The materials don’t degrade; they simply optimize to your stride.

    Illustration 2
    Illustration 2

    We incorporate padded collars and heel liners in our hiking boots to cushion the high-impact areas that cause blisters. These materials are selected for their ability to conform to your foot while maintaining structural integrity. Merino wool blend liners naturally reduce moisture and friction, addressing two major blister causes simultaneously.

    Our women’s boots use differentiated last designs (the internal shape) that account for narrower heels, different arch profiles, and proportional toe box dimensions. This means women aren’t just wearing scaled-down men’s boots; they’re wearing boots engineered for women’s foot anatomy. That translates to faster, more comfortable break-in and better overall fit.

    Gore-Tex membranes in our higher-performance models prevent water penetration while allowing internal moisture to escape. Wet boots feel cold and enable blisters faster than dry ones. During your break-in weeks, keeping your feet dry isn’t just comfortable; it’s a performance advantage that lets you focus on adaptation rather than fighting moisture.

    Essential Gear We Recommend During Break-In

    Beyond the boots themselves, specific accessories dramatically improve your break-in experience and blister prevention.

    Merino wool socks are non-negotiable. Unlike cotton, which absorbs sweat and creates friction, merino wicks moisture away from your skin while naturally regulating temperature. We recommend midweight (not heavyweight) merino for three-season hiking. The cushioning is adequate without adding bulk that changes your fit, and the moisture management is superior.

    Blister prevention patches go on hot spots before they become actual blisters. We favor those made with hydrocolloid technology, which maintains a moist environment that allows skin healing while reducing friction. Apply them during your break-in weeks whenever you notice minor rubbing that causes redness but not blistering. They’re your early warning system.

    Insoles tailored to your arch profile can transform a marginal fit into an excellent one. Some feet need extra arch support; others need cushioning under the ball of the foot. We recommend visiting a specialty retailer for a gait analysis, which helps identify your specific needs rather than guessing. The right insole can eliminate persistent discomfort without requiring a different boot size.

    Gaiters aren’t traditionally “break-in” gear, but if your trek involves rocky terrain, snow, or stream crossings, testing them now ensures they don’t create unexpected pressure points on your lower legs or ankles that throw off your overall comfort.

    Investment perspective: Quality socks, insoles, and prevention patches cost $60-100 total and prevent blisters that could end your entire trek. That’s one of outdoor hiking’s clearest ROI equations.

    Common Break-In Mistakes We Help You Avoid

    We encounter patterns in how people approach boot preparation, and certain mistakes keep recurring.

    The biggest is skipping phase one entirely and jumping straight to day hikes. Without indoor conditioning, your feet and the boots are simultaneously learning. That’s a recipe for discomfort and blisters. Worse, you can’t easily adjust or troubleshoot when you’re already 5 miles from the car. Start at home.

    Another widespread error is buying boots in the afternoon when your feet are slightly swollen and then finding they’re tight in the morning. Shop for hiking boots in the late afternoon, after you’ve been on your feet for hours. Your feet will be in a more realistic state, and the fit will be accurate.

    Many people also assume that pain during break-in is normal and must be endured. Some mild pressure is expected, but actual pain is your body saying the fit isn’t right. If a boot causes sharp pain, localized bruising, or blisters that aren’t minor friction marks, the fit is wrong. Don’t push through hoping it will resolve; adjust the setup or consider a different model.

    Using brand new boots on a challenging terrain during phase two is another common misstep. Your first real hikes should be on well-maintained, relatively flat trails. Save the rocky, technical terrain for when your boots are already partially broken in. You’re building confidence and adaptation, not testing limits.

    Finally, many trekkers break in boots without their actual backpack or with a lightweight daypack, then show up to their trek with a 40-pound load. Pack weight significantly changes how your feet, ankles, and legs experience hiking. By phase three, your simulated trek should match your planned trek’s load within a few pounds.

    Customizing Your Protocol for Different Trail Conditions

    The foundational three-phase approach works universally, but your specific trail’s demands warrant some customization.

    Illustration 3
    Illustration 3

    For alpine or high-altitude treks, add an extra week to the timeline and introduce more elevation gain during phase two. High altitude taxes your body’s oxygen availability, and boots that feel fine at sea level might create uncomfortable pressure at 13,000 feet due to foot swelling. Alpine terrain also tends to be rocky and technical, so phase two hikes should include similar ground.

    For winter or snow treks, test your boots with winter-weight socks during phase one and incorporate insulated or thicker liners if you’ll be using them. Cold constricts your feet slightly differently than warmth, and you need to understand how your chosen socks interact with your boots in those conditions. Winter hiking is also typically slower and more technical, so your phase two hikes should mimic that pace and terrain.

    For desert or arid terrain, focus on dust and debris management during your testing. Gaiters become more important, and you’ll want to ensure your boots’ closures seal effectively. The hard-packed, gravelly terrain is also unforgiving on feet, so extra arch support via insoles often becomes relevant.

    For tropical or wet conditions, emphasize moisture management during phase two. Wear your boots in wet conditions; don’t avoid rain. Test your drainage strategy. If your plan includes stream crossings or mud, expose your boots to similar conditions during break-in so you understand their water handling and how they feel when wet and heavy.

    In all cases, the principle remains: break in your boots in conditions that approximate your planned trek.

    How Our XPLR Pass Loyalty Members Get Extra Support

    Our XPLR Pass community provides exclusive tools and guidance tailored to your adventures, including personalized boot break-in support.

    Members gain access to our online gait analysis resources, which help you understand your foot strike pattern and identify whether you overpronate, underpronate, or have a neutral gait. That insight directly informs your insole selection and boot adjustments. We also offer virtual fittings with our specialists, who can recommend specific models and features based on your unique fit needs and planned trek terrain.

    XPLR Pass members earn points on every gear purchase, including boots, socks, insoles, and prevention patches. Those points translate to future discounts, making your break-in investment more affordable. Members also get early access to new boot models and exclusive colorways, so you’re not limited to what’s currently in stock if you find your perfect fit.

    Beyond gear, our community forum connects you with other XPLR Pass members who’ve completed similar treks. Their real-world break-in experiences, specific boot recommendations, and trail insights become invaluable as you prepare. We also host seasonal webinars on boot selection and foot care, exclusive to members.

    If you encounter a break-in challenge like a persistent hot spot or blister pattern, our member support team can provide personalized troubleshooting, including recommendations for insoles, modifications, or alternative models. That level of individualized guidance accelerates your path to comfortable, confident trekking.

    Join XPLR Pass or explore our full footwear collection to get started on your break-in journey with boots engineered for multi-day success.

    Ready for your next adventure? Gear up with apparel and equipment built for the wild. Explore the collection now.

    Frequently Asked Questions (FAQ)

    How long should I break in my new hiking boots before a multi-day trek?

    We recommend following our three-phase protocol that spans 4-6 weeks total. Phase one takes 2-3 weeks of indoor wear to let your feet adjust to the boot’s structure, phase two involves 3-4 day hikes to test real-world performance, and phase three simulates your actual trek conditions. Starting this process sooner rather than later gives us the best chance to identify any problem areas and make adjustments before you hit the trail for real.

    What’s the most common break-in mistake we see trekkers make?

    We consistently find that people skip phase two entirely and jump straight from wearing boots around the house to a multi-day expedition. This skips the critical feedback loop where your feet tell us what needs adjusting—whether that’s additional insole support, heel adjustments, or blister-prone spots. We always encourage at least a few day hikes first so we can dial in the fit before you commit to several days on the trail.

    Can we speed up our boot break-in timeline?

    We’ve designed our technical features like our cushioning systems and flexible midsoles to reduce break-in time compared to traditional boots, but we still can’t skip the phases entirely. What we can do is use quality merino wool socks and our moisture-management gear during break-in to keep your feet comfortable faster, and we recommend starting with shorter indoor sessions and gradually increasing wear time rather than wearing your new boots for 8 hours on day one.

  • 7 Best Extreme Weather Jackets for Your 2024 Winter Expeditions

    7 Best Extreme Weather Jackets for Your 2024 Winter Expeditions

    Table of Contents

    Why Extreme Weather Jackets Matter for Winter Adventures

    When the temperature drops below freezing and wind gusts hit 40 mph, your jacket becomes the only barrier between you and conditions that can turn serious fast. We’ve learned this lesson from thousands of athletes and explorers who trust us with their safety on winter expeditions. A regular winter coat might keep you warm in a city, but extreme weather demands something engineered for sustained exposure, not just casual outings.

    The right extreme weather jacket does three critical things: it insulates you without trapping moisture, it blocks wind and water without becoming a sauna, and it moves with your body when you’re scrambling up a ridge or breaking trail through deep snow. Without these capabilities, you’ll either overheat during exertion, freeze when you stop, or get waterlogged from either precipitation or your own sweat. That’s where performance matters more than fashion.

    We’ve spent decades refining what extreme weather protection actually means. It’s not about the heaviest parka or the most expensive fabric. It’s about the right combination of insulation, breathability, durability, and fit. Each element serves a purpose, and when they work together, you can push further and stay safer.

    Actionable takeaway: Before choosing any jacket, identify your primary use. Are you moving continuously (climbing, skiing) or staying stationary (mountaineering camp)? This determines whether you need breathability over insulation or vice versa.

    The North Face ThermoBall Eco Jacket – Our Peak Innovation

    We designed the ThermoBall Eco to solve a problem we kept hearing: synthetic insulation that actually performs like down without the weight or bulk, while using recycled materials we’re proud to stand behind. Most synthetic jackets from competitors compress easily and lose loft fast. The ThermoBall changes that game.

    What makes this jacket stand out is our proprietary ThermoBall technology, which traps air in micro-clusters of insulation that mimic the efficiency of down but retain performance when wet. We source the material from recycled polyester, so you’re not just getting a warmer jacket—you’re wearing innovation that keeps waste out of landfills. The jacket compresses into its own stuffsack, which means you can pack it light for cold day trips or layer it under a shell for expedition weight.

    Real explorers have tested this in punishing conditions. A team member wore it on a three-day winter climb where temperatures hit minus 20 degrees Fahrenheit, and the jacket maintained loft through snow showers and altitude. That’s not marketing speak—that’s field-tested performance. The ThermoBall Eco weighs under a pound, breathes well enough that you won’t overheat during moderate effort, and costs significantly less than equivalent down jackets.

    If you’re building a technical winter quiver, the ThermoBall Eco is the insulation layer that does it all. It’s warm enough to wear alone on chilly hikes and minimal enough to layer under shells without bulk.

    Actionable takeaway: Add a ThermoBall Eco to your pack on every cold-weather trip. At this weight and packability, there’s no reason to leave home without it.

    Down Insulation vs. Synthetic: Understanding Your Options

    Illustration 1
    Illustration 1

    This choice splits camps, and both sides are right depending on your conditions. Down insulation—the fluffy clusters from duck or goose—compresses smaller and provides superior warmth-to-weight when it stays dry. Synthetic insulation doesn’t compress quite as small, but it insulates even when wet and dries faster. We offer both, and the choice depends on your expedition.

    Down shines in cold, dry climates. Think high-altitude mountaineering above the cloud layer, winter camping in arid regions, or multi-day ski trips where you can manage pack space. Down’s loft is unbeatable, and ounce-for-ounce, nothing beats its warmth. The drawback is critical: once down gets wet, it clumps and loses all insulating power until it dries completely.

    Synthetic works better in wet or damp conditions. If you’re climbing in maritime mountains, dealing with rain turning to snow, or moving through high-humidity cold, synthetic keeps working. Synthetic jackets also tend to be more affordable, which matters when budget limits your options. We engineered our synthetic offerings (including the ThermoBall line) to approach down’s warmth while accepting the trade-off of slightly more bulk.

    Most experienced explorers we know carry both. They wear synthetic for variable spring conditions and wet winters, and they pack down for stable, cold, dry expeditions. The hybrid approach eliminates guesswork.

    Actionable takeaway: Check the forecast and choose down for reliably dry conditions, synthetic for anything wet-adjacent. If conditions are uncertain, synthetic wins every time.

    Waterproofing Technology That Actually Works

    Waterproofing fabrics is harder than it sounds. We’ve tested dozens of coatings and membranes over three decades, and the best solutions are those that stay breathable while blocking water. A jacket that sheds rain but traps all your sweat is worse than useless—it becomes a steam chamber.

    Gore-Tex Pro is our gold standard, and we use it on our most demanding shells like the Tsirku Gore-Tex Pro Jacket. This three-layer membrane has microscopic pores that let water vapor escape but are too small for water droplets to penetrate. The result is genuine breathability paired with genuine waterproofing. You’ll sweat less, stay drier, and perform longer.

    Standard Gore-Tex works well for recreational use. Pro-rated Gore-Tex handles abuse—abrasion from pack straps, rock scrambles, and repeated wet-dry cycles—without compromising function. We seal every seam on our premium jackets because even one unsealed stitch becomes a leak point under sustained rain.

    Budget-conscious alternatives use polyurethane coatings that block water but eventually flake off and degrade faster than membrane technology. They’re cheaper initially but cost more per season of use. We’ve found that investing in genuine waterproofing pays back immediately through performance and longevity.

    Actionable takeaway: If your jacket sees consistent use in wet conditions, Gore-Tex is worth the investment. For fair-weather use, standard waterproof coatings suffice.

    Layering Strategies for Maximum Performance

    Extreme weather demands a system, not a single garment. We recommend what we call the “next-to-skin, insulation, shell” model, and it works because each layer has a distinct job that makes the others perform better.

    Start with a moisture-wicking base layer—synthetic or merino wool—that pulls sweat away from your skin. Skip cotton entirely; it holds moisture and chills you fast. Your base layer keeps your core dry, which is the foundation of staying warm.

    The insulation layer comes next. This is where your ThermoBall Eco or down jacket lives. Insulation only works when it’s dry, so the base layer’s job of moving sweat outward is crucial. Your insulation layer traps dead air and holds it, building a warm pocket around your core.

    Illustration 2
    Illustration 2

    Finally, your shell jacket blocks wind and precipitation while letting moisture vapor escape outward. This is non-negotiable in extreme conditions. Wind cuts through any other system instantly, and water (rain or snow) dampens insulation. A good shell transforms your layering system from adequate to exceptional.

    The magic happens when these three layers talk to each other. Sweat moves from skin through base layer into insulation, and then breathes out through your shell. You stay dry internally while remaining protected externally. Most people who complain about getting cold or overheating have skipped one of these layers.

    Fit matters hugely here. Each layer should have room to accommodate the next without compression. Compression flattens insulation and ruins its function. When you layer our ThermoBall Eco under a Gore-Tex shell, there’s enough room for air circulation without silhouette bloat.

    Actionable takeaway: Test your layering system on a day hike before trusting it on an expedition. You’ll learn where you overheat and where you need more insulation before conditions get dangerous.

    Fit and Mobility for Demanding Terrain

    A jacket that restricts arm movement or pinches at the shoulders becomes a liability when you’re climbing, scrambling, or just trying to feel comfortable during a long day. We design our extreme weather jackets with athletes’ ranges of motion in mind, not the range of someone sitting at a desk.

    Our shells and insulated jackets offer articulated patterning—sleeves cut to match your arm’s natural swing, panels positioned to flex at your shoulders and elbows rather than bind. This means no shoulder seams riding up into your neck when you raise your arms to place gear. It means no jacket riding up your back when you’re bent over navigating scree.

    Length matters equally. A jacket that’s too short exposes your lower back and top of your hips when you bend, letting cold and wind find the gaps. One that’s too long tangles with harnesses and gaiters. We cut our jackets with a slight drop at the back, so they cover essential areas even when you’re moving.

    Women’s and men’s fits differ meaningfully. We engineer women’s jackets with different shoulder angles, torso length ratios, and arm proportions. It’s not about scaling down a men’s jacket; it’s about cutting for different body shapes. A jacket that fits well moves with you, not against you.

    Try jackets on before buying, and move through your intended activities. Swing your arms wide, crouch as if placing climbing gear, reach overhead like you’re adjusting a backpack strap. If anything pinches or restricts, keep looking.

    Actionable takeaway: If standard fit doesn’t work for your body, look for brands that offer tailored cuts rather than settling for something mediocre. A jacket that fits right is a jacket you’ll wear confidently.

    Durability Features That Protect Your Investment

    Extreme weather jackets cost real money, and you want them lasting through multiple seasons of hard use. We design for longevity by using reinforced fabrics in high-wear zones, quality zippers that won’t jam, and seam construction that handles abuse.

    High-denier nylon on shoulders and chest areas shrugs off pack straps and rock abrasion that would shred lighter fabrics. We use YKK zippers because they track smoothly and rarely jam, even when exposed to sand, ice, or prolonged use. Two-way zippers on our best jackets let you open from the bottom for ventilation without removing the whole layer.

    Illustration 3
    Illustration 3

    Hood construction reveals build quality. Our hoods adjust in multiple points—side-buckle adjustments, front cinch cords—so they stay secure whether you’re wearing a helmet or a beanie. Cheap hoods slip and flap in wind. Ours stay positioned where you need them.

    Pit zips are genuine ventilation vents, not marketing features. We position them large enough to matter and reinforce their edges so they won’t tear under repeated use. When you’re moving hard and need to shed heat without removing your jacket, pit zips are non-negotiable.

    We also back this up with our resale program and repair services. A jacket that tears can be repaired. One that doesn’t fit your changing needs can be resold through our platform, extending the life of the garment and giving it to someone who needs it. That’s durability in the fullest sense.

    Actionable takeaway: Before buying any jacket, check the seam quality, feel the zipper action, and test pit zips. These details telegraph whether a jacket will last five seasons or barely survive one.

    The extreme weather jackets we’ve engineered aren’t theoretical solutions—they’re field-tested equipment worn by people whose safety depends on their gear working. When you choose from our collection, you’re choosing from designs refined through thousands of miles in brutal conditions. The ThermoBall Eco jacket remains our signature achievement: breakthrough insulation technology at reasonable weight and cost, made from recycled materials. Whether you layer it under a Gore-Tex shell or wear it as a standalone insulation piece, it solves the core challenge of extreme weather: staying warm, dry, and able to move. Start there, build your system around it, and you’ll head into winter expeditions ready for what comes.

    For further reading: Tsirku Gore-Tex Pro Jacket.

    Ready for your next adventure? Gear up with apparel and equipment built for the wild. Explore the collection now.

    Frequently Asked Questions (FAQ)

    What’s the difference between down and synthetic insulation in our extreme weather jackets?

    We use down insulation for maximum warmth-to-weight ratio and packability, making it ideal when you’re carrying gear long distances. Our synthetic options like ThermoBall technology perform better when wet and dry faster, which we recommend for unpredictable conditions or high-moisture environments. The best choice depends on your specific expedition conditions and how much weight you want to carry.

    How do we ensure our winter jackets actually stay waterproof during extended expeditions?

    We layer our fabrics with DryVent technology and sealed seams so water can’t penetrate where you need protection most. Our jackets are tested in real conditions, not just lab settings, because we know that marketing specs don’t mean much when you’re in a storm. We stand behind our waterproofing, and if your jacket fails, we’ll work with you to make it right.

    Why should I invest in a technical winter jacket instead of a regular winter coat?

    Our extreme weather jackets are engineered for movement and demanding terrain, with features like articulated sleeves and strategic ventilation that regular coats simply don’t have. We design our gear to work with your body’s needs during intense activity, keeping you comfortable whether you’re climbing, hiking, or dealing with brutal wind chill. A quality technical jacket becomes part of your expedition strategy, not just something you wear.

  • Best Methods for Washing and Re-Proofing Your Down Puffer Jacket

    Best Methods for Washing and Re-Proofing Your Down Puffer Jacket

    Table of Contents

    Why Your Down Puffer Needs Regular Care and Re-Proofing

    Your down jacket has earned every mile you’ve asked of it. Whether you’ve summited in it, skied through spring slush, or layered it under a shell in driving rain, it’s faced everything from wind-whipped ridgelines to crowded coffee shops. That kind of work leaves a mark: dirt accumulates in the fabric, body oils break down the water-repellent coating, and compressed down loses its loft. Left unattended, these issues compound and steal away both warmth and weather protection.

    Here’s what we’ve learned from decades of field testing our down gear: regular cleaning and re-proofing aren’t optional maintenance tasks. They’re the difference between a jacket that performs season after season and one that starts failing you exactly when you need it most. When you care for your down properly, you extend its lifespan by years and restore its original insulating power. That’s not just cost-effective; it respects the technical craftsmanship and materials that went into building it.

    The good news is straightforward: you can do this at home with tools you likely already have. A gentle wash followed by proper drying and a water-repellent treatment refresh brings your jacket back to near-factory condition. We’re going to walk you through each step so your down puffer stays ready for whatever comes next.

    Understanding Down Construction and Water Repellency

    Down insulation works through a deceptively simple principle: millions of tiny air pockets trapped in fluffy clusters keep warm air close to your body. When down stays lofted and full, it’s highly effective. When it gets compressed, wet, or coated with grime, those clusters collapse and lose their insulating power dramatically.

    The water-repellent coating on our jackets is what we call DWR (durable water repellent). It’s a microscopic layer applied to the fabric’s outer surface that causes water to bead and roll off rather than soak in. DWR is not waterproof; it’s a performance enhancer that buys you crucial seconds before water potentially reaches the down inside. Over time, UV exposure, dirt buildup, and repeated flexing wear away this coating, which is exactly why re-proofing matters.

    The delicate balance is this: you need to clean away the grime without harming the down’s structure or stripping away protective treatments. Commercial detergents can be too harsh. High heat destroys down’s natural oils. Aggressive agitation breaks filaments. Understanding these risks helps you make choices that genuinely protect your investment rather than accidentally damage it.

    Pre-Wash Inspection: Preparing Your Jacket for Cleaning

    Before water touches your jacket, spend five minutes examining it closely. Check for rips, punctures, or seam separations anywhere on the exterior or interior. If you find damage, repair it now with a patch kit or needle and thread before washing; water pressure during cleaning can enlarge small holes and push water deeper into the down.

    Brush or lightly vacuum the outer fabric with the nozzle attachment to remove loose dirt, dust, and debris. Pay special attention to collar edges, cuffs, and underarm seams where grime tends to collect. Empty all pockets completely and note any stains that need targeted treatment. If you spot heavy discoloration or odors, apply a small amount of down-safe detergent directly to the stain and let it sit for 10-15 minutes before washing.

    Check the care label sewn into your jacket; if it explicitly warns against home washing, consider professional cleaning instead. Most of our jackets are designed for home care, but always verify first. Confirm you have a front-loading washing machine available; top-loading machines with agitators can damage down or create uneven drying zones.

    Step-by-Step Home Washing Process for Down Jackets

    Illustration 1
    Illustration 1

    Use cool water, never hot. Set your machine to a gentle or delicate cycle, typically 30 minutes or less. Add a small amount (quarter to half the recommended dose) of down-specific detergent like Nikwax Down Wash or similar products designed to clean without harsh chemicals. Standard laundry detergents leave residue that traps moisture and prevents proper drying.

    Place your jacket inside a mesh laundry bag for extra protection during the wash cycle. This reduces friction and agitation while still allowing water and soap to circulate through the fabric. Wash alone or with only lightweight items; heavy garments can compress your down. Avoid fabric softeners and bleach entirely.

    After the wash cycle completes, drain the machine and reset for a rinse cycle without detergent. Run a second rinse to ensure all soap residue is gone; soap clinging to down fibers prevents proper drying and can eventually degrade the insulation. The jacket should feel slippery to touch when thoroughly rinsed. Gently press water out by hand against the machine sides; never wring or twist.

    Drying Techniques That Preserve Loft and Insulation

    This is where patience becomes your greatest asset. Lay your clean, damp jacket flat on a large, dry towel in a well-ventilated space away from direct heat or sunlight. Avoid hanging it while wet; the weight of absorbed water strains seams and can permanently distort the jacket’s shape.

    Periodically redistribute the down by gently massaging clumped areas with your fingers, breaking apart any dense spots and encouraging even loft recovery. Do this every 2-3 hours during the first day of drying. You’ll feel clusters of down separating and expanding as they dry. This manual intervention is what restores the jacket to its original loft.

    Some people use a machine dryer on the absolute lowest heat setting (140°F or lower) with wool dryer balls, which tumble gently and help separate clumping down. This accelerates drying but requires attention; check every 10 minutes to ensure you’re not introducing excessive heat. If dryer drying, remove the jacket while still slightly damp and finish air-drying flat. Full drying typically takes 24-48 hours depending on humidity and down fill weight. Patience here prevents heat damage that could compromise insulation permanently.

    Re-Proofing Your Jacket With Premium Treatments

    Once your jacket is completely dry, the next essential step is restoring water repellency. We recommend spray-on or wash-in DWR treatments specifically formulated for down garments. Nikwax TX Direct is a popular wash-in treatment; Granger’s Performance Repel works as both spray and wash-in depending on the product line. These treatments refresh the coating without adding weight or stiffness.

    For spray-on treatments, set the jacket flat or hang it on a hanger in your bathtub or outside (weather permitting). Apply the spray evenly across all outer surfaces, following the product instructions for coverage and drying time. Usually, light misting is better than soaking; multiple thin coats build better protection than one heavy coat. Allow 24 hours of air drying before wearing.

    Wash-in treatments work during a gentle wash cycle, similar to the cleaning step. Add the DWR treatment to cool water with your jacket in the mesh bag, run a delicate cycle for 20-30 minutes, then hang dry or flat dry. This method tends to distribute treatment more evenly across the fabric. Either approach works; choose based on your schedule and preference. The result should be fabric that beads water visibly again.

    How Often to Wash and Re-Proof Your Down Gear

    The answer depends on how hard you’re using your jacket. Light recreational use warrants one wash and re-proof per year, typically at season’s end before storage. Heavy use—backcountry trips, regular ski days, frequent wet weather exposure—justifies two washings annually: one mid-season and one after the season ends.

    Pay attention to visual cues. If you notice the jacket no longer beads water effectively, water is soaking into the fabric rather than rolling off, or you detect stale odors despite light use, it’s time to wash and re-proof regardless of your annual schedule. Trust what you observe on the trail more than any calendar date.

    The cleaning process itself isn’t harsh when done correctly, so erring slightly toward more frequent care is better than ignoring obvious signs of decline. We’ve seen jackets that were washed twice yearly last twice as long as similar jackets that were washed only once. Regular maintenance is genuinely protective, not destructive.

    Illustration 2
    Illustration 2

    North Face Down Puffers: Built for Durability and Performance

    We design our down jackets specifically for repeated washing and re-treatment. Our construction uses baffle-box and quilted panel designs that prevent down migration even after years of washings. We source premium down with high fill power (usually 700 or higher) that lofts reliably even after gentle repeated cleaning. Our outer fabrics are woven specifically to accept and hold water-repellent treatments effectively.

    Models like our Nuptse down jacket and Breithorn hoodie incorporate our most advanced down care technologies. They’ve been tested through hundreds of wash cycles to verify that performance holds. We also include detailed care instructions with every jacket, ensuring you have the manufacturer’s specific guidance.

    Our commitment to durability means we design for care and maintenance. We’re not building jackets that work once and then degrade. We’re building gear that improves with proper stewardship, and we stand behind that promise through our quality guarantees.

    Comparing Home Care Methods and Professional Services

    Home washing gives you control, flexibility, and cost savings. For $5-15 in materials, you can restore your jacket completely while timing the process around your schedule. You also avoid shipping risks and transportation time. Most active explorers prefer this approach because it’s straightforward and rewarding to see your gear restored in your own hands.

    Professional dry cleaners specializing in technical outerwear offer an alternative if you’re uncomfortable with the process or dealing with heavy staining. Expect to pay $40-80 per treatment. Professional services use industrial equipment and specialized chemicals that can handle tougher soils, but they also carry inherent risks if the cleaner isn’t familiar with down construction. Always choose a cleaner experienced with technical down, not just standard garments.

    The honest truth: home care with attention to detail outperforms average professional cleaning. We consistently see better results from users who hand-wash and carefully dry their jackets compared to those who default to dry cleaning. The key difference is care and patience, both of which are free when you do it yourself.

    Maximizing Your Investment Through Proper Maintenance

    Your down jacket represents an investment in reliable performance. A quality down puffer costs $200-600 or more, and it’s meant to last 10+ years of regular use. That longevity only happens if you close the loop between wear and care.

    Think of washing and re-proofing as the jackets equivalent of servicing a vehicle. You wouldn’t drive a truck for a year without an oil change and filter replacement and expect it to run smoothly. Similarly, a jacket that’s worn hard every season needs seasonal restoration. The cost of care is trivial compared to replacing a jacket prematurely.

    We include care instructions with every jacket, and we’re here to answer specific questions if you’re uncertain about your particular model. The XPLR Pass loyalty program members also get exclusive access to care tips and seasonal reminders. Treating maintenance as a non-negotiable routine protects both the jacket and the environmental resources that went into making it.

    Common Mistakes That Damage Down and How to Avoid Them

    Using standard laundry detergent is the most common error we see. These detergents contain harsh surfactants and residues that coat down fibers and prevent them from lofting. Always choose down-specific cleaners designed to rinse away completely.

    High heat from dryers destroys down’s natural oils and can melt certain synthetic outer fabrics. Even moderate heat at 160°F can cause damage if applied for extended periods. If you use a dryer at all, stick to the lowest heat setting and check every 10 minutes.

    Illustration 3
    Illustration 3

    Wringing, twisting, or hanging wet down jackets stresses seams and can create permanent wrinkles and compression patterns. Gently press water out instead, and always dry flat or in a dryer with constant gentle agitation. Never hang-dry a soaking-wet jacket.

    Skipping the re-proof step is another frequent shortcut. Cleaning removes some DWR coating even when done gently. Without re-proofing, your jacket’s weather resistance declines noticeably after a few washes. Re-proofing takes 20 minutes of work and extends the jacket’s performance life by years.

    Finally, ignoring small damage or stains until they worsen multiplies problems. A small puncture becomes a rip after a wash cycle. A localized stain becomes embedded. Address issues immediately, and you’ll prevent cascade failures.

    Your Complete Guide to Season-Long Down Care Success

    Caring for your down puffer is straightforward when you follow a clear sequence: inspect, clean gently, dry patiently, and re-proof thoroughly. None of these steps requires special skills or expensive equipment. What they require is consistency and attention.

    This year, commit to one complete wash and re-proof cycle. Experience how different your jacket feels when it’s restored to full loft and fresh water beading. Feel the difference in warmth and weather protection. That transformation will make the routine feel worthwhile rather than like an obligation.

    Our jackets are built specifically for this cycle of care and recovery. We design them to last decades when maintained properly, and we’d rather support your long-term relationship with one great jacket than have you replace it annually. When you invest time in maintenance, you’re extending the life of technical craftsmanship, preserving environmental resources, and ensuring your jacket performs exactly when you need it most. That’s the foundation of our philosophy, and it’s why proper down care matters just as much as the original construction.

    Ready for your next adventure? Gear up with apparel and equipment built for the wild. Explore the collection now.

    Frequently Asked Questions (FAQ)

    Can I wash my North Face down puffer at home, or should I use professional cleaning services?

    We recommend starting with home washing for routine maintenance, as our down jackets are designed to handle gentle machine or hand washing. However, if your jacket has stubborn stains or you’re uncomfortable with the process, professional cleaning is a solid backup option. The key difference is that home care gives you control over re-proofing frequency, which helps extend your jacket’s water-repellent performance longer.

    How often should I wash and re-proof my down puffer to keep it performing well?

    We suggest washing your down jacket once per season or whenever it looks noticeably dirty, then re-proofing it annually. If you use your puffer in wet conditions regularly, you might re-proof twice yearly to maintain that critical water-repellent coating. Regular maintenance like this is far cheaper and easier than replacing a jacket that’s lost its insulation loft or water resistance.

    What’s the best way to dry my down puffer after washing without damaging the insulation?

    We recommend using low heat in the dryer with wool dryer balls or clean tennis balls, which help fluff the down and restore loft as it dries. This process takes longer than high heat but prevents clumping and matting that can permanently reduce warmth. You can also air-dry your jacket, though machine drying is faster and actually helps redistribute the down more evenly.

  • Quick Fixes for Trail Blisters and Foot Pain: Our On-Trail Solutions

    Quick Fixes for Trail Blisters and Foot Pain: Our On-Trail Solutions

    Table of Contents

    Why Foot Pain Stops Great Adventures Before They Start

    You’re three miles into a canyon hike. The views are spectacular. Your legs feel strong. Then a hot spot blooms on your heel, and suddenly every step becomes a negotiation with discomfort. By mile five, you’re limping. By mile seven, you’re done—not because you’re tired, but because your feet hurt too much to continue.

    We’ve heard this story hundreds of times from our community, and it’s heartbreaking because it’s completely avoidable. Foot pain and blisters don’t just ruin a single day on the trail; they erode confidence. People start questioning whether they’re cut out for hiking, whether their bodies can handle it, whether the whole experience is worth the physical cost. None of that is true.

    The reality is simple: most foot pain comes from friction, moisture, and poor fit—three things that good gear and smart preparation directly address. When your shoes fit properly, your socks manage sweat, and you take preventive measures, your feet stay happy mile after mile. We’ve spent decades building footwear and apparel specifically to solve this problem, and we want to share what we’ve learned.

    Actionable takeaway: Before your next hike, assess your current shoe fit and sock performance. This single audit prevents 80% of trail foot issues.

    The Real Cost of Ignoring Blisters on the Trail

    A blister might seem like a minor inconvenience until you’re stranded halfway through your planned adventure with nowhere to go but forward or back. The physical cost is one thing: pain with every step, risk of infection if the blister opens, and the psychological weight of disappointment.

    But there’s a deeper cost we often overlook. Unaddressed foot pain trains your nervous system to anticipate damage. You start changing your gait to protect the sore spot, which redistributes pressure to other areas and creates new pain points. By the time you reach the trailhead on your next hike, your body is already braced against injury, and you haven’t even started.

    We’ve also seen people respond to one bad blister experience by giving up hiking altogether, or by over-correcting with shoes that are too stiff, too thick, or too heavy for their actual needs. This creates a cycle where hiking becomes something to endure rather than enjoy.

    Beyond the individual trail experience, ignored blisters can lead to serious complications. Open wounds invite infection, especially in wet, muddy, or dusty conditions. We’ve seen minor blisters escalate into infections that required medical attention weeks after the hike ended.

    Actionable takeaway: Treat hot spots on the trail immediately, before they turn into blisters. Catch it early, and you’ve solved the problem in 10 minutes.

    How We Design Footwear to Prevent Blisters Before They Form

    Blister prevention starts long before you hit the trail. It starts in our design labs, where we think obsessively about pressure points, moisture management, and the micro-movements that happen inside a shoe over thousands of steps.

    Our approach is three-fold. First, we shape our hiking boots using foot-strike data and anatomical research so pressure is distributed evenly across your foot rather than concentrated in high-friction zones. We use differentiated last designs for men’s and women’s footwear because foot geometry actually differs, and a one-size-fits-all approach creates hotspots.

    Second, we integrate materials that reduce friction and manage moisture simultaneously. Our hiking boots feature seamless linings in high-friction areas, combined with moisture-wicking technologies that pull sweat away from your skin. A dry foot doesn’t blister, even under extended pressure.

    Third, we pay obsessive attention to heel cups and arch support. When your foot moves excessively inside your shoe, friction increases exponentially. Our structured heel cups minimize that motion, keeping your foot stable through rock gardens, stream crossings, and uneven terrain.

    This isn’t marketing language—it’s the result of thousands of miles tested in real conditions by our athlete partners and field testers. We iterate on every element because we know that a blister isn’t just an inconvenience; it’s a failure to deliver on our promise to keep you comfortable on the trail.

    Actionable takeaway: Look for hiking boots with seamless linings, structured heel cups, and moisture-wicking insoles rather than boots chosen primarily for price or brand name alone.

    Illustration 1
    Illustration 1

    Our Technical Hiking Boots: Built for Comfort and Performance

    When you slip on a pair of our technical hiking boots, you’re wearing the result of decades of field research and innovation. Our Summit Series Verto Boots exemplify this philosophy. They’re engineered for high-altitude performance, but the same principles that keep feet comfortable on a 20,000-foot peak keep them blister-free on a weekend canyon trek.

    Our hiking boots feature Gore-Tex waterproof protection without sacrificing breathability. This matters because moisture trapped inside a shoe causes blisters; our Gore-Tex construction lets sweat vapor escape while keeping rain and stream water out. Your feet stay dry from the inside and outside.

    We also integrate Vibram outsoles designed specifically for trail traction and ground feel. A sole with good feedback helps you place your foot precisely and confidently, which actually reduces unnecessary movement and friction inside the shoe. It’s a subtle detail with real consequences for blister prevention.

    The toe box in our hiking boots is roomier than you might expect, which serves two purposes: it gives your toes room to splay naturally during push-off, and it prevents the pressure points that develop when toes are cramped. We’ve learned that slight swelling happens naturally on longer hikes, so our boots accommodate that without compromise.

    Insulation varies by model depending on your target conditions, from uninsulated boots for summer scrambles to heavily insulated options for winter and high-altitude climbing. Choose the right thermal rating for your trip, and you avoid the sweaty-feet-in-winter-boots problem that causes blisters in cold-weather hiking.

    Actionable takeaway: Invest in a boot designed for your primary trail environment. A summer boot won’t serve you well in winter, and an over-insulated winter boot worn in spring creates excess moisture and blister risk.

    Quick On-Trail Fixes Using Our Gear

    You’re out there, and despite your best preparation, a hot spot develops. Here’s what we carry and recommend for immediate trail response.

    Bring blister prevention patches or athletic tape in your pack. Apply these at the first sign of heat or redness, before a blister forms. These preventive patches reduce friction immediately and often nip the problem in the bud. We recommend carrying several, plus extra socks.

    If a blister has already formed, stop and clean the area with our packable first-aid supplies. Drain the blister carefully using a sterile needle (we carry one on our multi-tools), then apply antibiotic ointment and cover it with a protective blister pad or athletic tape. This keeps dirt out and cushions the area from further pressure.

    Gaiters, which are part of our apparel line, prevent dirt and sand from entering your shoes and creating friction against your skin. On dusty trails or in loose scree, gaiters are genuinely a game-changer. They’re lightweight and compact, and they solve a specific problem that causes blisters on many terrain types.

    Trekking poles reduce impact on your feet by distributing effort across your arms and core. We recommend them especially on downhill stretches, where foot pressure intensifies. Poles aren’t just about preventing falls; they’re a blister-prevention tool.

    Bring extra socks. If your current socks are damp, change into dry ones immediately. A fresh, dry sock eliminates one major blister trigger right there. We design our hiking socks to dry quickly and manage moisture actively, which makes this strategy even more effective.

    Actionable takeaway: Assemble a foot-care kit before your hike: blister pads, tape, antibiotic ointment, extra socks, and gaiters if hiking in sandy or dusty terrain.

    Blister Prevention Strategies with The North Face Apparel

    Blister prevention extends beyond footwear. The socks you choose, the layers you wear, and even how you manage moisture throughout your hike shape your foot health.

    Our hiking socks use merino wool and synthetic blends that wick moisture away from your skin faster than cotton ever could. Cotton holds moisture and creates the perfect environment for blisters. Our performance socks prevent that by keeping your feet genuinely dry throughout the day.

    Fit matters enormously with socks. Too-loose socks bunch and create wrinkles that cause friction. Too-tight socks restrict blood flow and increase pressure. Our hiking socks are engineered with specific cushioning zones and support panels that hold them in place without constriction. They’re designed to move with your foot, not against it.

    Layering strategy affects foot health, too. If you’re hiking in conditions that make your feet sweat profusely, choose lighter layers and manage temperature through movement and stops rather than overloading your feet with insulation they don’t need. Excess sweat inside your shoes is a direct path to blisters.

    Gaiters and lower-leg protection are part of the apparel conversation. These keep debris out of your shoes and also provide mild compression that can reduce swelling on longer hikes. Swelling increases pressure inside your shoe and friction increases with it.

    Illustration 2
    Illustration 2

    Our moisture-management apparel philosophy applies to your entire system. Breathable pants, vent-friendly layers, and strategic use of moisture-wicking base layers all work together to keep you cool and your feet dry.

    Actionable takeaway: Replace your socks with merino wool or synthetic blend hiking socks immediately, and evaluate whether your current layering strategy might be creating excessive foot sweat.

    Our High-Performance Socks and Insole Technology

    We invest heavily in sock technology because it’s foundational. When we developed our hiking sock line, we started by studying what happens inside a hiking boot mile by mile: where pressure concentrates, where sweat accumulates, where friction peaks.

    Our socks feature targeted cushioning in the heel and forefoot, where impact is highest. This cushioning absorbs shock and reduces the repetitive stress that contributes to blistering. The heel cup in our socks matches the heel cup in our boots, creating a unified support system that minimizes internal movement.

    We also integrate arch support into our sock design. Many people assume arch support comes only from the insole, but our socks contribute meaningful structure. This reduces foot fatigue and the subtle instability that leads to friction.

    Moisture management in socks goes beyond simple wicking. Our merino wool socks have naturally antimicrobial properties, meaning they resist odor and bacterial growth even when damp. This matters because a sock that smells bad is probably harboring bacteria that accelerate blister formation.

    Our insoles go deeper. We offer removable insole options that accommodate custom orthotics if you need them, and our stock insoles feature gel or foam cushioning in pressure zones. Some of our hikers prefer firmer insoles for stability; others need more compliance for comfort. We recognize that feet are different, and we build that flexibility into our footwear collection.

    For people with high arches, flat feet, or other structural considerations, we recommend evaluating insole options before your hike. A properly supported arch prevents the micro-movements that generate friction and blisters.

    Actionable takeaway: If you experience consistent blister formation in the same location, invest in quality hiking socks and consider custom or upgraded insoles to address underlying pressure or instability.

    Recovery Tips for Post-Trail Foot Care

    The trail ends, but your foot care doesn’t. What you do in the 24 to 48 hours after a hike shapes how quickly you recover and whether you’re ready for your next adventure.

    Start immediately: soak your feet in cool water for 15 to 20 minutes to reduce inflammation and flush out toxins from the day’s exertion. This is especially important if you hiked in hot conditions or covered significant distance. Follow up with gentle drying, paying special attention to the space between your toes where moisture lingers.

    If you’ve developed blisters, keep them clean and protected. Change any blister coverings daily, clean the area gently, and allow air circulation when you’re at home. Closed blisters heal faster than drained ones in some cases, so resist the urge to mess with them unless they’re causing pain.

    Apply a foot cream or balm that includes ingredients like shea butter or lanolin to prevent excessive drying. Trail hiking in heat can actually dehydrate your skin, making it more prone to cracking and breaking down. Moisturized skin is more resilient.

    Elevate your feet when possible for a few hours after your hike. This reduces swelling and speeds recovery by improving circulation. If you have significant soreness or swelling that doesn’t improve within 48 hours, it’s worth getting checked by a healthcare provider.

    Finally, take a day or two of reduced activity between major hikes. Your feet need time to recover just as much as your legs do. We recommend this especially for people doing back-to-back hiking days or multi-day trips. Prevention is easier than recovery.

    Actionable takeaway: Establish a post-hike foot-care routine immediately after returning home, and space your hiking trips to allow adequate recovery time.

    Choosing the Right Shoe for Your Trail and Terrain

    The best hiking boot for someone else might be a poor choice for you. Fit, terrain match, and intended use all matter.

    Start by understanding your trail. A smooth, well-maintained day hike might call for a lightweight hiking shoe with minimal ankle support. A steep, rocky scramble over technical terrain demands a stiffer midsole and ankle support that keeps you stable on uneven surfaces. A multi-day backpacking trip with heavy weight calls for a more robust boot with serious arch support and protection.

    Illustration 3
    Illustration 3

    Visit a specialty retailer who can assess your gait and foot type. Do you overpronate (roll your foot inward)? Do you have high arches or flat feet? These characteristics shape which boots work best for you. A boot that’s perfect for someone else might create pressure points on your specific foot geometry.

    Size matters, too. Most hiking boots should be a half to a full size larger than your street shoes. Your foot swells on the trail, and you want room for that expansion without your toes jamming into the toe box. At the same time, you don’t want so much room that your foot slides around and creates friction.

    Weather and season influence your choice. A boot optimized for summer might not provide adequate drainage for winter. A winter boot worn in summer will trap too much heat and create excessive moisture. When possible, own boots for your primary hiking season.

    Break in your new boots before committing to a serious hike. Wear them on short walks, around your house, and on easy trails. This allows the materials to mold to your foot and gives you time to identify any problem areas before they become blisters on a long adventure.

    Actionable takeaway: Get professionally fitted for hiking boots at a specialty retailer, and test them thoroughly on easy terrain before tackling your intended trail.

    Customer Stories: How Our Gear Changed Their Trail Experience

    We’ve received countless messages from hikers who transformed their relationship with the outdoors through better footwear and preparation. Their stories illustrate what’s possible when you take foot care seriously.

    One regular correspondent told us she’d given up on hiking after a brutal experience with blisters and pain forced her to quit halfway through a trip she’d planned for months. She felt defeated and assumed her body simply wasn’t built for hiking. When she tried our technical boots paired with quality hiking socks, something shifted. She completed the same trail six months later without a single hot spot. What changed wasn’t her body or her determination; it was the tools she was using.

    Another hiker we connected with struggled with chronic blister formation on the ball of his foot, always in the same spot. He’d tried multiple boot brands without success. We recommended evaluating his insoles and trying gaiters to reduce friction from sand accumulation. The combination worked immediately. He realized the problem wasn’t his feet or his hiking ability; it was a fixable equipment and technique issue.

    A mother who wanted to introduce her children to hiking came to us frustrated because her kids’ feet hurt during their outdoor adventures, which made family trips stressful. Properly fitted kids’ hiking boots and real hiking socks (not cheap cotton alternatives) transformed the dynamic. Now her family hikes together regularly, and her kids ask when the next trail adventure is planned.

    These aren’t extraordinary stories of superhuman endurance. They’re stories of ordinary people who discovered that the right gear makes an enormous difference. Trail foot pain isn’t something you have to tolerate or overcome through willpower. It’s a solvable problem.

    Actionable takeaway: If you’ve had a negative hiking experience due to foot pain, don’t assume it’s a permanent limitation. Invest in proper footwear, quality socks, and preventive strategies before dismissing hiking from your life.

    When you’re ready to build your hiking setup with intention, our team is here to help. We’ve spent decades learning what works on the trail, and we’re genuinely invested in your success out there. Your feet deserve the same level of care and attention as any other part of your hiking system. The best adventure is the one where you forget about discomfort and simply experience the landscape and the movement. That’s what we’re building toward with every boot and sock we make.

    Ready for your next adventure? Gear up with apparel and equipment built for the wild. Explore the collection now.

    Frequently Asked Questions (FAQ)

    What causes blisters on the trail, and how can we help prevent them?

    Blisters form when friction and moisture combine inside your shoe, creating that painful fluid-filled pocket. We design our hiking boots with seamless constructions and moisture-wicking materials to reduce friction at the source, while our high-performance socks use advanced fiber blends that keep your feet dry even during long, sweaty days. We also recommend starting with proper boot fitting and breaking them in gradually before tackling longer trails.

    What should I do if a blister develops while I’m still on the trail?

    We recommend stopping early to address it rather than pushing through, as continued friction will make things worse. Use a clean needle or blister patch from your first aid kit to prevent the blister from expanding, then wrap the area with our durable technical tape or adhesive blister pads to reduce ongoing friction. Our insole technology also helps redistribute pressure away from problem areas, so consider swapping to our premium insoles if you’re experiencing recurring pain.

    How do we design our hiking footwear differently to protect your feet?

    We integrate anatomical arch support, cushioning that absorbs impact without breaking down, and breathable uppers that manage moisture throughout your hike. Our boots go through rigorous testing on actual trails to ensure the heel counter stays stable and the toe box provides enough room to prevent pressure points. We also shape our soles to follow natural foot biomechanics, which reduces the repetitive stress that leads to pain and blisters over time.

  • Why Our Extreme Cold Jackets Outperform in Alpine Climbing

    Why Our Extreme Cold Jackets Outperform in Alpine Climbing

    Table of Contents

    The Alpine Climbing Challenge: Why Your Jacket Matters

    At 14,000 feet, the temperature drops 50 degrees from base camp. Wind picks up velocity with every hundred meters of elevation gain. Your body radiates heat at a rate that would surprise you if you stopped to think about it, and you won’t have the luxury of stopping often. This is where most jackets fail—not because they’re cheap, but because they were designed for ski runs or casual winter walks, not the relentless demands of alpine climbing.

    We’ve spent decades understanding what happens when climbers push into extreme cold and exposure. A jacket matters because it’s the barrier between your core and an environment actively working against your survival. It needs to shed wind and wet precipitation while letting your sweat escape. It needs to move with your arms as you’re gripping rock or driving an ice axe. Most critically, it needs to maintain its insulating properties even when compressed by a backpack or dampened by exertion.

    The difference between a good jacket and an exceptional one often reveals itself not at the trailhead, but at 20,000 feet when you’re already committed and running low on options. We design our extreme cold jackets specifically for these moments—where a single degree of lost warmth or a seam that lets wind through can shift the expedition from triumph to struggle.

    What Sets Our Extreme Cold Technology Apart

    Our approach to extreme cold protection starts with an honest question: what fails first in real climbing conditions? The answer is usually the combination of three factors—moisture buildup from exertion, wind penetration through gaps, and insulation degradation under compression.

    We address each one differently. For moisture management, we pair breathable fabrics with strategic venting that lets sweat vapor escape without opening the door to wind. Our outer shells use tightly woven constructions that block horizontal rain and spindrift while remaining flexible enough for full range of motion. The insulation itself matters enormously—we’ve moved away from materials that collapse under pack pressure toward engineered systems that maintain loft even when compressed.

    Our designs also account for the fact that alpine climbers layer differently than skiers. You’re wearing a thin base layer, an active mid-layer, and then our jacket as your final barrier. This means our insulation can’t be too thick or you lose mobility. It can’t be so thin that it fails to retain heat. The sweet spot requires constant testing and refinement.

    One specific advantage we’ve built in: our seams are taped at pressure points where water tends to find its way through. Hood design includes reinforced edges that funnel water away from your face rather than down your neck. Pit zips vent to the sides, not the underarms, so you’re releasing heat without exposing your torso. These aren’t revolutionary concepts individually, but the combined effect is jackets that stay dry and warm where competitors’ models start failing.

    Our ThermoBall and Dyncora Innovation for Peak Performance

    We developed ThermoBall technology specifically to answer a persistent problem: traditional down loses insulation when damp, and synthetic insulators add bulk. ThermoBall uses a proprietary pattern of synthetic down-alternative that traps heat like traditional down but maintains performance even when moisture is present. The micro-structure holds air in a way that mimics the best properties of goose down without the weight or the vulnerability to humidity.

    On alpine routes, you’re not dry. You might be exposed to spindrift, your own condensation, and fog that settles on gear. ThermoBall keeps working through all of it. We’ve tested it at elevations where the air itself feels like it’s drawing heat from your body, and it continues to provide reliable insulation where traditional down becomes a liability.

    Dyncora is our advancement in stretch synthetic insulation. Rather than a rigid panel of insulation that restricts movement, Dyncora flexes and recovers with your body. When you’re climbing, your shoulders and back need freedom to move without the jacket fighting you. Dyncora maintains its insulating integrity while allowing that mobility. You’re not sacrificing warmth for movement or vice versa—you’re getting both.

    The practical result: you can wear our jackets while actively climbing steep terrain without feeling like you’re in a straitjacket. We’ve tested these materials on expeditions to Denali, Rainier, and the North Cascades with climbers pushing their actual limits, not laboratory conditions. The feedback consistently points to warmth maintained without restriction.

    Protection That Moves With You: Mobility in Harsh Conditions

    Illustration 1
    Illustration 1

    Alpine climbing isn’t a static activity. You’re swinging an ice axe, securing protection, pulling rope, and sometimes scrambling over loose rock. A jacket that doesn’t move with you isn’t just uncomfortable—it’s dangerous. Fatigue sets in faster when you’re fighting your gear, and fatigue at altitude is a serious problem.

    Our extreme cold jackets use articulated panel construction. Instead of a single panel across the back and shoulders, we’ve engineered overlapping sections that let your shoulders rotate freely. The side panels extend slightly longer, giving you stability without binding. Sleeve construction allows full arm extension without the fabric riding up your back or creating pressure on your shoulders.

    Pit zips remain one of the most underrated features. They let you vent excess heat during climbs without removing your jacket entirely. For alpine routes where weather can change in minutes, this is invaluable. You can regulate temperature actively rather than overheating during exertion and then chilling during rest breaks.

    We also pay attention to collar design. Many jackets have high collars that restrict neck movement or create uncomfortable pressure. Ours use a lower profile that shields without binding, allowing you to look up and around—critical when you’re assessing route options or watching for falling ice.

    What to do next: Try your climbing jacket on over your harness and backpack before your first alpine outing. Move through the motions you’ll actually perform—reach overhead, swing an imaginary axe, crouch into a resting position. Does anything pinch or ride up? Does movement feel natural or labored? The right jacket should feel like an extension of yourself, not an obstacle.

    Tested by Our Athletes in Real Alpine Environments

    We don’t develop extreme cold jackets based on theory or wind tunnel data alone. Our Summit Series athletes have tested prototypes on actual climbs—not in controlled environments, but on the mountains where these jackets need to perform.

    Last season, our team collected feedback from climbers on Denali, Mount Rainier, and multiple routes in the Cascades. They wore our jackets in conditions ranging from -20 degrees Fahrenheit with 40-knot winds to warmer but wetter scenarios above 18,000 feet. They reported on what worked and what didn’t. Did the hood fit well when wearing a helmet? Did sweat accumulate in the armpits? Did the fabric stay flexible in extreme cold or become brittle?

    This real-world feedback drives our refinements. A climber testing our jacket at 19,500 feet on Denali’s West Buttress discovered that a small gap between the collar and hood allowed spindrift to accumulate. We redesigned that seam for the next iteration. Another athlete noted that while pit zips were essential, they needed to seal more effectively to prevent wind from entering when closed. We upgraded the zipper mechanism.

    This process takes years. We’re not rushing products to market based on a single good review or a successful test. We’re gathering data across different body types, climbing styles, and environments, then iterating until we’re confident that the jacket will perform for your next expedition.

    Sustainability Meets Performance in Our Outerwear

    Performance doesn’t have to mean environmental compromise. We’ve made a commitment to building jackets that last decades, not seasons, and to making them as responsibly as possible.

    Our fabrics increasingly come from recycled sources. We’re using recycled synthetic insulation where it performs as well as virgin material. For outer shells, we’re moving toward more sustainable waterproof membranes that don’t rely on certain fluorinated compounds. This requires constant innovation—we can’t just adopt a new material; it has to perform in the cold, wet, demanding conditions where our jackets are actually used.

    We also created our XPLR Pass resale program, recognizing that the most sustainable jacket is one that gets worn for 10 years by multiple people rather than discarded after a few seasons. When you’re ready to upgrade or pass your jacket to someone else, our resale program finds it a new home. This keeps gear in use longer and prevents waste.

    The cost of sustainability is real—responsibly sourced materials and ethical manufacturing practices cost more than the cheapest alternatives. We’ve made the decision that this is the right approach, even when it means our jackets cost more than competitors’ models. Your investment in one of our jackets is an investment in something that will perform for years and was built with consideration for the planet.

    How Our XPLR Pass Rewards Your Climbing Journey

    Our XPLR Pass loyalty program is designed for active explorers like you. Every purchase of our extreme cold jackets earns points that unlock exclusive benefits, early access to new Summit Series releases, and special rewards as you accumulate mileage and expeditions.

    Illustration 2
    Illustration 2

    But it goes deeper. XPLR Pass members receive technical support from our climbing team—real advice from experienced mountaineers who’ve worn our gear in serious conditions. You’re not just buying a product; you’re joining a community of climbers and explorers who are pushing their limits and supporting each other.

    Members also gain exclusive discounts on repairs and maintenance through our network of technical specialists. If your jacket gets damaged on a climb, we’ll fix it. If you want to refresh a zipper or reseal seams after years of use, XPLR Pass members get priority service and preferential pricing.

    The resale program I mentioned earlier is also exclusive to XPLR Pass members. You can list your previous-generation jackets and recoup some of your investment while knowing they’re going to someone who’ll use them well. This creates a circular economy where performance gear stays in circulation longer.

    Choosing the Right Extreme Cold Jacket for Your Ascent

    Different alpine routes call for different solutions. A brief, dry summit push on a 12,000-foot peak needs different protection than a multi-day expedition to 20,000 feet where temperatures plummet and you might encounter sustained wind and precipitation.

    Start by considering your typical conditions. If you’re climbing 4-season peaks where temperatures rarely drop below 0 degrees Fahrenheit and you’re moving quickly, a lighter insulated shell with good wind resistance might suffice. For sustained alpine routes in serious cold, you need more insulation and longer hours of reliable protection.

    Body fit matters significantly. We offer tailored cuts—if you’re smaller-framed or climbing in layered systems, our fitted models give you better range of motion than oversized jackets. If you run cold or you’re building a comprehensive system, our roomier cuts give you space for additional mid-layers without creating bulk at the torso.

    Consider your harness setup. Full-body harnesses have different intersection points than sport climbing harnesses. Make sure the jacket you choose doesn’t bind when you’re clipped in. Try it on over your expected layers and gear.

    One practical tip: buy from retailers who understand alpine climbing. Generic outdoor stores might sell our jackets, but specialists can help you think through your actual route, elevation gain, duration, and expected conditions. They can suggest whether you need our Tsirku Gore-Tex Pro Jacket for all-around alpine use or if our FutureLight AMK Jacket better matches your expedition profile.

    Real Climbers Share Their Summit Success Stories

    Sarah, a climber who summited Mount Rainier three times in the past two years, shared that our extreme cold jacket’s pit zips made the difference during her third attempt. She could regulate temperature during the steep climb to Camp Muir without overheating, then seal the zips during the exposed summit push. She stayed dry and warm throughout a 12-hour summit day.

    Marcus, who recently completed a Denali expedition, emphasized how the jacket’s packed weight was negligible despite its insulation level. On multi-week expeditions where every ounce matters, this counts. He also noted that the fabric didn’t become brittle in the extreme cold on the lower slopes—it remained flexible and didn’t develop cracks that could compromise seams.

    Jennifer, climbing in the North Cascades during November, shared that the jacket’s performance in wet alpine conditions surprised her. Spindrift accumulation and sustained precipitation didn’t degrade the insulation. She stayed warmer on her third day of climbing than she had in previous jackets after 24 hours of exposure.

    These aren’t paid testimonials or cherry-picked reviews. They’re real feedback from climbers using our jackets on actual expeditions where performance directly impacts safety and success.

    Gear Care Tips to Extend Your Jacket’s Lifespan

    A well-maintained extreme cold jacket can last decades. Proper care protects your investment and ensures it performs when you need it most.

    After each expedition, brush off any dried mud or debris. If your jacket got soaked, dry it thoroughly before storage. We recommend line-drying rather than machine drying—direct heat can damage insulation and fabric. Hang it in a dry location with good air circulation.

    Illustration 3
    Illustration 3

    For dirt or light stains, hand wash with cool water and mild detergent. Avoid vigorous scrubbing, which can damage the outer fabric. Rinse thoroughly until no soap residue remains. Again, air dry completely.

    Every few years, consider professional cleaning from a specialist who understands technical outerwear. They have equipment designed to remove deep-set soil without damaging materials. After cleaning, we recommend having seams professionally re-sealed if they’ve loosened.

    Store your jacket in a breathable bag or garment hanging space. Avoid vacuum-sealing for extended storage—this compresses the insulation permanently. We supply storage bags with our Summit Series jackets designed to protect without over-compression.

    If you notice a small tear or seam separation, repair it immediately. Small issues become major problems fast at altitude. Use seam sealer or take it to a specialist. With XPLR Pass membership, you get priority access to our repair network.

    Invest in Your Alpine Future Today

    An extreme cold jacket is one of the most important decisions you’ll make as an alpine climber. It’s the gear that stands between you and conditions designed to break resolve and compromise safety. We’ve invested decades in understanding what works, testing with real climbers in real conditions, and refining designs until they perform reliably.

    Our jackets aren’t the cheapest option on the market. They’re not designed to be. They’re built to last, to perform in the harshest conditions, and to support your ambitions whether you’re climbing local 4-season peaks or planning multi-week expeditions to major alpine zones.

    Start your journey with us by exploring our Summit Series collection. Test jackets over your expected climbing system. Talk with specialists who understand alpine climbing. Join our XPLR Pass community and connect with other climbers who are pushing their limits.

    The mountains are waiting, and you deserve gear that’s genuinely built to support your summit push. Let’s make sure you’re protected, comfortable, and ready for whatever conditions you encounter.

    Ready for your next adventure? Gear up with apparel and equipment built for the wild. Explore the collection now.

    Frequently Asked Questions (FAQ)

    Why do we use ThermoBall and Dyncora technology in our extreme cold jackets?

    We combine ThermoBall synthetic insulation with Dyncora’s advanced stretch fabric because we’ve found this pairing delivers the best balance of warmth and mobility for alpine climbing. ThermoBall retains heat exceptionally well even when wet, while Dyncora moves with your body during technical pitches, so you’re never sacrificing performance for protection.

    How should we care for our extreme cold jacket to keep it performing?

    We recommend machine washing in cold water with mild detergent every season or after heavy use, then tumble drying on low heat to restore loft. Avoid fabric softeners and excessive heat, as these degrade our insulation and weather-resistant coatings. Proper care extends your jacket’s lifespan by years and keeps it performing at the summit.

    Can our XPLR Pass members earn rewards on climbing gear purchases?

    Yes, we reward every purchase you make with us through XPLR Pass, including extreme cold jackets and alpine climbing gear. Your points accumulate toward exclusive discounts, early access to new technical collections, and special member-only events we host throughout the year.