Table of Contents
- Why Waterproof Shell Failures Happen on the Trail
- The Challenge of Patching Technical Fabrics in the Field
- Our Approach to Reliable Emergency Repairs
- Comparing Tape Solutions: What Actually Sticks in Wet Conditions
- Adhesive Options That Hold Up Under Pressure
- Patch Materials Designed for Real Durability
- How We Test Our Repair Products in Extreme Conditions
- Step-by-Step Patching Technique for Maximum Field Success
- Our Recommended Repair Kit for Every Adventure
- Preventive Care to Reduce Emergency Repairs
- When to Patch and When to Seek Professional Service
- Keeping Your Gear Trail-Ready with Our Support
- Frequently Asked Questions (FAQ)
Why Waterproof Shell Failures Happen on the Trail
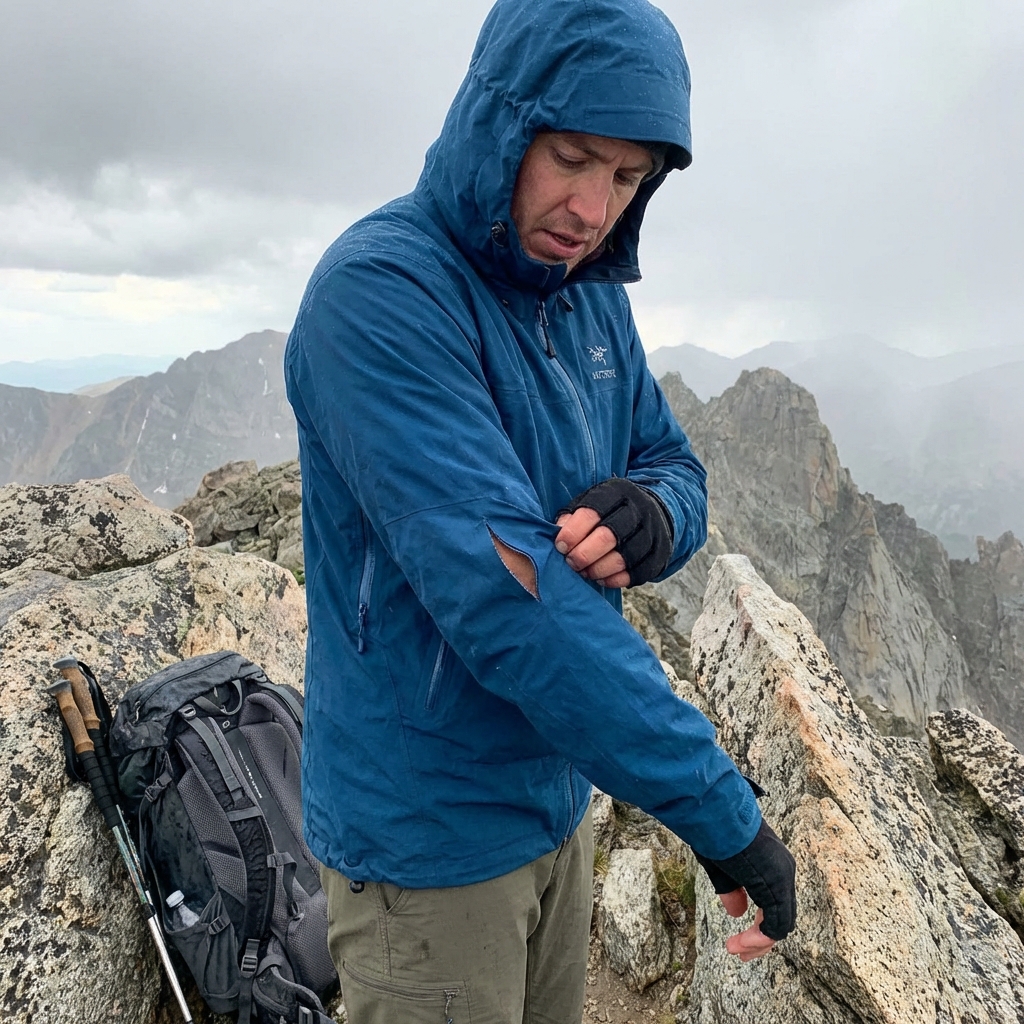
You’re five miles into a high-elevation ridge when your shell catches on sharp granite. A three-inch tear opens up, and suddenly that waterproof barrier between you and the weather is compromised. We’ve been there. After decades of building gear for people who push into real conditions, we know that field repairs aren’t optional—they’re a core survival skill. This guide walks you through everything we’ve learned about patching waterproof shells when you’re miles from home.
Waterproof shells fail in predictable ways, and understanding why matters for both prevention and repair. Abrasion damage happens when fabric rubs against rock, branches, or even your own pack frame over hours of movement. Punctures occur from sharp terrain, crampons, or ice axe contact. Seam separation happens less often if the shell was well-constructed, but it does occur when abrasion weakens the stitching or when a hard impact stresses a corner or pocket.
The fabric itself rarely gives up first. We use multi-layer constructions where the waterproof membrane sits sandwiched between an outer shell and inner lining. That membrane can be polyurethane, Gore-Tex, or other advanced barriers. When you get a hole, water finds that path immediately. Temperature swings and UV exposure also degrade adhesive bonds over time, which is why a patch that held perfectly in summer might fail mid-winter.
The most common scenario we see: people catch their jacket on a backpack strap or carabiner, creating a small tear that goes unnoticed until rain hits. Catching damage early prevents a minor repair from turning into a ruined day.
The Challenge of Patching Technical Fabrics in the Field
Technical fabrics don’t behave like cotton. They’re slippery, often treated with water-repellent coatings, and those coatings are exactly what makes traditional adhesives fail. When you try to stick a patch onto a coated nylon shell without proper preparation, the adhesive contacts the coating, not the fabric itself. That bond holds for a few hours, then peels apart.
Moisture is another enemy. Even if your shell feels dry, condensation clings to the inside of the fabric. Any adhesive applied over moisture will fail. In the field, you rarely have ideal conditions: you’re cold, possibly at altitude, and time-pressured. We’ve designed repair products specifically to handle these real-world constraints rather than lab conditions.
The fabric also moves and stretches. Unlike a rigid plastic container, a shell breathes, flexes, and shifts. A stiff, brittle patch material won’t move with the fabric, so it cracks or separates at the edges within hours. We prioritize flexibility in every repair material we recommend.
Our Approach to Reliable Emergency Repairs
We build repair solutions that prioritize speed and durability over perfection. Your goal on the trail isn’t a seamless, invisible mend. Your goal is a temporary seal that holds for the rest of your trip and survives a wash cycle at home. That shift in mindset changes everything about what you carry and how you apply it.
Our strategy relies on three layers of redundancy. First, we prep the damage site thoroughly, stripping away moisture and coating to create a clean surface. Second, we apply an adhesive formulated for damp, treated fabrics. Third, we reinforce with a patch material flexible enough to move with the shell. This approach works in rain, wind, and cold where single-step solutions fail.
We also prioritize materials that survive backpack pressure. A repair on your shoulder or back gets compressed against your pack frame for hours. We test patches under sustained pressure to ensure they don’t peel from mechanical stress alone.
Comparing Tape Solutions: What Actually Sticks in Wet Conditions
Tape sounds simple, and some emergency tapes do work. But not all. Standard duct tape fails almost immediately on waterproof shells because its adhesive doesn’t bond with coated nylon. It peels at the edges, and once edge separation starts, the whole patch comes loose.
We’ve tested dozens of products. Self-adhesive repair tapes designed for tent fabrics perform better because their adhesive formulation targets synthetic materials. Look for tapes labeled specifically for nylon or outdoor gear repair, not general-purpose tapes. High-quality repair tape adheres reliably in wet conditions and can flex without cracking.
The best tape solutions we’ve found work by combining strong initial adhesion with enough flexibility to move with the fabric. Thicker tapes (around 2mm) outperform thin ones because they distribute pressure across a wider area, reducing edge stress. Apply tape to both sides of the tear when possible—the outer side seals against water, the inner side reinforces against pressure and stress.
One immediate action: carry a small roll of high-quality repair tape in your daypack, not just in your main repair kit. Five pounds in at trailhead beats zero ounces at mile ten.
Adhesive Options That Hold Up Under Pressure
Liquid adhesives give you more control than tape alone, and we recommend them as the foundation for field repairs. Flexible polyurethane adhesives (like those in premium repair patches) bond to coated fabrics better than traditional fabric glue. They cure through moisture, which actually helps in damp conditions if you use the technique correctly.
Cyanoacrylate (super glue) seems like a quick fix but fails on waterproof shells. The fabric coating prevents proper bonding, and the adhesive becomes brittle when cold. Skip it entirely.
Contact cement works better than you’d expect because it bonds to the coating itself rather than trying to penetrate through it. Apply it to both the fabric and patch, wait the recommended time, then press together firmly. In the field, contact cement requires a few minutes of dry time—difficult but not impossible on a sheltered rest break.
We prefer waterproof, flexible construction adhesives designed for outdoor gear. They cure slightly slower than super glue but create bonds that flex with the fabric and hold through wet-dry cycles. The trade-off: you’ll wait 10-15 minutes for a secure bond rather than 30 seconds.
Test any adhesive on scrap fabric from an old shell before field deployment. You’ll see how it handles cold, damp conditions specific to your local weather.
Patch Materials Designed for Real Durability
The patch material matters as much as the adhesive. We use ripstop nylon for our recommended patches because it combines puncture resistance with genuine flexibility. Ripstop fabric doesn’t tear in straight lines—the grid weave catches and stops tears from propagating. When you repair a torn shell with ripstop, you’re not just filling a hole; you’re reinforcing the damaged area against future stress.
Patch thickness should be substantial enough to distribute pressure (we typically recommend 1.5-2mm) but not so thick that it creates bulk under your pack strap. We match patch material to shell material whenever possible—a nylon shell gets a nylon patch, reducing the stress concentration at the patch edge.
Color matters less on the trail but does affect durability. Darker patches (black or dark gray) withstand UV damage better over time. We include multiple patch colors in our kits so you can match your shell if you care about appearance, but the real win is carrying patches at all.
Adhesive backing versus custom-gluing is a personal choice. Pre-glued patches stick immediately, which saves time but offers less control. Custom-gluing lets you match adhesive to conditions—thicker adhesive for damp situations, thinner for frozen ones—but requires more skill.
How We Test Our Repair Products in Extreme Conditions
We don’t test repairs in a controlled lab and call them field-ready. Our team takes prototype repair systems into real mountains, creates intentional damage, and patches it on the trail under actual conditions. We’ve tested patches in rain, snow, sub-zero cold, and intense UV at high elevation.
Our testing protocol includes a 500-cycle flex test where we continuously bend patched fabric to simulate the movement and pressure of backpack wear. A solid field patch survives this without edge separation or cracking. We also run hydrostatic pressure tests—pushing water against patched areas under pressure—to confirm the seal actually stops water infiltration.
We age patches under accelerated UV exposure to catch degradation that might occur over multiple seasons of use. We test adhesive strength at different temperatures because a patch that holds at 70 degrees might peel at 20 degrees. Every repair product we recommend has logged thousands of miles on real shells worn by our athletes.
This testing philosophy applies to the tape and adhesive products we recommend as well. We don’t just hand you a generic solution; we’ve verified it works on our specific fabrics and under the conditions you’ll actually face.
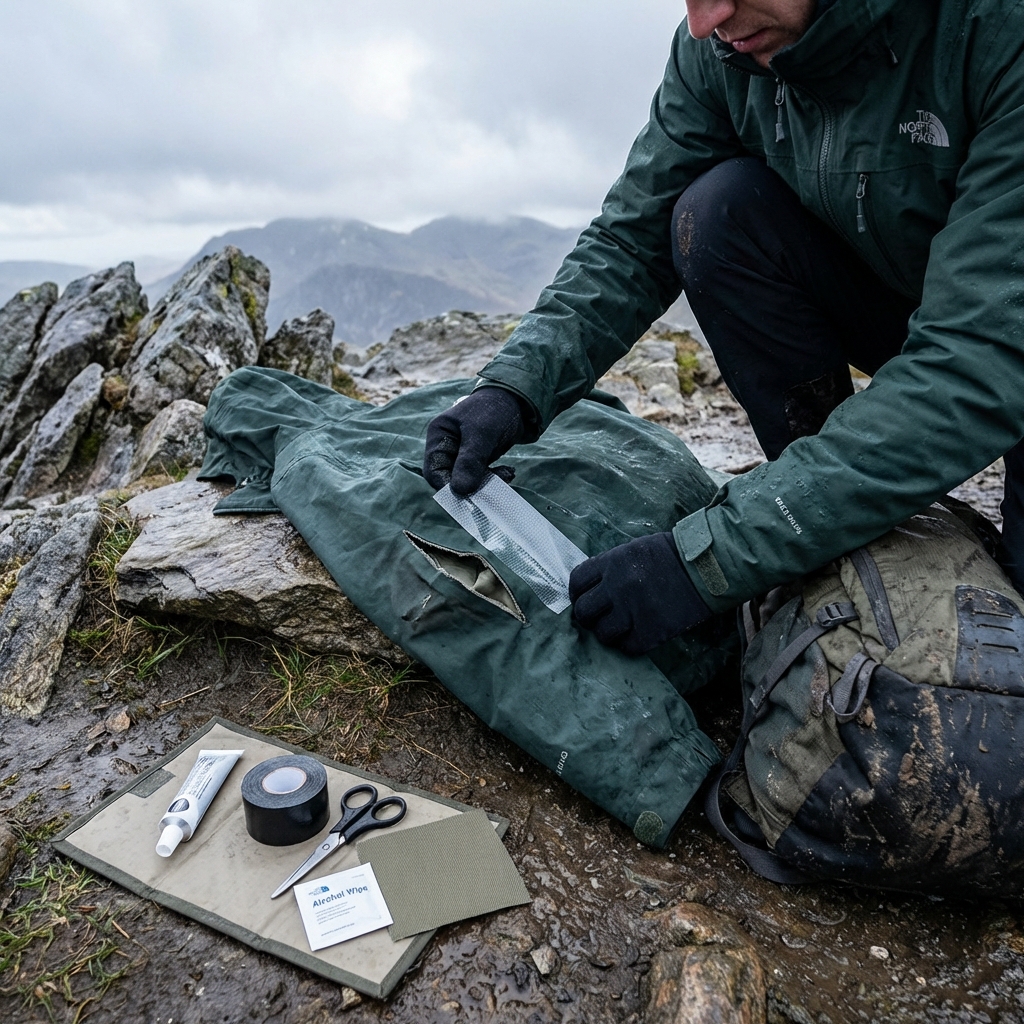
Step-by-Step Patching Technique for Maximum Field Success
Find shelter from wind and rain—even a large boulder or dense tree cover helps. Dry the tear site as thoroughly as possible using your shirt, a bandana, or even a few minutes of sun exposure. This step is critical. Moisture under a patch guarantees failure.
Inspect the damage. Tears longer than four inches benefit from tape before adhesive. Pull the tear edges together gently and run a strip of repair tape along the inside, then the outside, to stabilize the rip. Smaller punctures don’t need this step.
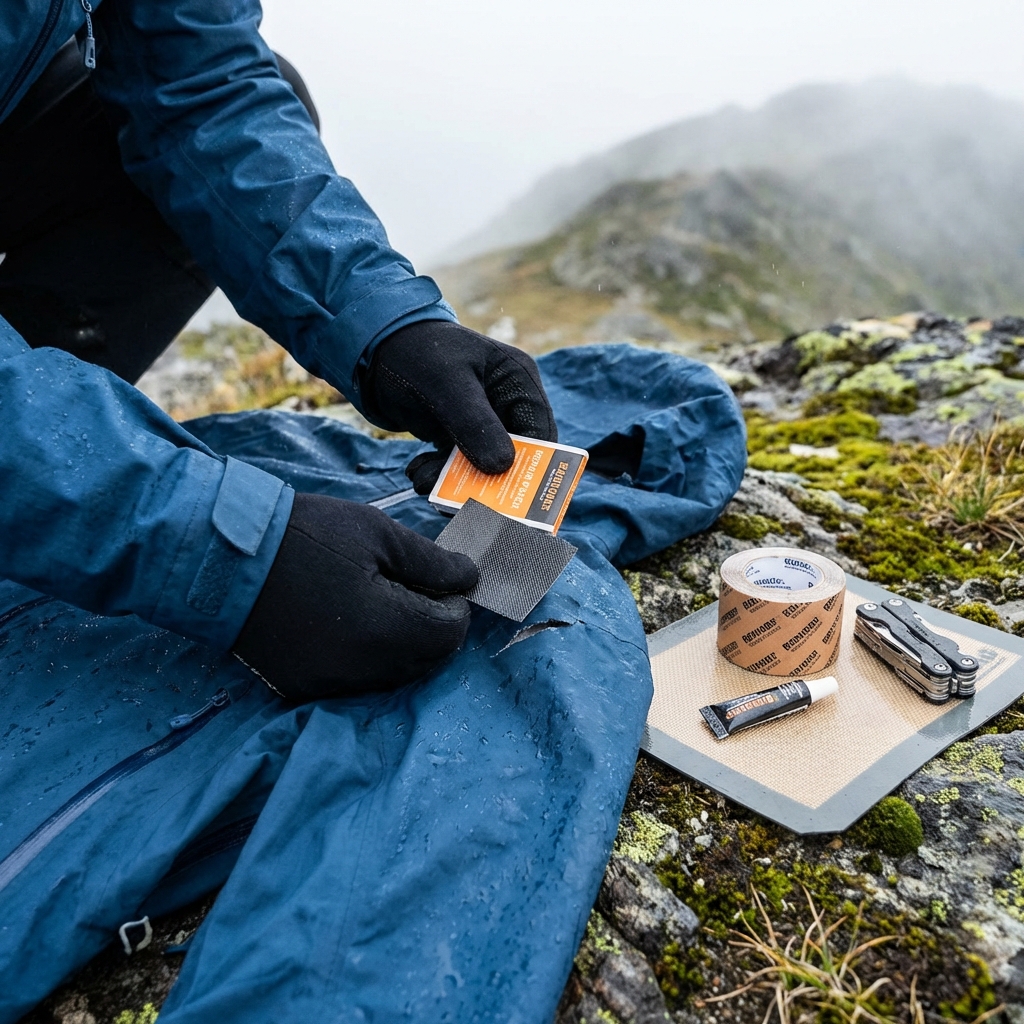
Roughen the surface around the tear using fine sandpaper (we include micro-grit paper in our field kits) or scrub it lightly with a small piece of coarse fabric. This removes the water-repellent coating and gives adhesive something to grip. Work in a two-inch radius around the damage.
Clean the area with a dry cloth or the back of your hand to remove dust and coating particles. Apply your chosen adhesive according to product instructions. Most liquid adhesives work best when applied thin and even—use a stick or applicator, not your finger.
Press your patch firmly into place, holding it for at least 30 seconds. Apply sustained pressure. Walk around, let your body weight help compress the patch against the shell. Most field repairs reach usable strength within 10-15 minutes. Wait longer if conditions are cold.
Our Recommended Repair Kit for Every Adventure
We pack a dedicated repair kit separate from our main first-aid or emergency gear. A solid field repair kit contains five elements: an assortment of pre-cut ripstop patches in multiple sizes (we recommend pieces ranging from 2×3 inches to 4×4 inches), a small tube of waterproof flexible adhesive, a roll of high-quality repair tape, fine-grit sandpaper or a small abrasive pad, and a small clean cloth.
For day hikes in mild conditions, a lightweight version works: one pre-glued patch, a roll of repair tape, and a small cloth. That bundle weighs under two ounces and addresses 95% of shell damage you’ll encounter.
For multi-day trips or mountaineering, we add a second adhesive option (contact cement and a polyurethane-based adhesive give you flexibility for different temperatures), extra patches in various sizes, and backup tape. This version weighs maybe four ounces—trivial compared to the security of reliable gear repair capability.
We sell pre-assembled field repair kits as part of our XPLR Pass membership, and they’re available individually on our website. More important than the specific brand: carry a kit, store it in an accessible pocket, and don’t feel precious about using it. A temporary repair on the trail beats a destroyed shell at the trailhead.
Preventive Care to Reduce Emergency Repairs
The best field repair is the one you never need. Regular inspection of your shell catches damage early. After each trip, spend five minutes examining high-stress areas: shoulders, elbows, the back where your pack rubs, and the front chest area near zippers and straps. Look for discoloration, texture changes, or small tears.
Store your shell properly at home. Hang it rather than folding, keep it away from direct sunlight, and store it in a cool, dry place. Heat and UV degrade waterproof membranes over time, even when you’re not wearing the shell. A shell stored in a hot car degrades faster than one in a closet.
Clean your shell regularly using our recommended process: gentle hand wash with cool water and mild soap designed for technical fabrics. Harsh detergents break down water-repellent coatings. We provide detailed care instructions on the tags of our shells and on our website.
Handle your shell with care on the trail. Tuck your ice axe, crampons, and sharp gear into side pockets rather than securing them loosely where they can dig into your shell. Cinch your pack straps so the pack doesn’t slide and abrade your shoulders. Move deliberately over sharp terrain rather than rushing.
Minor preventive maintenance—reapplying a durable water repellent (DWR) coating annually—keeps water beading on the surface rather than saturating and searching for holes. We sell DWR refresh products specifically formulated for our shells.
When to Patch and When to Seek Professional Service
Most damage on the trail gets a field patch. Tears under six inches, punctures, and minor seam separation all respond to emergency field repair. Use this as your immediate fix to get you safely off the mountain or to the next shelter.
Bring your shell home for permanent repair if the damage is more extensive. Tears longer than six inches, multiple punctures in close proximity, or compromised seam tape (where you see the white waterproof membrane showing through seam stitching) warrant professional service. We offer professional repair services through our stores and website.
Seam separation specifically requires professional re-taping to restore full waterproof integrity. A field patch buys you time, but a properly taped seam is a permanent fix you can’t achieve in camp. The same applies to damage near critical stress points like armpit seams or hood attachment points.
The rule we follow: if you’re confident your field patch will hold for the rest of your trip and you’ll send the shell for professional repair immediately after, patch it. If you’re uncertain, or if damage affects a critical seam or structural area, carry your shell out unpacked and seek professional service before wearing it again.
Keeping Your Gear Trail-Ready with Our Support
Our commitment extends beyond selling you shells. We provide detailed care guides, repair videos, and field testing data on our website. If you’re an XPLR Pass member, you get access to our extended repair and replacement services and discounts on professional repair work.
We also stand behind our products. If a shell fails due to manufacturing defect, we repair or replace it. Damage from normal trail use—rocks, crampon catches, general abrasion—falls outside warranty, but we offer discounted professional repair to keep your gear in service.
Join our community of active explorers who share trail repair tips, photos of their patched shells still performing after thousands of miles, and lessons learned. We learn from every repair story and work it back into better product design and guidance.
Carry your repair kit, stay prepared, and get back out there. Your next adventure starts with gear you trust.
Ready for your next adventure? Gear up with apparel and equipment built for the wild. Explore the collection now.
Frequently Asked Questions (FAQ)
Can I really repair my waterproof shell in the field, or should I wait until I’m home?
We’ve designed our emergency patching solutions specifically so you can make reliable repairs on the trail and keep moving. Our tape and adhesive options are engineered to stick even in wet, cold conditions, and we test them in extreme environments to ensure they’ll hold up until you can do a more permanent fix at home. For most field repairs, you’ll get several days of reliable waterproofing if you follow our technique correctly.
What’s the difference between tape and adhesive patches for waterproof shells?
We recommend tape for quick fixes when you’re wet or in a hurry because it requires zero drying time and works in damp conditions. Adhesive patches give you a stronger, longer-lasting bond, but they need a dry surface and some curing time. We suggest carrying both in your repair kit so you can choose the right solution based on your situation and how much time you have to work.
How do I know if my shell damage is worth patching or if I should just replace the jacket?
We advise patching any damage smaller than a few inches long, since our field repair methods hold strong under normal use. If you’ve got multiple large tears, damage near seams, or leaks that keep returning after patching, we’d recommend having us inspect the jacket or considering a replacement so you stay protected in serious weather.
Leave a Reply