Table of Contents
- Moleskin and Blister Padding for Immediate Pressure Relief
- Our High-Performance Hiking Socks: The Foundation of Foot Comfort
- Specialized Blister Treatment Tape and Athletic Strapping
- Proper Footwear Adjustment Techniques That Actually Work
- Anti-Friction Balms and Prevention Creams for Long Hikes
- Our Responsive Hiking Boot Design and Fit Technology
- Compression and Support Systems for Sustained Trail Comfort
- Frequently Asked Questions (FAQ)
Moleskin and Blister Padding for Immediate Pressure Relief
Nothing derails a backcountry day faster than a hot spot turning into a blister two miles from camp. Your feet carry you across ridgelines and through creek crossings, but the moment friction takes hold, every step becomes a negotiation. We’ve seen countless hikers cut trips short because foot pain wasn’t managed early, and we’ve also watched experienced explorers breeze through double-digit mileage days thanks to simple, smart prevention and quick intervention tactics.
The good news: most on-trail blister problems respond well to layered solutions. We’ve built our knowledge across decades of developing hiking footwear and gear specifically for the conditions where blisters thrive, and we’re here to walk you through the fixes that actually work in the field.
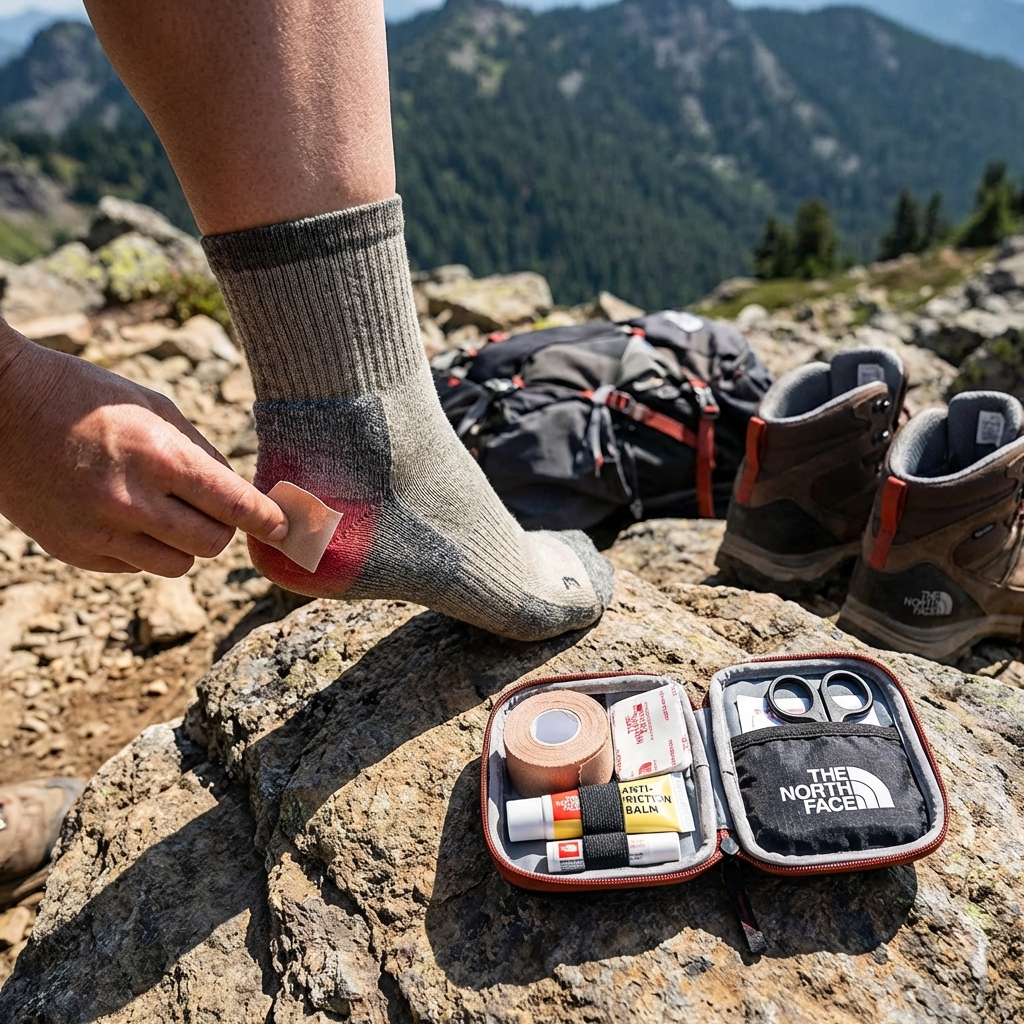
When you feel the first hint of a hot spot forming, moleskin is your fastest defense. This self-adhesive foam padding works by redirecting pressure away from the problem area, and if you catch it early enough, you’ll stop a blister before it forms.
Here’s the practical move: the moment you notice rubbing or redness, stop and clean the area with whatever moisture you have available. Dry it completely. Cut your moleskin into a shape slightly larger than the affected zone, then apply it directly over the trouble area. The key is getting the edges down firmly so they don’t bunch up and create new friction points.
We recommend carrying at least one pre-cut piece in your day pack, plus scissors or a small knife to customize fit on the trail. Some hikers layer two pieces if the friction is intense, creating a thicker cushion. Moleskin typically lasts 4 to 6 hours of hiking before it starts to shift, so reapply or replace it during longer trips. The cost is negligible, and the blister prevention payoff is immediate.
If you already have a blister, moleskin works well as a secondary layer over blister-specific treatments to add extra cushioning and keep dirt out. We’ve seen it make the difference between finishing a trip and calling for an early exit.
Our High-Performance Hiking Socks: The Foundation of Foot Comfort
No padding or tape solution works if your socks are creating the friction in the first place. This is where most casual hikers stumble: they wear cotton socks, experience blisters, then buy fancy blister pads instead of changing their sock game.
We design our hiking socks with merino wool blends and synthetic fibers specifically because they manage moisture and reduce sliding inside the boot. Merino wicks sweat away from your skin while maintaining grip against the boot interior, meaning your foot stays in place rather than shifting with every step. This is foundational. A quality sock eliminates half your blister risk before you even hit the trail.
Look for socks with reinforced heel and toe areas where friction concentrates, and choose the right thickness for your boot fit. A thin or midweight sock works for snug-fitting boots, while thicker socks suit roomier footwear. Bring a second pair on multi-day trips and rotate them daily if possible. Damp socks compound friction problems fast, so if you’re crossing water or sweating heavily, changing into dry ones at a rest stop can prevent a cascade of foot pain.
We’ve tested our hiking socks on thousands of miles across rocky ridges, muddy descents, and alpine scrambles. They hold up because the materials and construction directly address what causes blisters: moisture retention and foot slippage. Start here before you reach for expensive treatments.
Specialized Blister Treatment Tape and Athletic Strapping
When moleskin isn’t enough or you’re dealing with a blister that’s already formed, athletic or blister-specific tape offers targeted support and protection. Unlike standard adhesive tape, blister treatment tape is engineered with materials that conform to skin movement, stick reliably in wet conditions, and stay put for extended periods.
The application method matters as much as the tape itself. For a developing blister, use a technique called “anchor strapping”: apply strips of tape in an X pattern over the hot spot, then add a circle of padding in the center. This distributes pressure across a wider area and reduces movement at the problem zone. For existing blisters, apply the tape only after you’ve cleaned, disinfected, and dried the area thoroughly.
Many athletes prefer blister-specific brands designed for wet environments because standard athletic tape loses adhesion when you sweat or wade through streams. We recommend testing whatever tape you choose on a short day hike before committing it to a multi-day expedition. A tape that works beautifully in a gym might peel off after your first creek crossing.
Carry tape in your repair kit year-round. It’s lightweight, takes up almost no space, and solves problems beyond blisters: securing loose socks, stabilizing an ankle after a minor twist, or even patching gear. Think of it as versatile insurance for your feet and lower legs.
Proper Footwear Adjustment Techniques That Actually Work
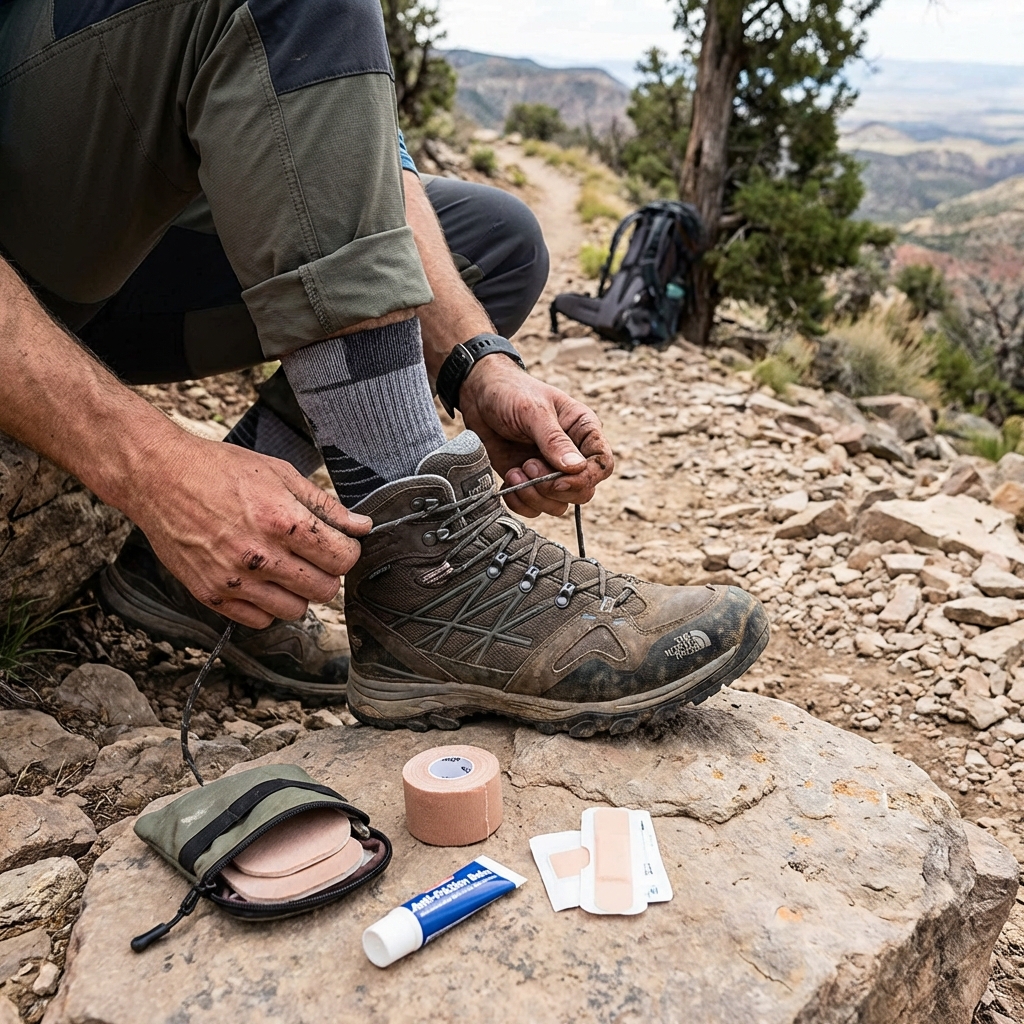
Here’s what we see constantly: hikers lace their boots the same way they tie their street shoes, then wonder why their feet slide around inside. Boot fit is dynamic, not static. Your feet swell as you gain elevation and log miles, and a lacing pattern that feels snug at the trailhead might be too loose by noon.
Start with this field-tested approach. Loosen your laces completely and pull the boot tongue forward so it sits centered. Lace from the bottom upward, increasing tension slightly with each pass. At the instep (roughly the middle of your foot), tie the first pressure point firmly. This holds your heel in place and prevents forward sliding. Then lace the upper boot with even tension all the way to the top, finishing with a secure knot.
If hot spots develop mid-hike, don’t immediately assume the boot is wrong. First, adjust your lacing. You might need to reduce pressure at the heel, increase it at the arch, or shift tension to prevent a specific zone of friction. Most hikers find that loosening laces over the toes while keeping the midfoot snug eliminates pressure buildup on the top of your foot. Experiment during rest breaks; a 30-second lacing adjustment can erase hours of discomfort.
For any boot, consider using gaiters to prevent debris (sand, dirt, pebbles) from entering the top, which can create friction inside the shoe. Even small particles cause surprising amounts of rubbing, especially on long descent sections where your foot slides forward and back.
Anti-Friction Balms and Prevention Creams for Long Hikes
Prevention is always cheaper than cure, and anti-friction balms work by creating a slippery barrier between skin and the inside of your boot before problems start. These products typically contain wax or oil-based ingredients that reduce the coefficient of friction where your foot contacts the boot material.
Apply a thin layer to known trouble zones the morning of your hike, before you put on socks. Common high-friction areas include the heel, the inside of your big toe, and the top of your foot where the tongue makes contact. Less is more here: a light coat stays effective longer than a thick glob that migrates around inside your boot.
If you’re undertaking a longer hike (8+ miles) or dealing with extended exposure to wet conditions, reapply balm at your midday break. A quick touch-up takes 90 seconds and can keep minor hot spots from escalating. Bring a small container in your pack, not a full jar. A film canister or mini tin works perfectly.
We’ve also seen hikers successfully use tinctures of traditional options like lanolin or petroleum jelly, though modern anti-friction products are formulated specifically to stay in place and maintain grip. Petroleum jelly, in particular, can migrate and leave your foot sliding inside the boot, which sometimes creates more problems than it solves.
Our Responsive Hiking Boot Design and Fit Technology
The right boot is your best blister defense, and our boots are engineered from the ground up to minimize friction and pressure points. This is where our decades of summit-specific design pay dividends.
We use contoured insoles that align your foot arch with the boot’s internal structure, reducing unnecessary movement. Our boot lasts (the wooden forms we build around) are shaped to match actual human foot geometry, not generic rectangles. This means your heel doesn’t slide, your toes aren’t compressed, and pressure distributes evenly across the entire contact surface.
Materials matter too. We use smooth inner linings in high-friction zones and strategic padding in areas where pressure naturally concentrates. Our Gore-Tex linings keep moisture out while allowing your foot to breathe, which prevents the waterlogged swelling that triggers blisters. Whether you’re wearing the Verto FA boots for technical terrain or the Verto SA Gore-Tex boots for alpine expeditions, the construction prioritizes foot comfort alongside performance.
We also offer different widths and last shapes for men and women, recognizing that foot morphology varies significantly. A boot that perfectly fits a size 10 men’s foot is uncomfortable at best for a size 10 women’s foot. This distinction eliminates a whole category of friction problems before they start.
Compression and Support Systems for Sustained Trail Comfort
After you’ve addressed immediate blister concerns, compression becomes your ally for extended comfort on long days. Compression socks or wraps increase blood flow to your feet and reduce swelling, which directly impacts how much space your foot takes up inside your boot.
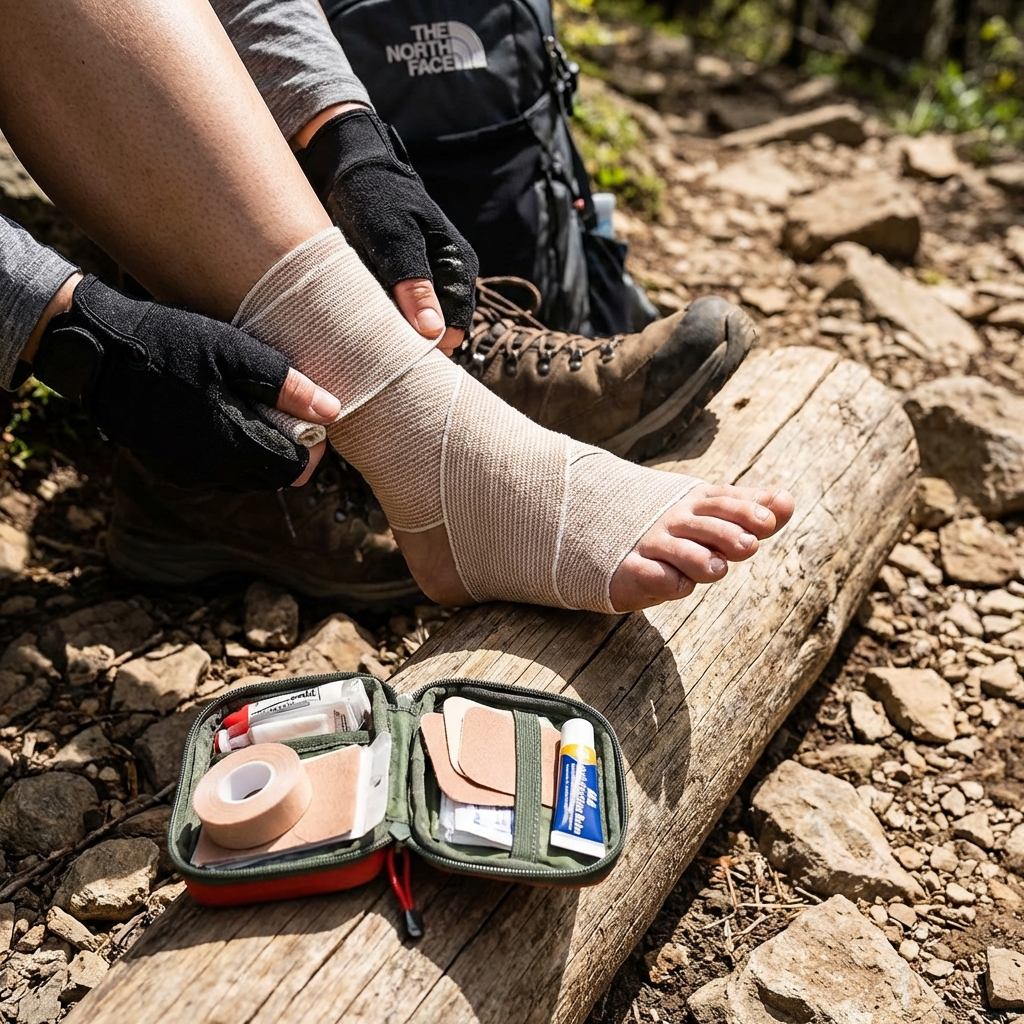
Mild compression (15 to 20 mmHg) is ideal for day hiking because it supports endurance without restricting movement. Wear your compression socks throughout the hike, not just as recovery gear afterward. The support is especially valuable on descents where impact and downhill pressure can spike swelling and cause blisters to form suddenly in the afternoon.
Arch support insoles also play a role here. Your arch naturally collapses slightly as you tire, which changes your foot shape and can cause previously comfortable boots to develop pressure points. A supportive insole maintains arch structure, keeping your foot stable and centered inside the boot throughout your entire day on trail.
Consider the combination: our merino hiking socks plus a quality insole plus compression elements work synergistically to keep your feet stable, dry, and pressure-free. This trio handles most on-trail blister challenges, and together they cost less than a doctor visit and miles of pain.
The takeaway: build your foot comfort system in layers. Start with the right socks and boots, add padding and tape for hot spots, use anti-friction balms preventively, adjust lacing when needed, and incorporate compression support for longer efforts. We’ve engineered our boots and socks to work as the foundation of this system, giving you a head start that most hikers never achieve. Your feet carry you across mountains and through valleys. Keep them happy, and the trail opens up in ways that tired, blistered feet simply cannot experience. The investment in quality gear and smart maintenance habits pays dividends across every expedition you undertake.
Ready for your next adventure? Gear up with apparel and equipment built for the wild. Explore the collection now.
Frequently Asked Questions (FAQ)
What should I include in my trail foot care kit before heading out?
We recommend packing moleskin, blister treatment tape, an anti-friction balm, and a few pairs of our high-performance hiking socks as your essentials. Adding athletic strapping tape gives you options for securing padding or providing arch support if discomfort develops mid-hike. These items take up minimal space but make a major difference when foot issues start.
How do our hiking boots help prevent blisters compared to regular shoes?
Our responsive hiking boot design features targeted cushioning zones and fit technology that reduces excess movement inside the shoe, which is what causes most blisters. We’ve engineered our boots with heel cups and midfoot support that work together to keep your foot stable, so you’re not sliding around with each step on rough terrain.
Can I fix a blister that’s already forming while I’m still on the trail?
Absolutely. We suggest stopping early rather than pushing through, then cleaning the area and applying moleskin or our specialized blister treatment tape to reduce friction immediately. If the blister is small and hasn’t broken, this approach often stops the problem from getting worse so you can finish your hike more comfortably.
Leave a Reply